blankhomeaboutthe fammy faithwhats cookinget crafty

Wednesday, March 12, 2014

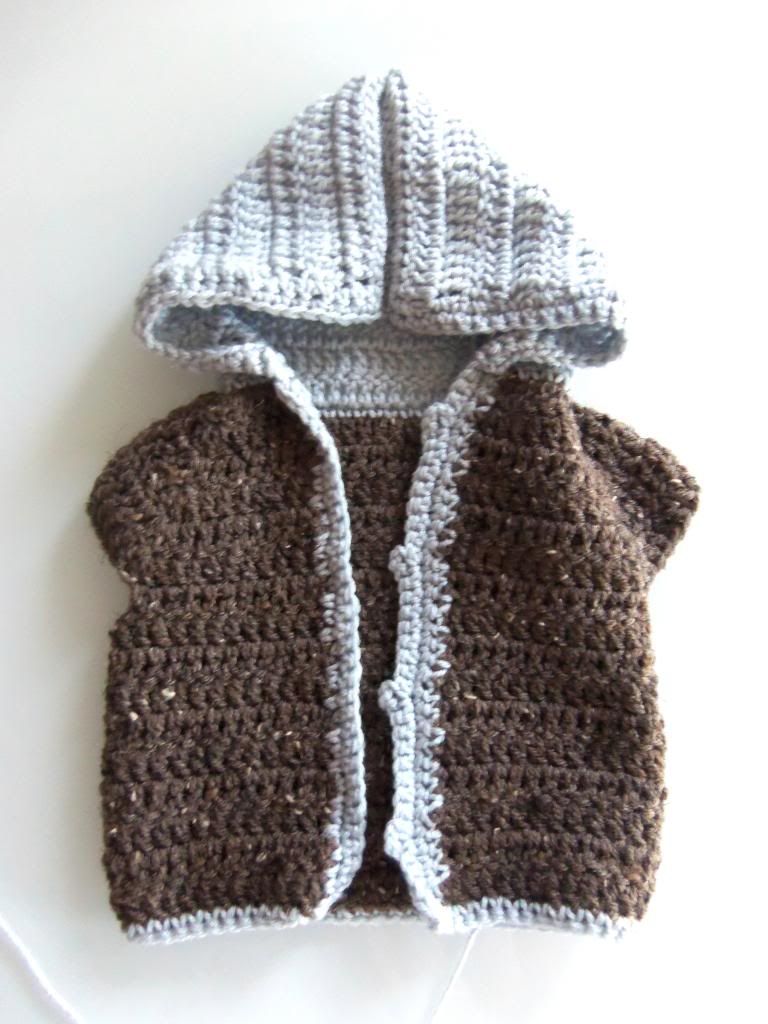
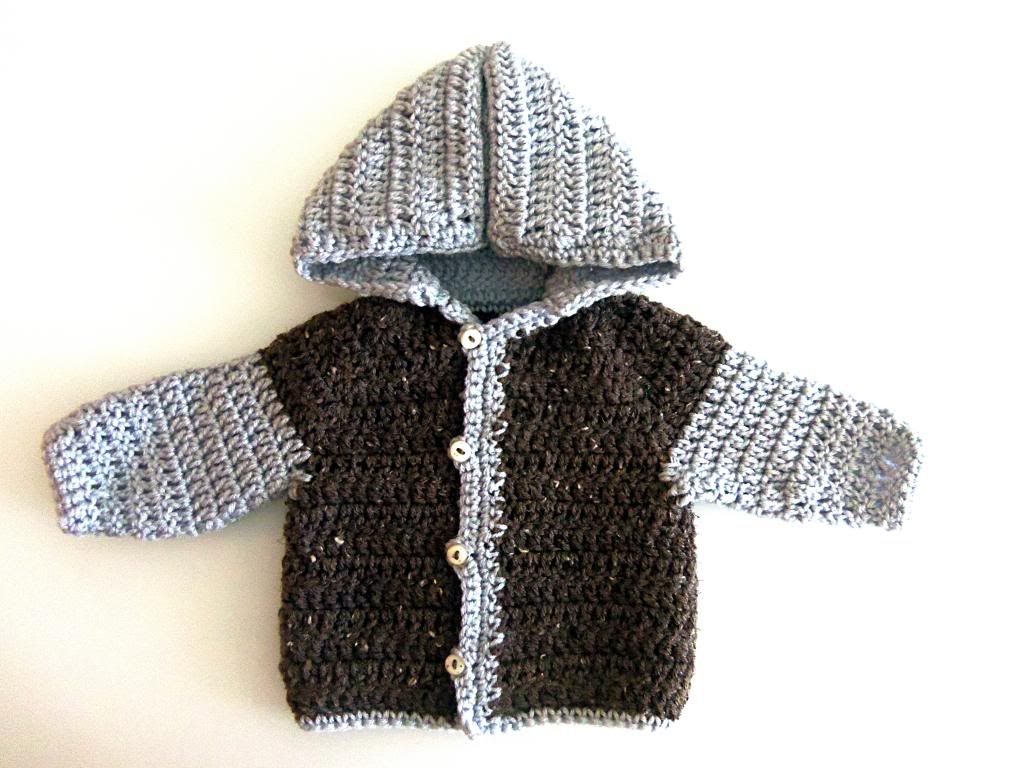
Easy Crochet Baby Sweater

If you know me you know that I have a bit of a crochet obsession. I own way to much yarn for my own good! I find that it is a very relaxing hobby for me and I have loved creating all kinds of crocheted items. With a new baby on board now I of course had to outfit him with some crocheted sweaters for the cold winter months. This time I am sharing this easy tutorial with you so that you can make your little one a sweater as well!
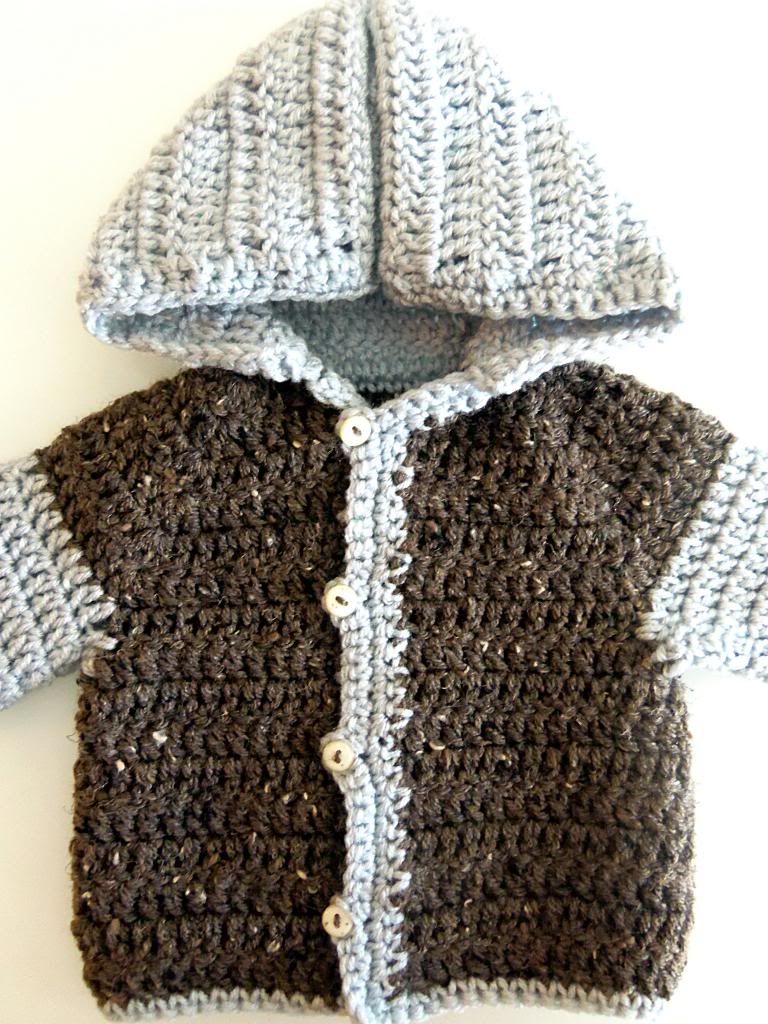
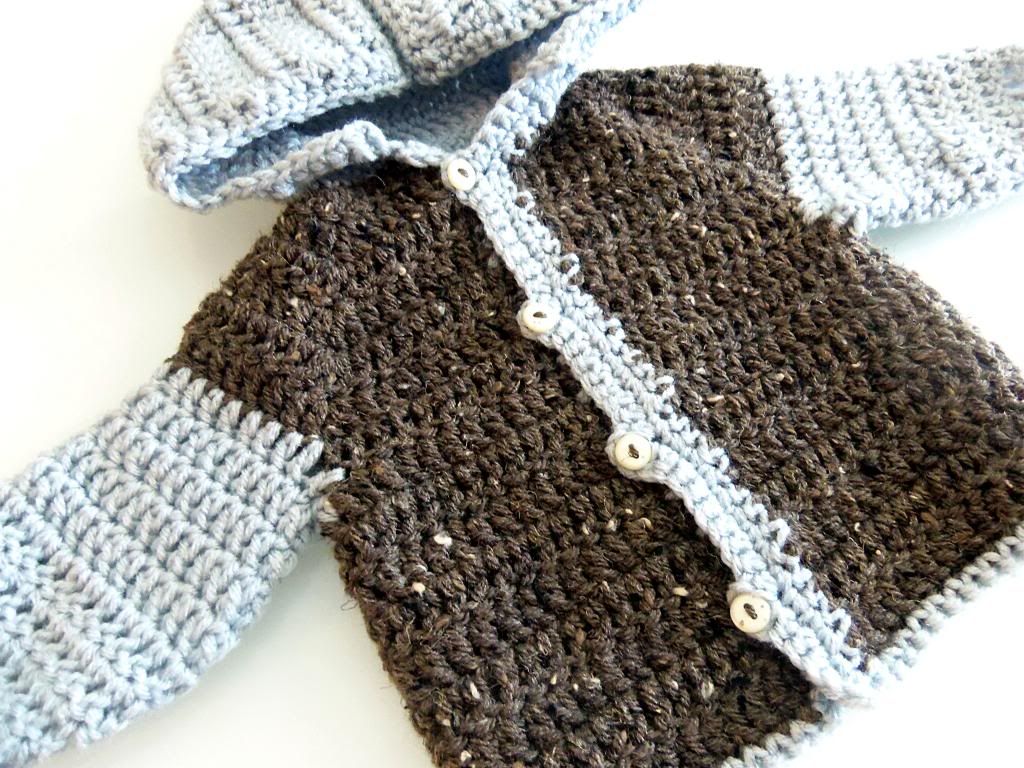
In fact I went a little crazy and now my baby boy has an entire winters worth of sweaters to wear! And if crocheting isn't your thing, you can always purchase any one of these beauties in my Etsy shop!
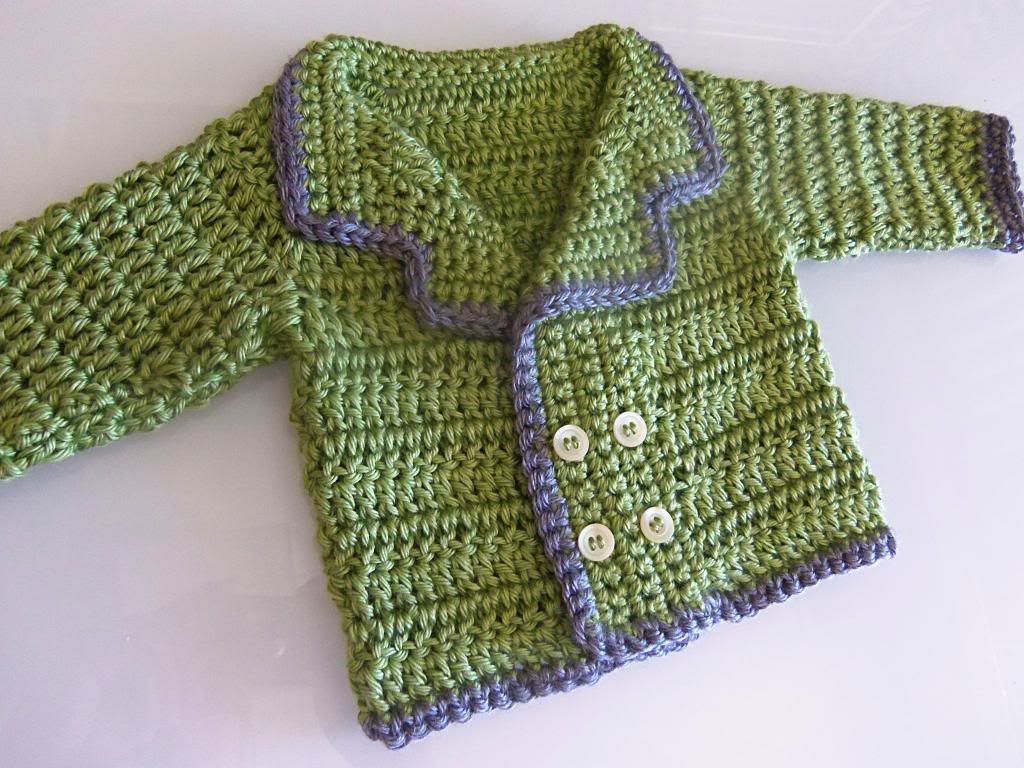
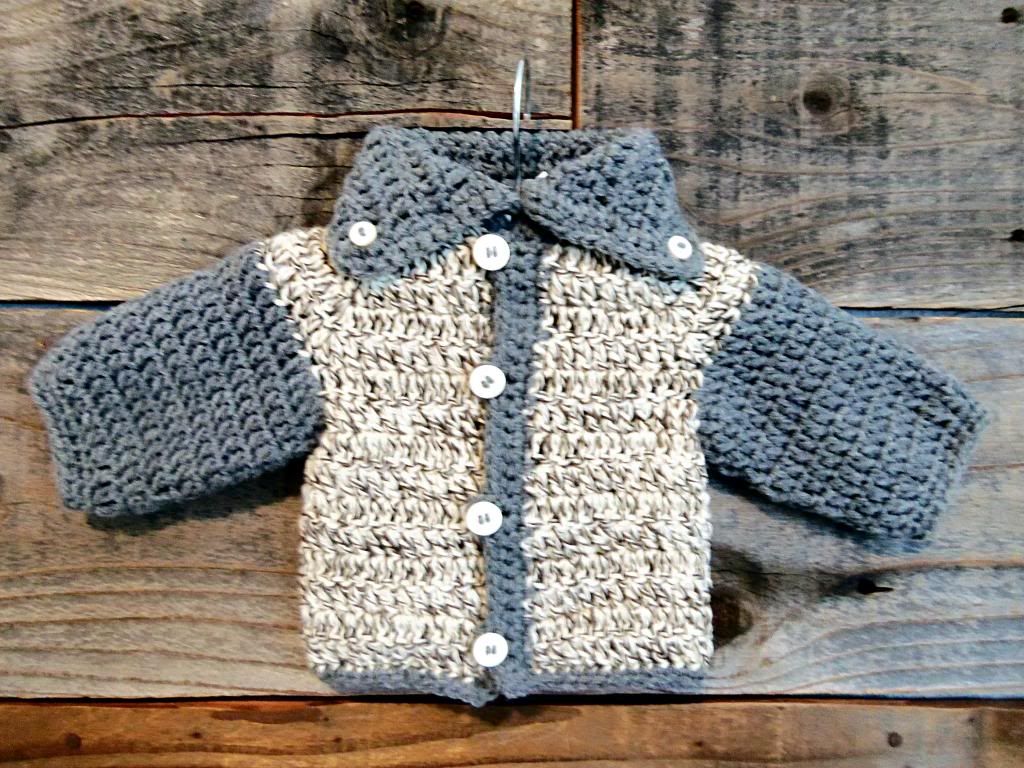
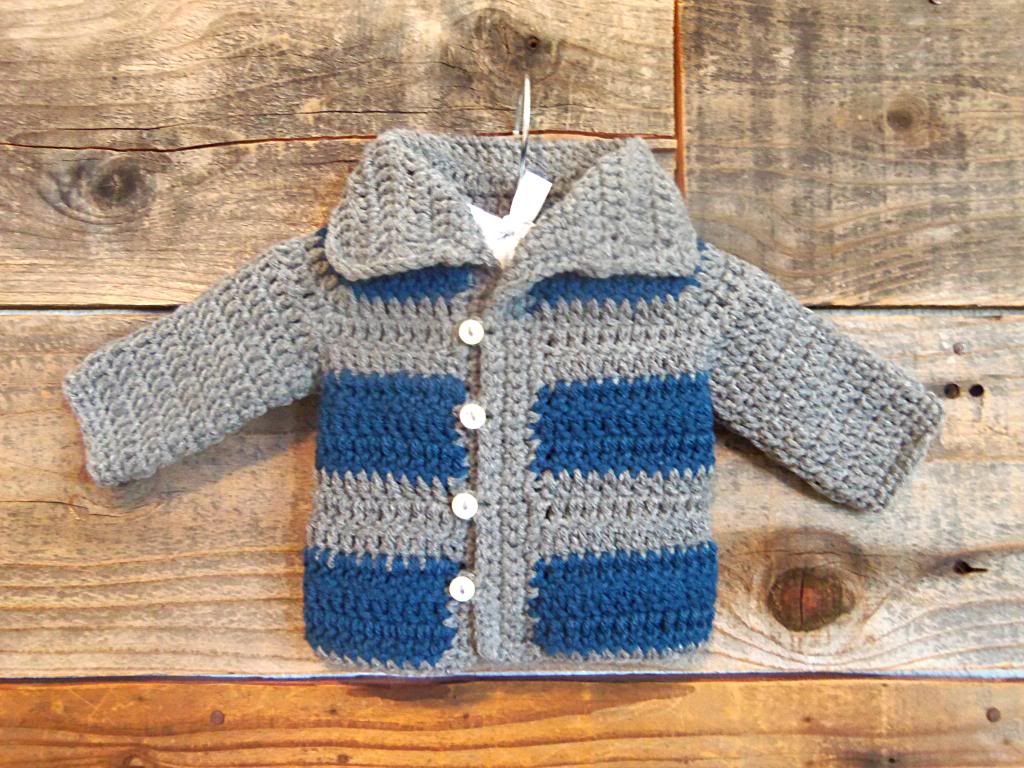


Here are the measurements for sizes newborn to 9 months old:
0-3 months: 16 in / 40.5 cm
3-6 months: 17 in/  43cm
6-9 months: 18 in/ 45.5 cm

You will want to use a different size hook for each of the sizes. I would use an H hook for the newborn-3 month size and then just use a size larger hook for each of the larger sizes.


Key:
ch= chain
dc= double crochet
sc= single crochet

Start by chaining 36
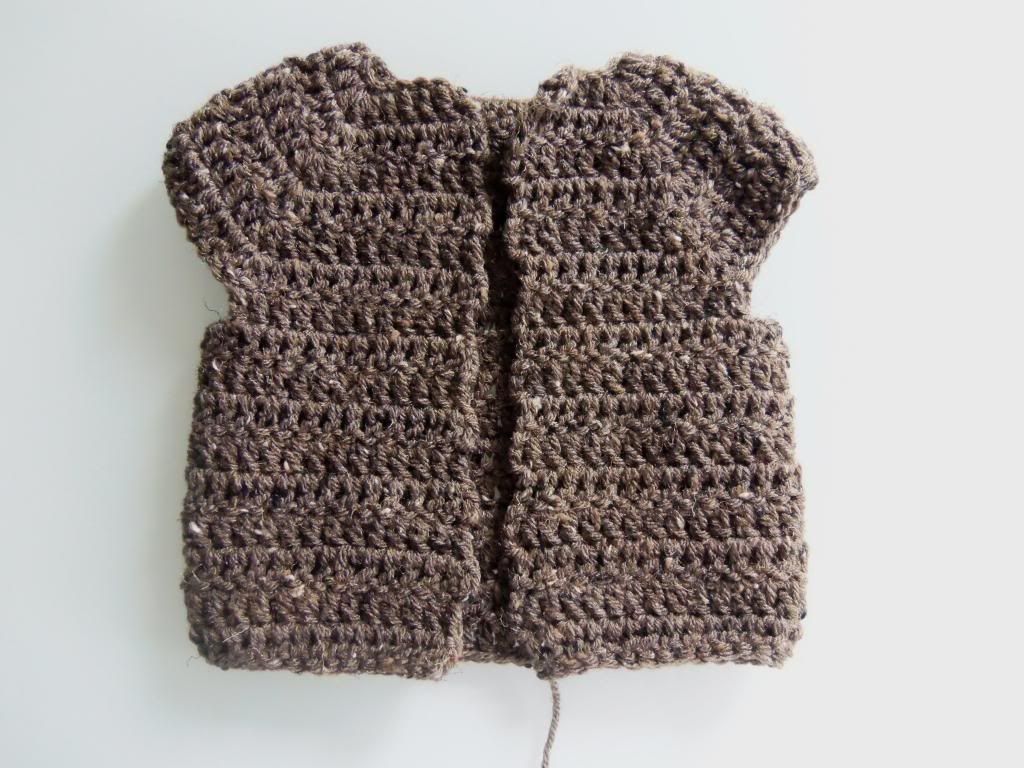
Row 1: 1 dc in fourth chain from hook, and in next 3 chs, 3 dc in next ch, 1 dc in next 5 chs, 3 dc in next ch, 1 dc in next 10 chs, 3 dc in next ch, 1 dc in next 5 ch, 3 dc in next ch, 1 dc in last 5 ch, ch 3 and turn work over.
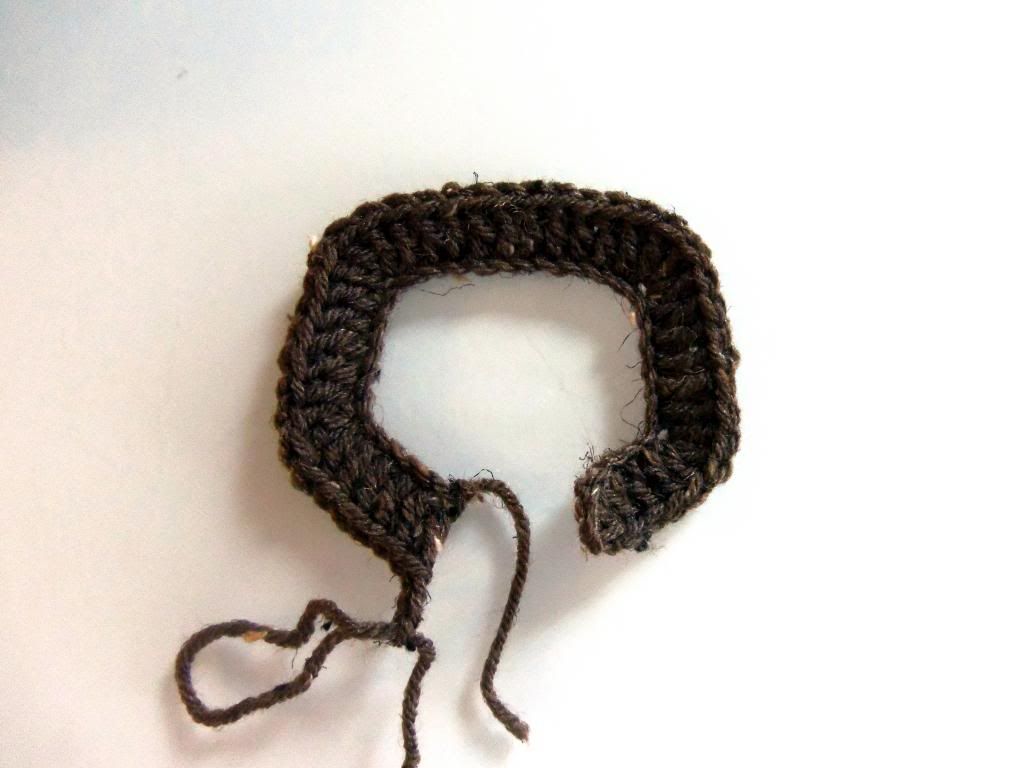
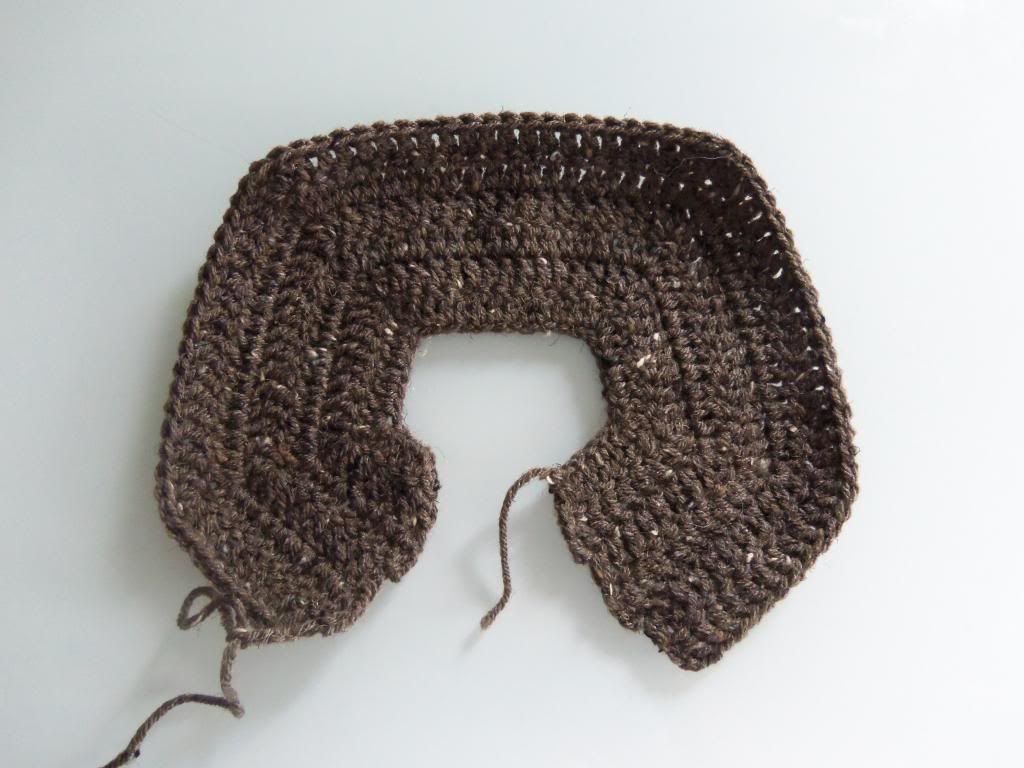
Row 2-5: .Dc in the very first chain and continue until you reach the middle dc of the 3 dc grouping where you will do 3 dc. Repeat, remembering to put your 3 dc into the middle dc of each of the previous 3 dc groupings.
Row 6: Shaping the arm holes. Ch 3, 1 dc in the very first chain and in each chain until you get to the middle dc of the 3 dc grouping, Ch 4, skip to the next middle of the dc of the 3 dc grouping and 1 dc in the middle of the 3 dc grouping. Dc in each chain until you get to the middle dc of the next 3 dc grouping, ch 4, skip to the next middle of the dc of the 3 dc grouping and 1 dc in the middle of the 3 dc grouping. Dc in each of the next chains until you get to the end of that row.

Row 7-15: Ch 3, 1 dc in each chain across row, starting with the very first chain, until you reach row 15, remembering to chain 3 at the end of each row before turning to work on your next row.
Trim: to do a trim around the vertical opening of the sweater edge, ch 1, 1 sc in the ridge, 1 sc in the post, repeat this for the entire row. When you reach the corner ch 1, turn and repeat steps until you reach the bottom corner. 3 sc in corner, ch 1 and 1 sc in each ch around bottom of sweater until you reach opposite corner, 3 sc in corner, ch 1,  1 sc in the next ridge, 1 sc in the next post all the way until you reach the corner of that row, ch 1, turn and 1 sc in each chain until you reach the first sc of the 3 sc grouping in the bottom corner.
Button Holes: Ch 1, turn, sc in each of the next chs until you reach your determined button hole spot and ch 3 and sc in the same chain, 1 sc in the next chs until you reach your next button hole spot and ch 3, sc in the same ch and continue until you have added all of your button holes and have reached the top corner of your sweater. 3 sc in corner ch, ch 1 and 1 sc in each chain around the neck.

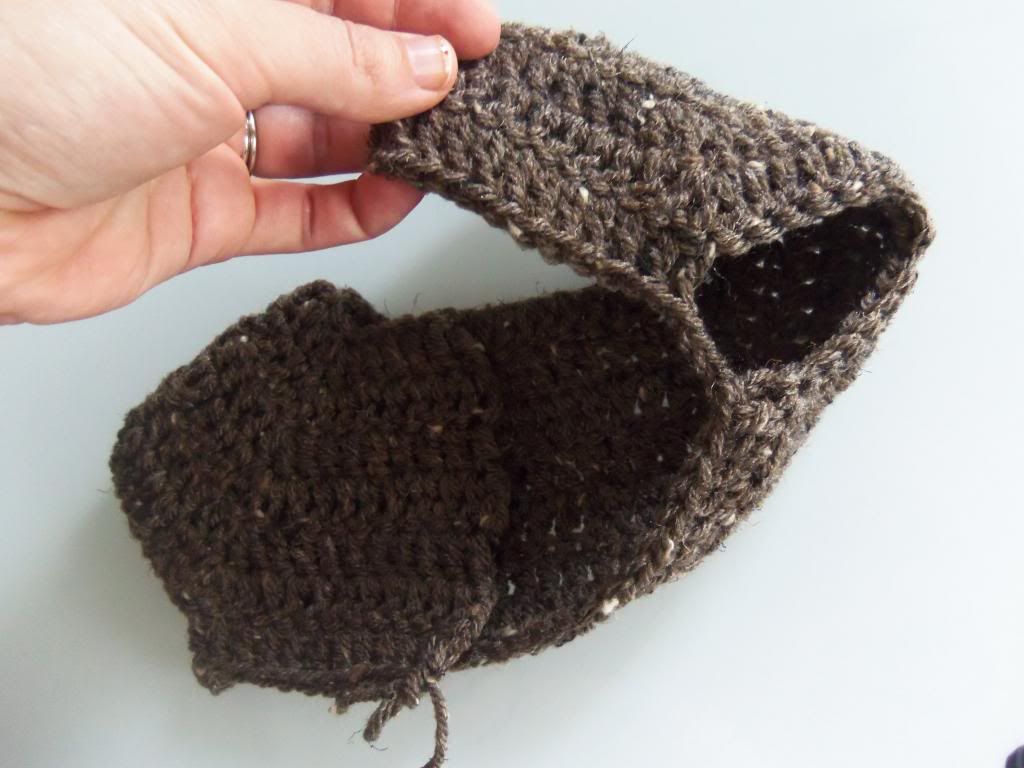
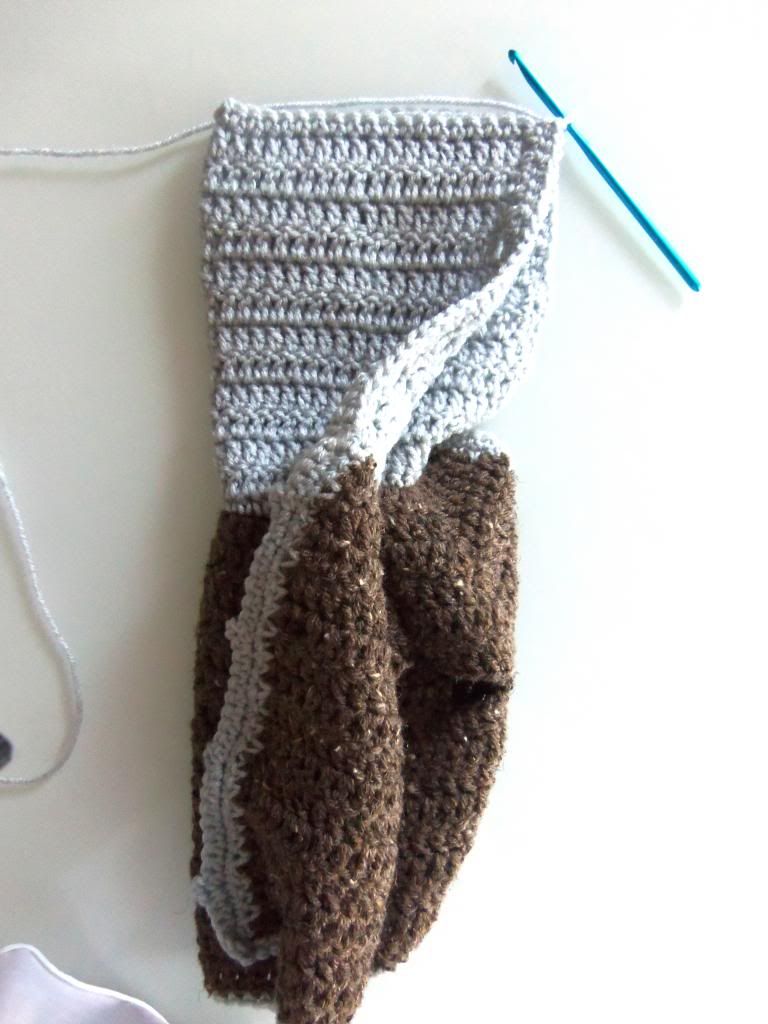
Hood: Attach yarn at corner of neck with slip stitch, ch 3, 1 dc in each ch across, ch 3, turn, 1 dc in each chain for 12 more rows. If you would prefer to do a collar instead of a hood you will stop at row 4 and just fold down the collar
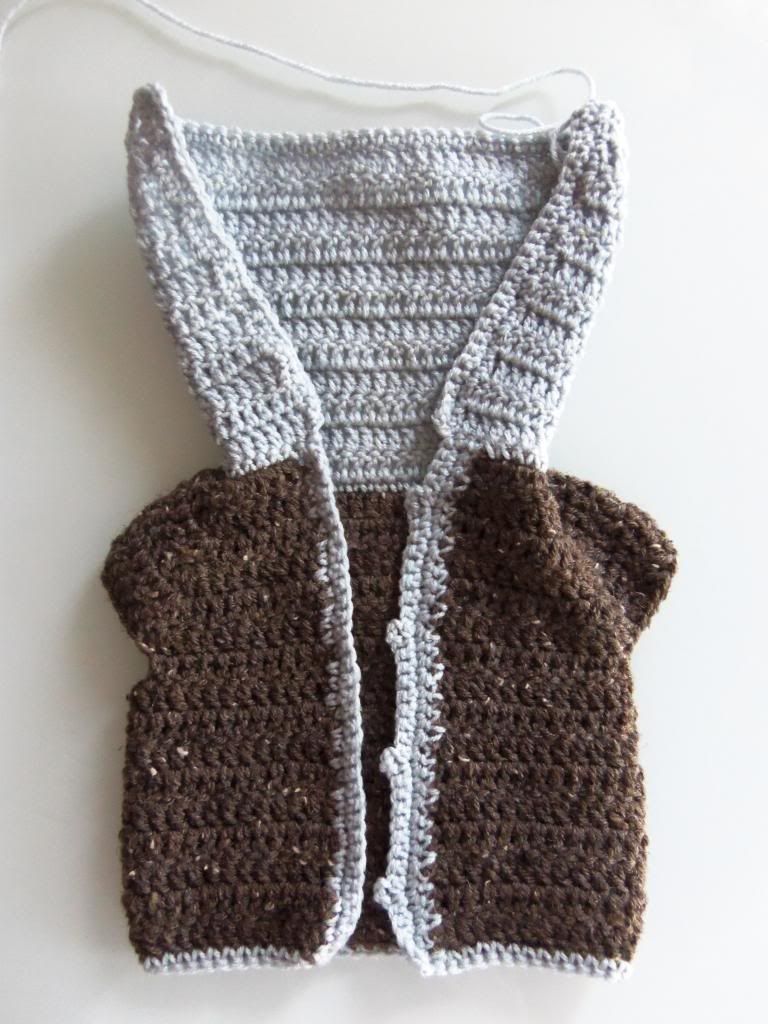
Turn sweater inside out and fold sweater over and line up your hood rectangle. Slip stitch each matching chain until you reach the end, ch 1, tie off and sew in your tail.

Arms:
Row 1-9: Start in the middle bottom of the arm opening. Attach your yarn to one of the chains and ch 3, 1 dc in each ch (In the corners where the posts are you will 1 dc into ridge, 1 dc in post, 1 dc in ridge). Continue with one dc into each chain. Write down the number of dc's you made in the first round of your first sleeve so that when you move to the next sleeve you will be sure to have the same amount so that one sleeve is not larger or smaller than the other. When you have a dc in every chain in the first row, slip stitch into the 3rd ch that you started with, ch 3 to go up to your next round and continue to do 1 dc in each chain around and slip stitching into the first ch 3 and repeat for 8 more rounds followed by 2 rows of sc.
Wednesday, March 5, 2014

Minty Gooey Cake Bars


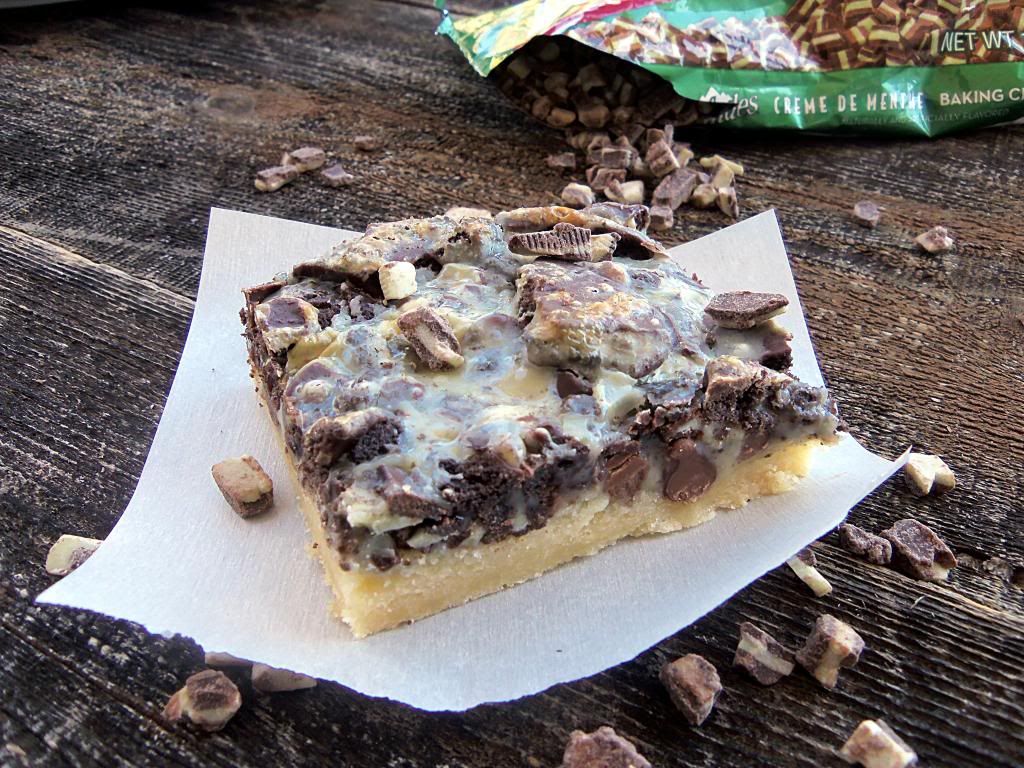
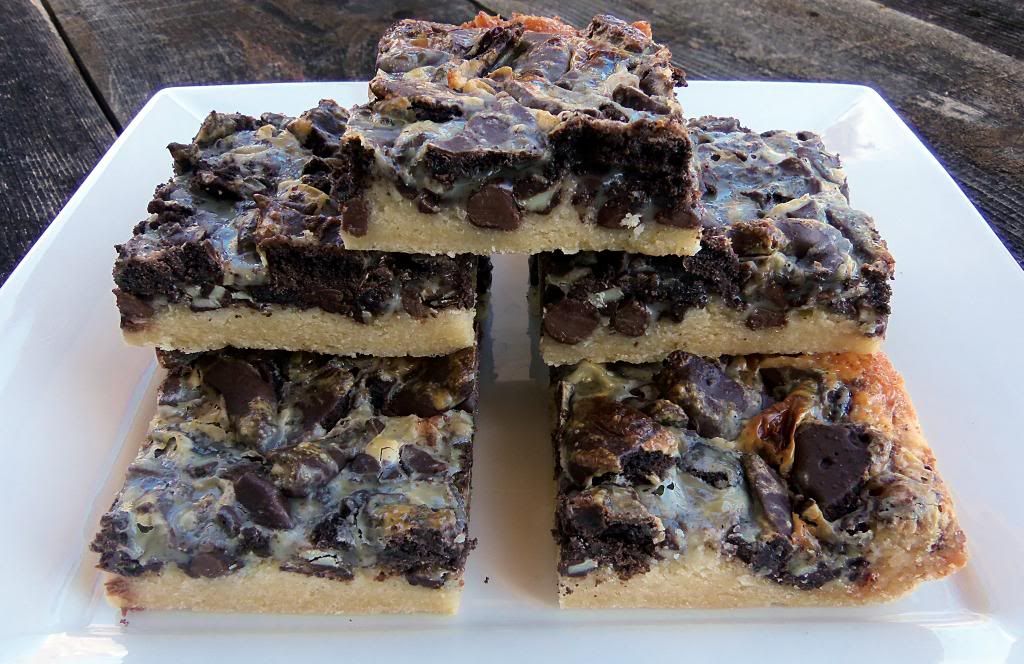
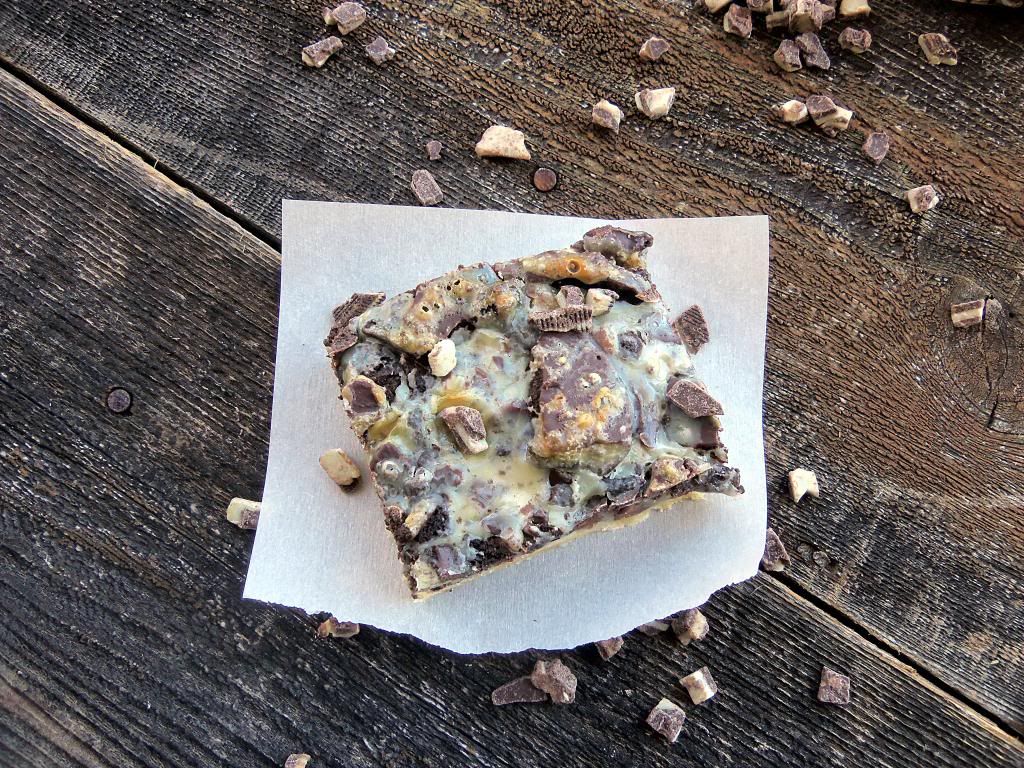
This last St. Patricks day I was searching for a new dessert that was either literally green or had a minty component to it. And thats about as far as our St. Patricks Day celebration goes in our family. Luckily I have Pinterest in my life and luckily there was a plethora of both green and minty desserts for the making. Thats when I stumbled across a dessert from Picky Palate, whose website is full of delicious food for the making. I read the recipe she had made for Minty Gooey Cake Bars and almost fell out of my seat. Holy decadent!! I almost got a cavity just reading the ingredients. That being said I knew it was going to be a winner of a recipe and one that I HAD to make for our upcoming St. Patricks Day. And of course I had to make it a bit early just to be sure that it was delicious….


Spoiler alert...this recipe is flipping amazing and is being filed away in my go to, need to impress, having a sugar craving, make more than on St. Patricks day file. The plate was devoured in a matter of minutes and not without serving up a big glass of ice cold milk with each bar. Delish!!

Minty Gooey Cake Bars

Ingredients:
1 box yellow cake mix
1stick softened butter
1 large egg
1 cup chocolate chips
1 cup Andes mint pieces
1 small can sweetened condensed milk
20 girl scout thin mint cookies, or Grasshopper cookies, broken into pieces

Directions:
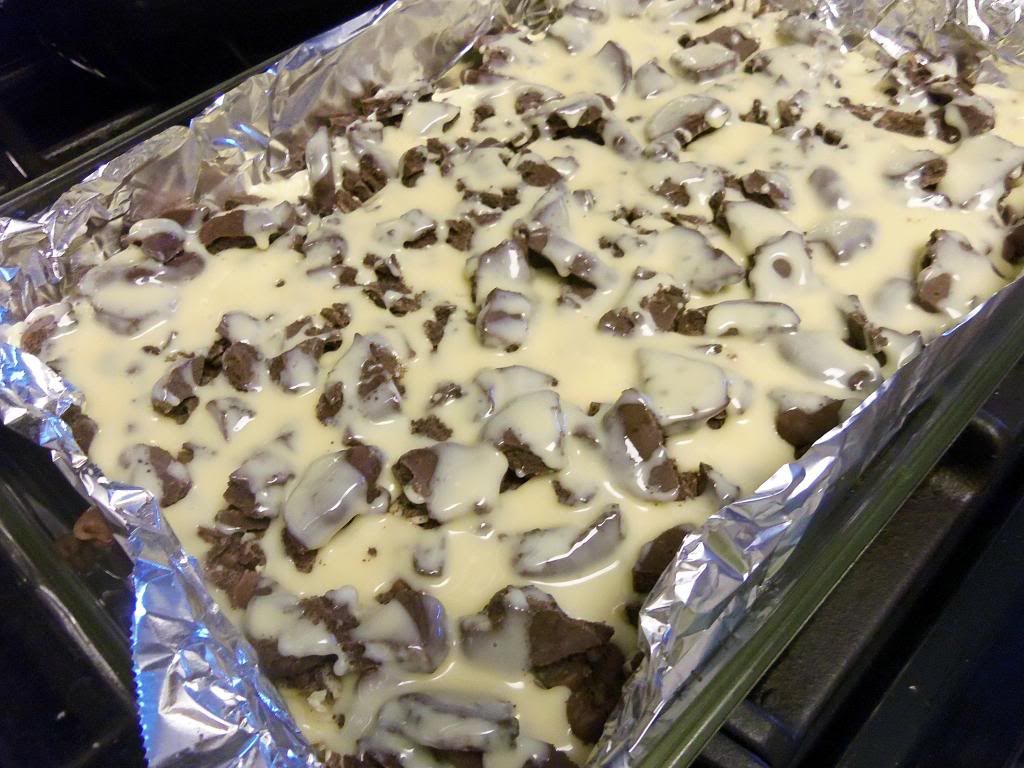
Preheat oven to 350 degrees and line a 9x13 inch baking dish with no stick cooking spray. Place cake mix, butter and egg into a large bowl; mix until dough forms. Press dough into bottom of prepared baking dish. Top evenly with chocolate chips and Andes mints. Drizzle sweetened milk over the top and top with broken pieces of mint cookies. 
Bake for 30-35 minutes, until baked through. Immediately after removing from the oven, take a plastic knife around edges of pan to loosen. :et cool completely cool before cutting into squares.


Wednesday, February 26, 2014

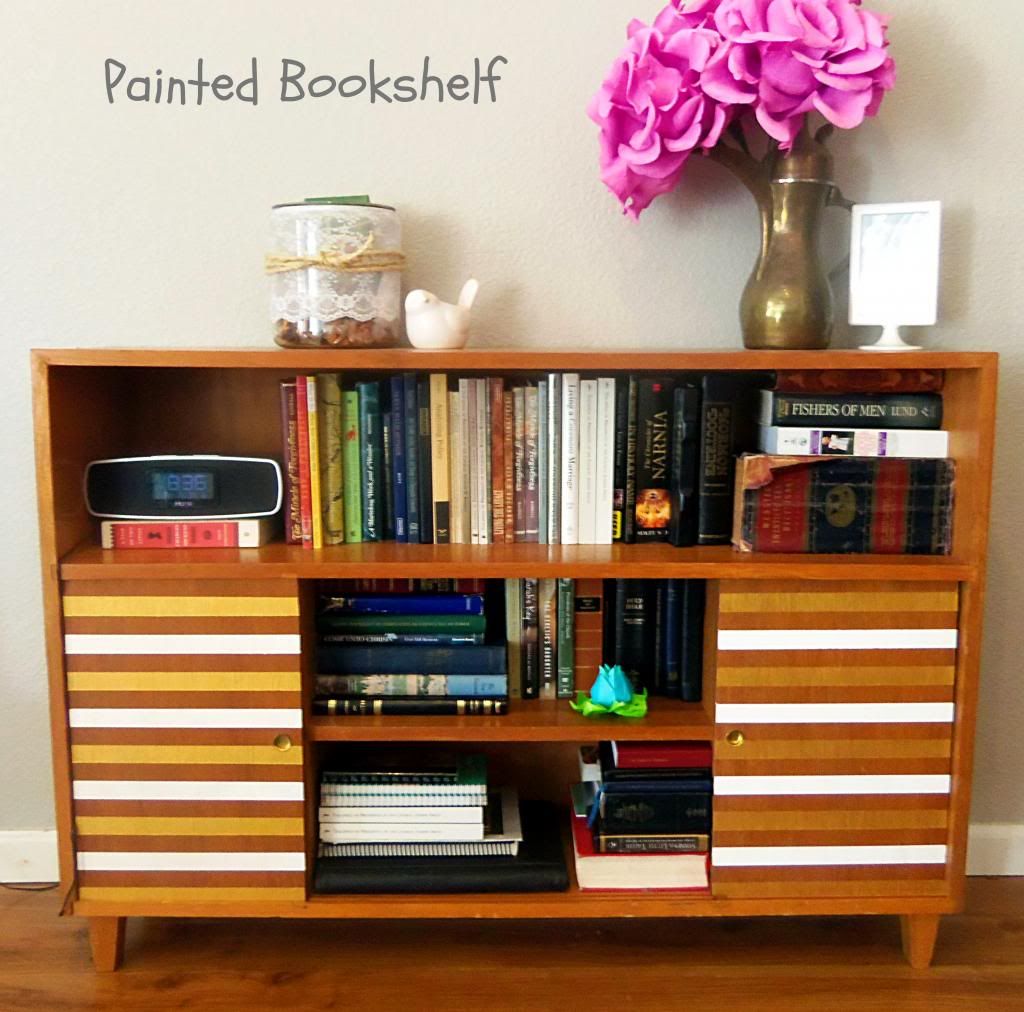
Painted Bookshelf

After
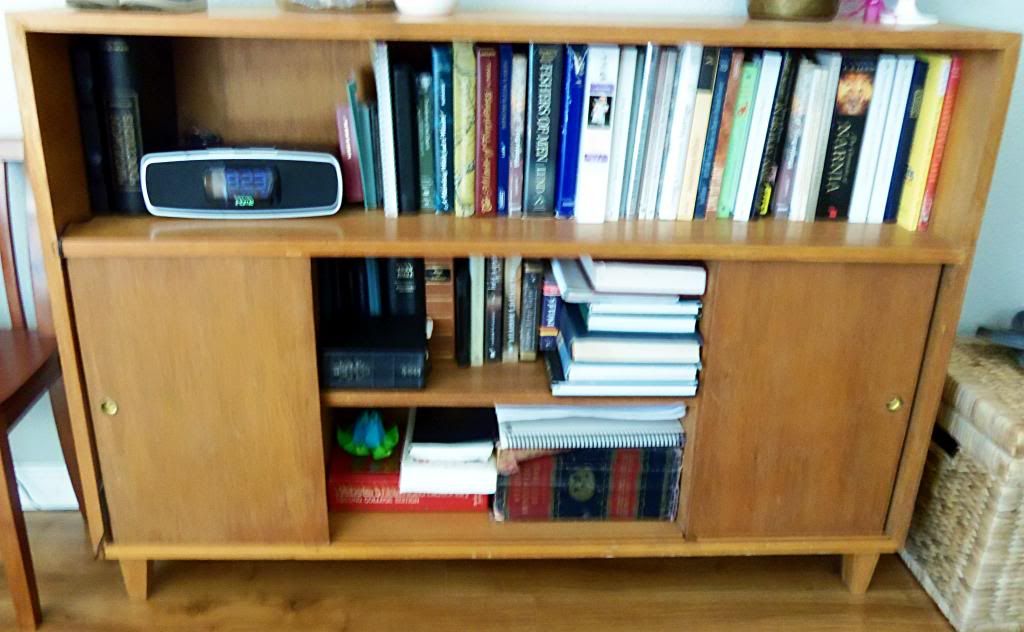
I picked up a little bookshelf from a local thrift store to use in our house and after living with it for a few months I decided it needed a little sprucing up. I didn't want to paint the entire unit so I opted to try just painting the sliding doors.

Before
After removing the doors, I used painters tape to stripe them out. I then lightly sanded then wiped down the exposed wood parts.


And I alternated painting the stripes white and gold. The surface of the doors was very smooth so the stripes came out perfect.


It adds the perfect amount of interest and funk to the otherwise plain bookshelf of its former life. Im pretty happy...its amazing what a difference it makes making just a simple little change.

Wednesday, February 19, 2014

Fig, Prosciutto & Kale Grilled Cheese

I was looking through my cabinets the other day for a snack for my son and found an economy size bag of dried figs that I had purchased from Costco months early and hadn't even used a 1/16 of. I wasn't sure E was going to go for the texture of the dried figs but I decided to try anyways. Turns out he has found another obsession aside from applesauce, bananas and watermelon. He has mowed through this bag with no trouble at all! In fact I have had to start regulating his fig intake so that his bowls don't spontaneously combust on me! As the bag was dwindling down I realized that if I wanted to use figs for anything I had better make my move before E finished them off. That was when my fig, proscuitto and kale grilled cheese made its appearance.


This grilled cheese combines flavors that you might not ordinarily think of using together, but they work soooooo perfectly! Its both sweet with the dried figs and salty with the cured prosciutto. A perfect combination! And of course I had to throw a little healthy into the mix and what better way than to use some vitamin packed kale. My husband gave it a definite two thumbs up while licking his fingers. This recipe will definitely be making a debut on our monthly rotation for sure!


Fig, Proscuitto and Kale Grilled Cheese

Ingredients:
sandwich bread, I used sourdough
butter
dried figs, 5 per sandwich
proscuitto, 3-4 thin slices per sandwich
kale, ribs removed
grated mozzarella cheese

Directions:
Reserve about 5 figs per sandwich, depending on how large the bread is that you are using. Slice each of your figs into at least 4 thin slices; set aside. Prepare your bread by lightly spreading butter on the outside pieces. Place a layer of mozzarella cheese down on one of the un-buttered sides of your bread. Place your cut figs fairly close together on top of the cheese. You want to make sure that you get a piece of fig with every bite. Layer your proscuitto down next. Place a layer of kale down over the proscuitto and top with an additional layer of grated mozzarella. Place your remaining piece of bread over the cheese with the buttered side up. Heat a large pan over medium heat and cook your sandwich until a gold crust forms on the bread. Turn and repeat on the other side. Serve and enjoy!

Wednesday, February 12, 2014

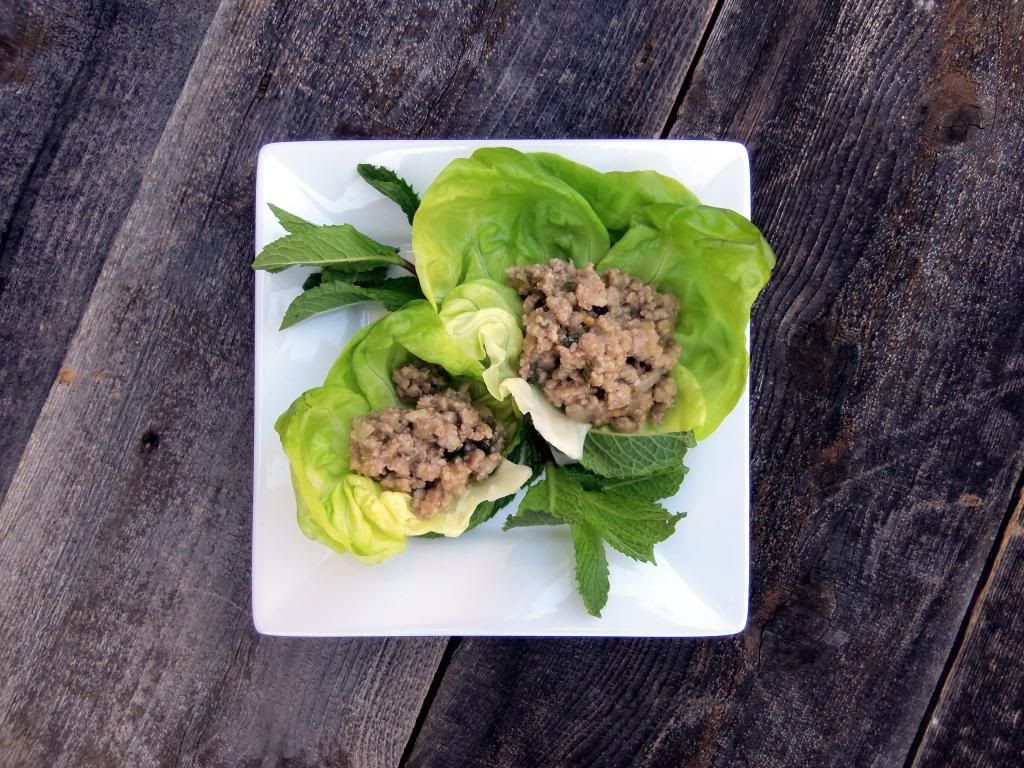
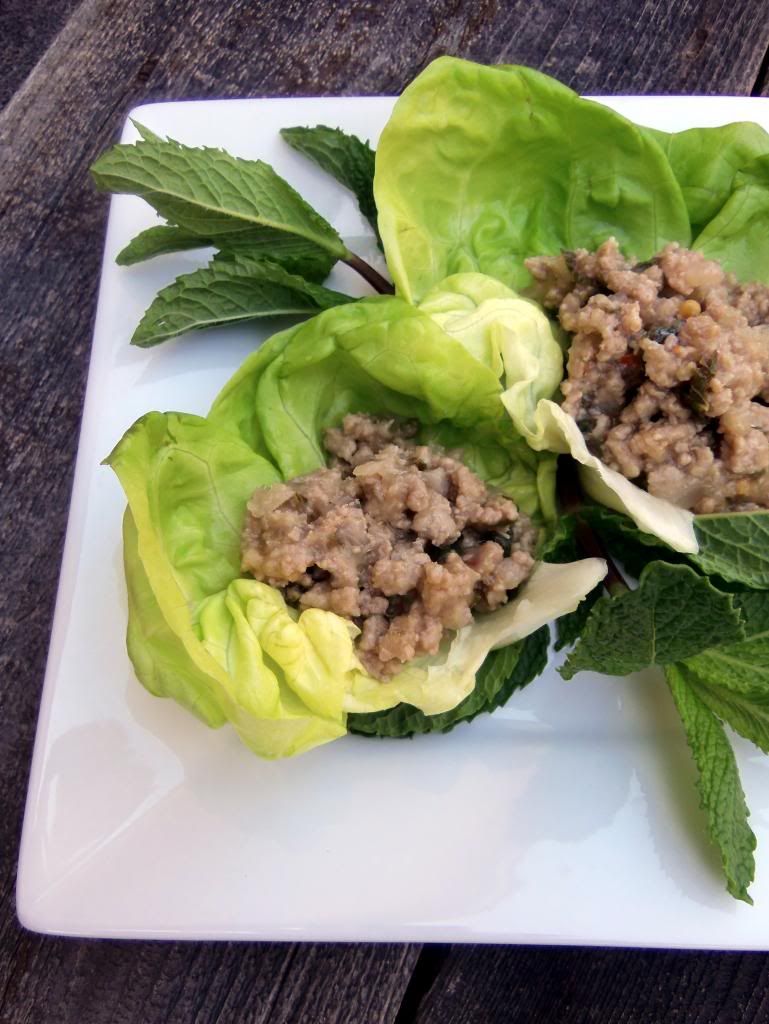
Turkey Larb


A few of you might be completely turned off by the name of this recipe, maybe even more than a few. In fact when I told my husband what we were having for dinner he thought I said turkey lard!!? What the heck is larb, you say? Larb is actually a type of Laotian meat salad that is regarded as the national dish of Laos. It is most often made with chicken, beef, duck, turkey, pork or even fish and flavored with fish sauce, lime juice and fresh herbs. The meat can either be raw or cooked (don't worry...the meat in this recipe is definitely cooked!). The bottom line is that the dish is incredibly fresh, flavorful, healthy and delicious!! 

Turkey Larb

Ingredients:

Dressing-
1/3 cup fresh lime juice, about 5 limes
3 tablespoons fresh lemon juice, about 1 large lemon
2 tablespoons fish sauce
2 tablespoons honey

Larb-
3 tablespoons vegetable oil
1/2 red onion, diced
3 shallots, thinly sliced
1 (4-inch) piece lemon grass, minced
1 Thai chili or 1 serrano chili, stemmed and thinly sliced
salt and pepper
1 1/2 pounds ground turkey
1/2 cup chopped fresh mint leaves
1 head bitter lettuce, leaves separated 
Directions:
For the dressing, whisk together all ingredients in a small bowl and set aside. 
For the larb heat oil in a large skillet over medium heat. Add onions, shallots, lemongrass, chili and salt to taste. Cook until the vegetables begin to soften, about 5 minutes. Add the turkey and season with salt. Cook, stirring frequently, until the meat and vegetables are cooked through, about 6 minutes. Add the dressing to the pan and cook for 2 minutes. Remove the pan from the heat and stir in the mint. Season with salt and pepper, to taste. Spoon turkey mixture onto the lettuce leaves and arrange onto a serving platter.


Wednesday, February 5, 2014

Crochet Overalls

I am now featuring these adorable hand crocheted green and grey overalls in my Etsy shop!! They have four functional button enclosures at the shoulders and I am always taking custom orders, so if you would prefer a different color don't hesitate to convo me!

Sizes available for these little cuties are:
0-3 months: 16 in/40.5 cm, chest circumference
3-6 months: 17 in/43 cm, chest circumference
6-9 months: 19 in/45.5 cm, chest circumference 


Wednesday, January 29, 2014

Zebra Popcorn

Do you ever go to Costco during the holidays when they have the sample stand out, serving and selling that deliciously addicting popcorn?!!? There sits samples of cheddar, almond, zebra, and cinnamon white chocolate popcorn! Are you like me, trying not to act embarrassed as you walk up to the station for the 15th time grabbing another sample? Well I am tired of waiting for another holiday to come around before I can buy another months supply.....and now I don't ever have to wait again! This recipe is so close to Zebra Popcorn flavor that I might just open up a stand of my own and start selling it!

Zebra Popcorn

Ingredients:
12 Cups popcorn
1/2 cup butter
1 cup brown sugar
1/2 Karo syrup
1/2 teaspoon baking soda
2 teaspoon vanilla
1 1/2 cups melted white chocolate for drizzling
1 1/2 cups melted milk chocolate for drizzling

Directions:
Preheat your oven to 250 degrees. Place popcorn in largest bowl you can find. You will need a large bowl with a little extra room so that you will be able to adequately incorporate the hot caramel and the popcorn. I actually split up my popcorn between two bowls.
Melt butter in a large microwave safe bowl. Add in brown sugar and corn syrup and stir to combine. Microwave until you see bubbles start to form. Once bubbles form, continue to microwave for 3 minutes without stirring.

Remove from microwave and stir in vanilla and baking soda.
Pour the mixture over your popcorn and stir until the popcorn is well coated. You will want to do this right away so that your caramel mixture does not become hard which will make it nearly impossible to then coat your popcorn. Spread your coated popcorn onto a baking sheet lined with parchment paper or a silpat. Place popcorn in the oven for 30 minutes being sure to toss every 10 minutes. 
 Remove your popcorn from the oven and let cool completely before drizzling with melted white and dark chocolate.  Let your popcorn rest until the white and milk chocolate drizzle has hardened. I am completely impatient so I place my pan of popcorn in the refrigerator or freezer to harden faster. When cooled, brake into manageable pieces and serve right away or store in an air tight tupperware container until ready to eat.

Blogging tips