blankhomeaboutthe fammy faithwhats cookinget crafty

Wednesday, May 28, 2014

Sun Dried Tomato and Tarragon Stuffed Mushrooms


I love mushrooms and they have always reminded me of my father. Every time he eats mushrooms he always likes to make the statement that mushrooms are a good substitution for eating meat. He continues for a few minutes giving us all the ways you can replace mushrooms for meat and how satisfying it could be. He repeats this as if he has stated it for the first time in his life, when in actuality I hear it at least a dozen times a year :) Although mushrooms are meaty in texture I am not sure I could substitute my meat for mushrooms all the time. But, I do love mushrooms and especially stuffed ones.


These mushrooms are so flavorful and packed full of really interesting flavors like tarragon, sun dried tomatoes, basil and cheese to name a few. And even though there is no meat incorporated into the stuffing, they sure are as satisfying and delicious as my good ol' dad says they are!

Sun Dried Tomato and Tarragon Stuffed Mushrooms

Ingredients:
1 pound mushrooms
2 tablespoons olive oil
salt and pepper
1 small onion, diced
2 cups finely chopped sun dried tomatoes
4 garlic cloves, finely chopped
1/2 cup Parmesan cheese
1 1/2 tablespoons tarragon leaves
4 tablespoons chopped basil leaves
fresh mozzarella cheese

Directions:
Preheat your oven to 350 degrees. place your mushrooms with caps removed onto a baking sheet. Drizzle with olive oil and a little bit of slat and pepper. Bake for about 8-10 minutes if you are using small mushrooms. If using large portobello mushrooms bake for about 15 minutes. While mushrooms are cooking heat two tablespoons of olive oil in a pan and add the onions. Cooks on low heat for about 7 minutes, stirring every few minutes. Add garlic and sun dried tomatoes and cook for and additional few minutes. Remove from heat and let cool. Once cooled, add the Parmesan cheese, basil and tarragon. Taste for needed salt and pepper. 


Pile the filling on top of your mushrooms and top with a slice of fresh mozzarella. Return to the oven and bake for about 10 minutes or until the cheese is melted and the mushrooms are hot. Garnish with fresh chopped basil and serve hot. Enjoy!


Wednesday, May 21, 2014

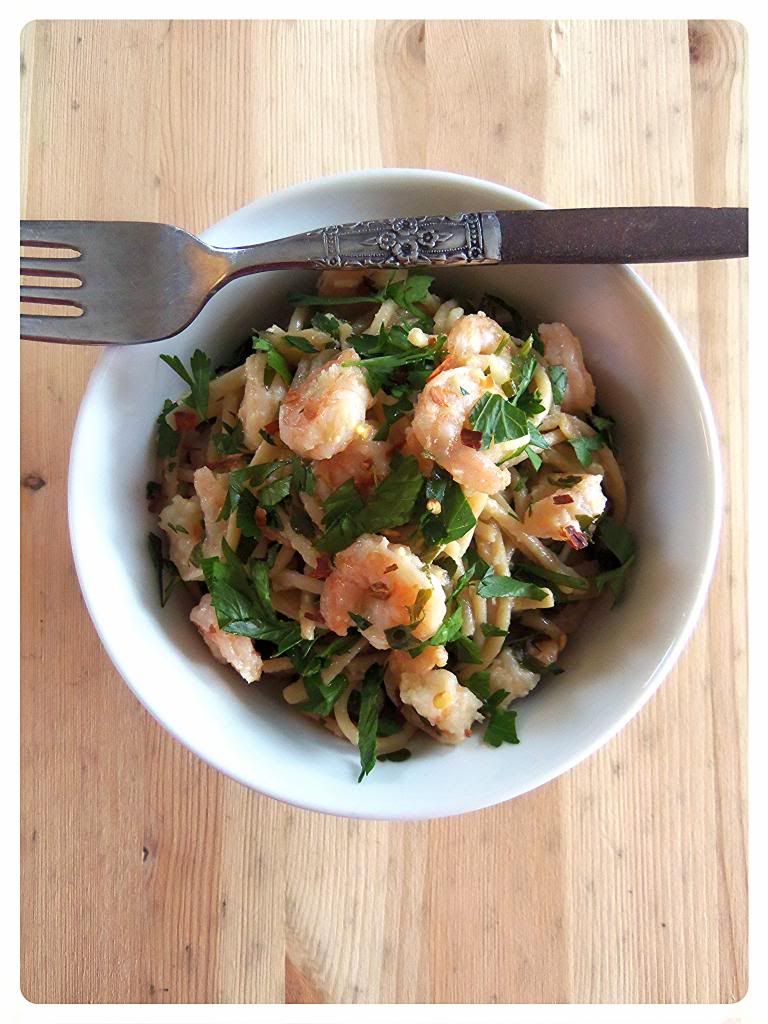
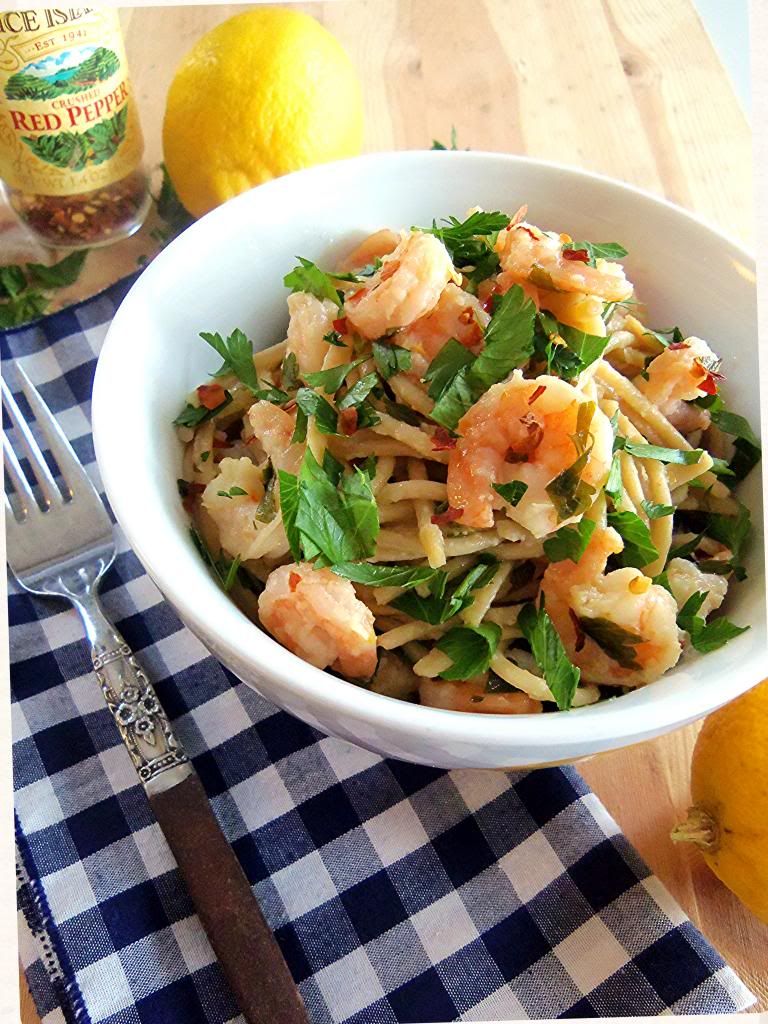
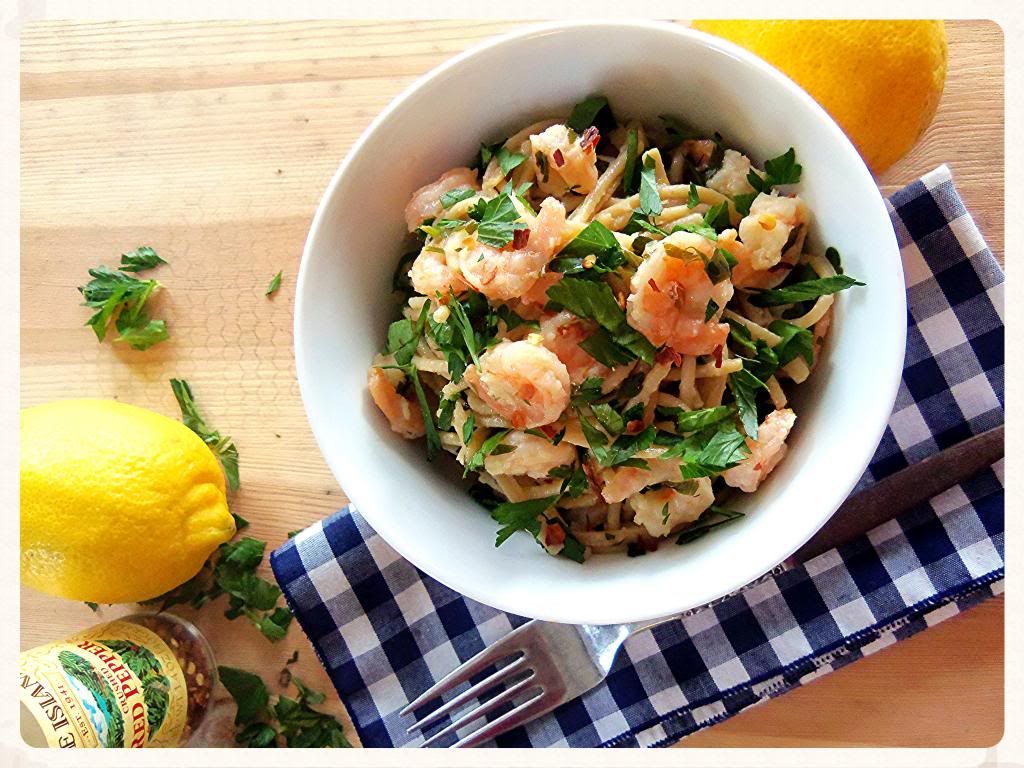
Whole Wheat Pasta with Shrimp, Lemon, Parsley & Red Pepper Flakes

Sometimes simple recipes with just a few ingredients can be some of the yummiest and most flavorful! In fact this recipe is a staple in our household because of those simple facts. Most of the ingredients are pretty standard and are staples in our household which makes it a snap to put together in as little time as it takes my pasta to cook to al dente!

Now that's my kind of recipe...quick, delicious and easy! This recipe has just a few ingredients but when combined together are packed with flavor and will leave a lasting impact on your taste buds! Be sure to make extra; your family will be begging for more and as the flavors sit and continue to meld together they only get better! 

Whole Wheat Pasta with Shrimp, Lemon, Parsley & Red Pepper Flakes

Ingredients:
1 box whole wheat pasta
6 tablespoons olive oil
6 tablespoons butter
6 small to medium cloves garlic
1/2 teaspoon red pepper flakes
2 pounds shrimp, more or less according to your preferences
2 lemons
1/2 cup parsley plus more for garnish
salt and pepper to taste

Directions:
Prepare pasta according to package directions, being sure to cook al dente. While pasta is cooking, melt butter and oil in skillet. Once oils are hot, add garlic and let cook for about 1 minute. Add red pepper flakes, stir, then add shrimp and cooked until just pink. Turn heat off and add the zest of one lemon, the juice of two, and parsley. Stir to combine and check for needed salt and pepper. Add cooked and drained pasta to your skillet, toss before plating and garnish with more parsley.

Wednesday, May 14, 2014

Easy Chicken Brine


I have always heard about brining meat and the wonders it does for flavor and texture but I have never been very interested in trying it. Im not sure what sparked my interest in it this week but I decided I would give it a try so I could either prove it wrong or become a believer. After cleaning up from our dinner meal for the night I simply put together my brine recipe and added my chicken and stuck it in the fridge for the following day. When it was time to start preparing dinner I simply removed my chicken breasts, rinsed them under water and stuck them on the grill. My husband, son and I sat at the dinner table each with chicken on our plate very anxious to dig in. Of course my son had already started attacking his food, but lets be honest, I couldn't use him as a gauge for whether the chicken was a success or not since I'm convinced he would eat just about anything. So my husband and I decided to slice off a piece and give it a try. The first thing that came to my mind was "I will never prepare my chicken any other way." Yes, thats right, it was a huge success, like big time! I had never had chicken so perfectly juicy and seasoned in my life. And heres the kicker...after taking my chicken out of the brine I put absolutely zero seasoning on it, zilch, nada, nothing! So all of the flavor I was tasting was coming strictly from the brine. 100% delicious, and it couldn't have been easier to throw together. Everyone has salt and water on hand and you can always play around with any of the other added ingredients. Give it a try, you might turn into a brining fanatic like me!!

Chicken Brine

Ingredients:
4 cups water
4 tablespoons of grated or finely chopped red onion
4 tablespoons salt
5 cloves garlic, finely chopped
2 sprigs of fresh rosemary or 1 heaping tablespoon of dried rosemary
1 lemon, thinly sliced
5 boneless, skinless chicken breasts

Directions:
Place the water and salt in a large tupperware container. Stir until salt is dissolved. Add onion, garlic, rosemary, lemon slices and your chicken breasts. Seal the container and place in your refrigerator for 24-48 hours. When ready to cook, run each of your chicken breast under cold water and pat dry. BBQ the chicken breasts until internal temperature reaches 165 degrees.

Wednesday, May 7, 2014

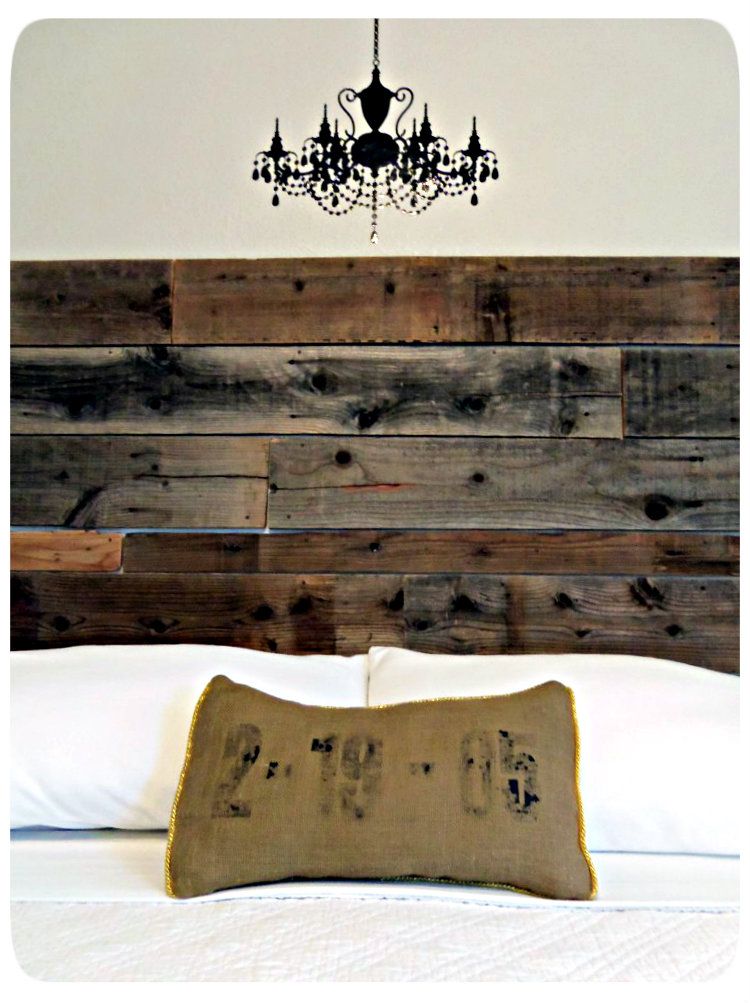
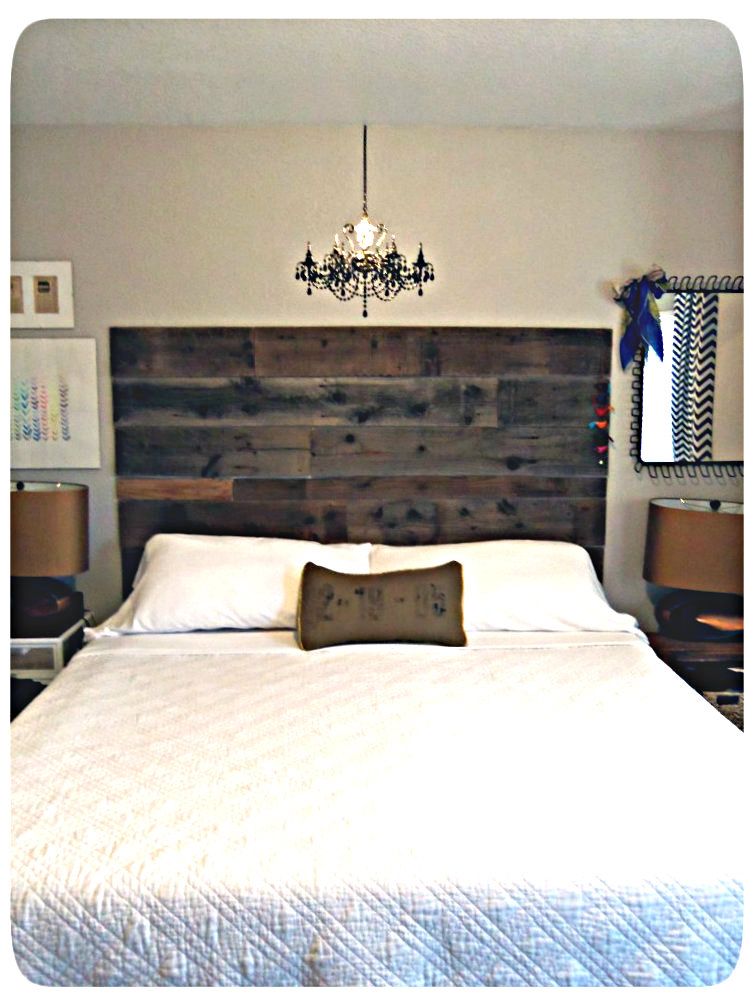
Headboard Anniversary


Yes, its that time, the 2 year anniversary of my favorite headboard ever! I am such a lucky lady to have such a  wonderful and handy husband. One day about a year ago I pointed to a photo of a wood headboard and said "I want this, can ya make it for me sweetie?!" Of course he could...and make it he did!! We had just pushed out our fence line in our back yarn and used new wooden boards to do so. That meant we had an incredible pile of old wooden planks that were already gorgeously aged. The timing could not have been better. Ben laid out the planks, made some cuts and voila, my favorite headboard was born. Maybe just maybe a little something to do with me loving my headboard so much might have included the fact that we purchased our first king size bed at the same time.


Wednesday, April 30, 2014

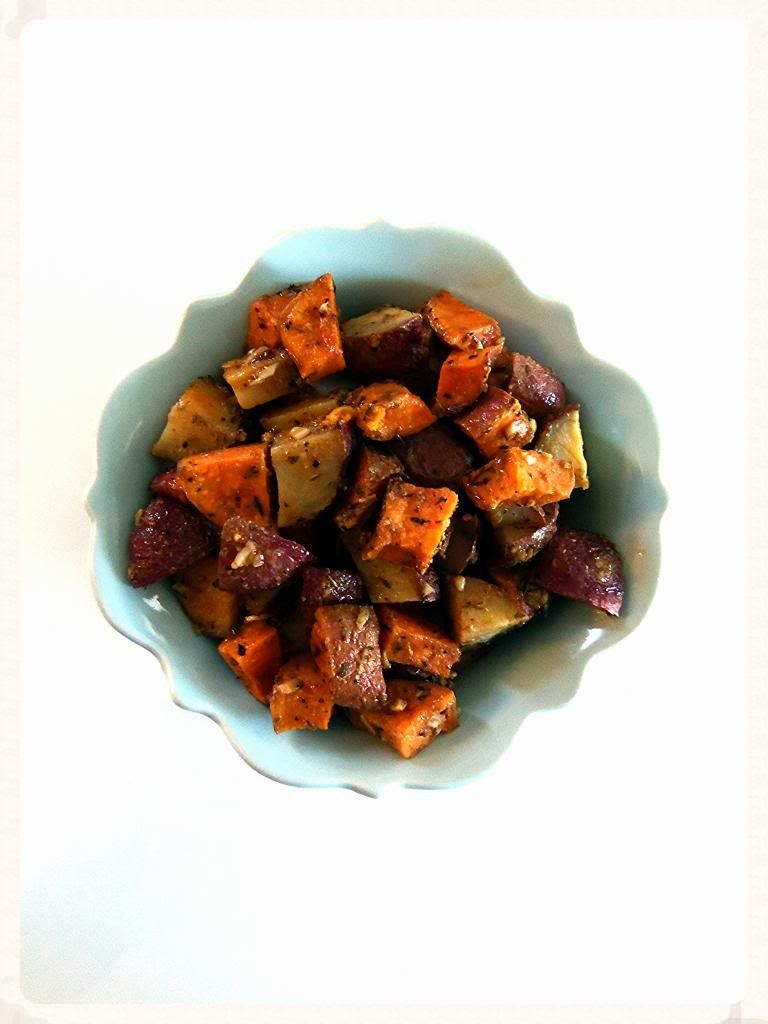
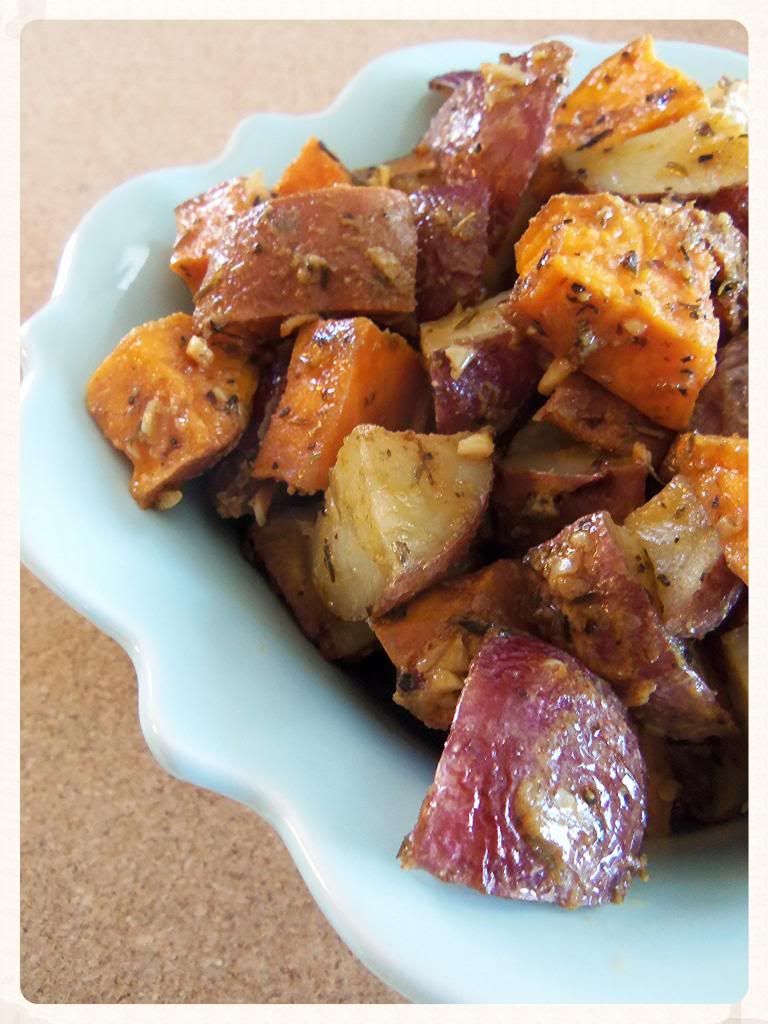
Mexican Roasted Sweet Potoatoes

We recently had a Costco built very very close to our house. So close that it didn't make sense not to have a membership simply for reasons of proximity :) Having shopped there the past year I feel like I have learned a big lesson for my little family of 3. Less is more! So many times I have picked up produce or packages of food and thought "We, two adults and a 1 1/2 year old, wont have any trouble eating all of this food before it goes bad" Wrong! Oh the money I have wasted, but oh the lessons I have learned. 
So when I ventured to Costco last month I thought nothing of buying a large bag of potatoes. After all potatoes last in a dark cool place for like forever...right! Wrong again! At least for me that is. I kept my hefty bag of potatoes in the garage to store and noticed one day that they had started to sprout through the bag! Holy cow, I hadn't even gone through half the bag!!! What was I going to do with all of these potatoes? I was determined not to have them end up in the trash with all of my other failed purchases. That's when Mexican roasted sweet potatoes came to be. They turned out to be so good that we had them all week and even invited family over to enjoy them with us.

Mexican Roasted Sweet Potatoes

Ingredients:
8 medium sweet potatoes, diced (I used half sweet and have russet)
1/3 cup olive oil
2 teaspoons fresh oregano
1 teaspoon ground cumin
1/2 teaspoon salt plus more for sprinkling on top before roasting
black pepper to taste
3 garlic cloves
1/4 teaspoon smoked paprika
1 heaping tablespoon Dijon mustard
1 lime, juiced

Directions:
Preheat your oven to 400 degrees. Combine all of the ingredients except the potatoes and lime into a jar or in a deep bowl and mix thoroughly. Toss your potatoes in a bowl with the oil mixture and then transfer to a foil lined baking sheet. Sprinkle with salt and pepper.
Roast the potatoes for 40 minutes, until they are browned on the edges and fork tender. Remove from oven and sprinkle with lime juice. Test for additional salt or pepper and serve warm.

Wednesday, April 16, 2014

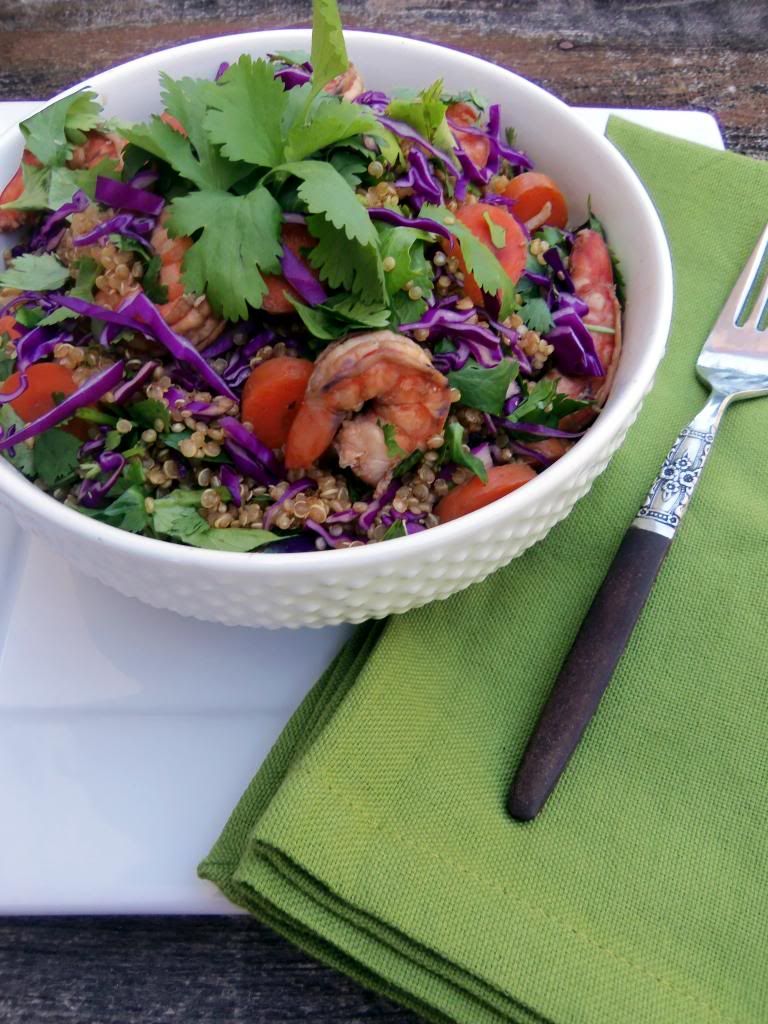
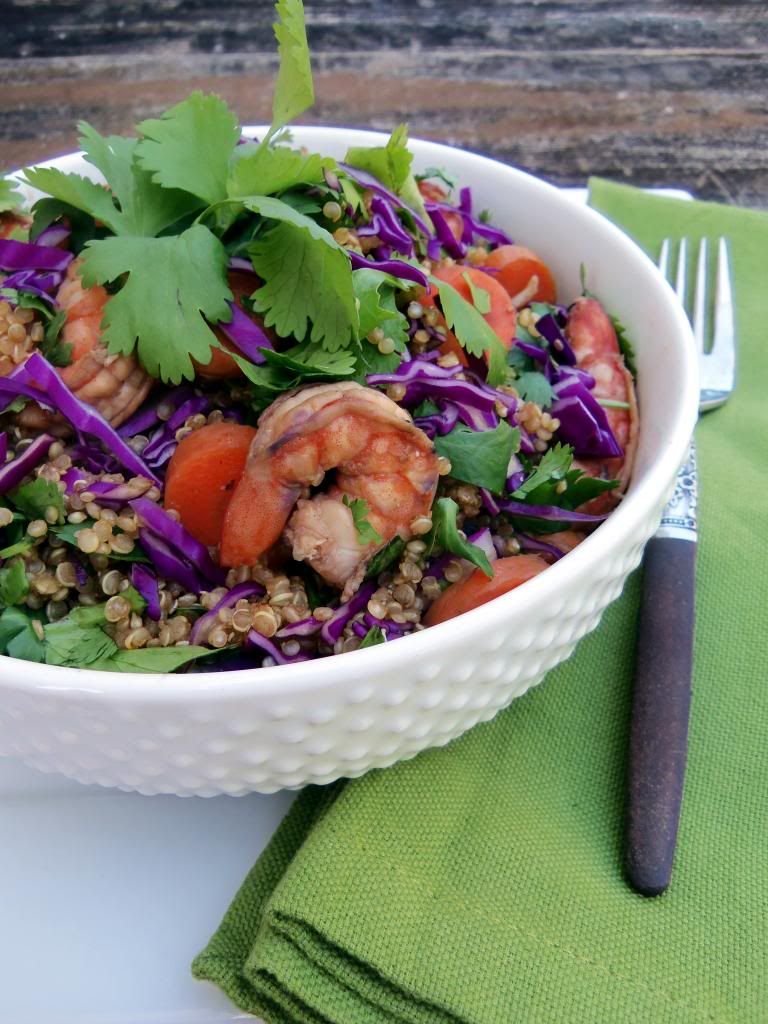
Vietnamese Fried Quinoa with Shrimp

This recipe is a little play on Vietnamese rice. I used quinoa instead of rice and added some yummy shrimp. This dish is so great because you can add or subtract so many elements to make it something that your family will really enjoy. Instead of shrimp you can add chicken or even pork. And if you have some picky eaters in your house who wont come near cabbage with a  ten foot pole you can always substitute snap peas or broccoli. There are a million possibilities. 
I didn't even miss having traditional rice in this dish. The quinoa compliments all of the ingredients very well and added a nice variation. In fact when I platted dinner for my husband and myself, Ben looked at his bowl and said "oh wow, this looks like something I'm gone like!" Its safe to say that after we licked our bowls clean that it was indeed a dish that both of us like very much.

Vietnamese Fried Quinoa and Shrimp

Ingredients:
1 lb shrimp
3 tablespoon soy sauce
1 tablespoon sesame seed oil
1 teaspoon white wine vinegar
1 tablespoon fresh grated ginger
2 cups quinoa
3 1/2 cups vegetable or chicken broth 
1/4 cup soy sauce
1 tablespoon sugar
1 teaspoon hot red pepper sauce
4 large eggs or 7 large egg whites
1/4 teaspoon salt
5 tablespoons vegetable oil
1 bunch green onions, trimmed and chopped 
5 cloves garlic, chopped
2 1/2 cups shredded cabbage
4 carrots, chopped
1/2 cup fresh cilantro, chopped

Ingredients:
Place your shrimp into a large zip lock baggie along with the soy sauce, sesame seed oil, vinegar and ginger. Let marinate at least 30 minutes in fridge or longer. Place rinsed quinoa into a pot with vegetable or chicken broth and bring to a boil. Once a boil is reached turn the heat down to a simmer and cover with a lid for around 15 minutes or until all of the liquid is absorbed; set aside. Combine soy sauce, sugar and hot sauce in a small bowl and set aside. Mix together eggs with 1/4 teaspoon of salt. Heat cast iron skillet or wok over heat and add two tablespoons of oil and half of the onions. Pour in the eggs and cook swirling the eggs as you stir intermittently, until they have set, about 2 minutes. Transfer to a platter and set aside. Add your marinated shrimp and juice to hot pan and cook until pink and cooked; set aside. Add 2 tablespoons of oil to pan and add remaining onions and garlic. Cook stirring for a few seconds. Add cabbage and carrots and cook, stirring for about 3 minutes. Transfer to a platter. Add remaining 1 tablespoon of oil to the pan and add cooked quinoa. Stir for a few seconds and add soy sauce mixture. Add eggs, vegetables and shrimp. Before serving toss in fresh cilantro. Enjoy!

Wednesday, April 9, 2014

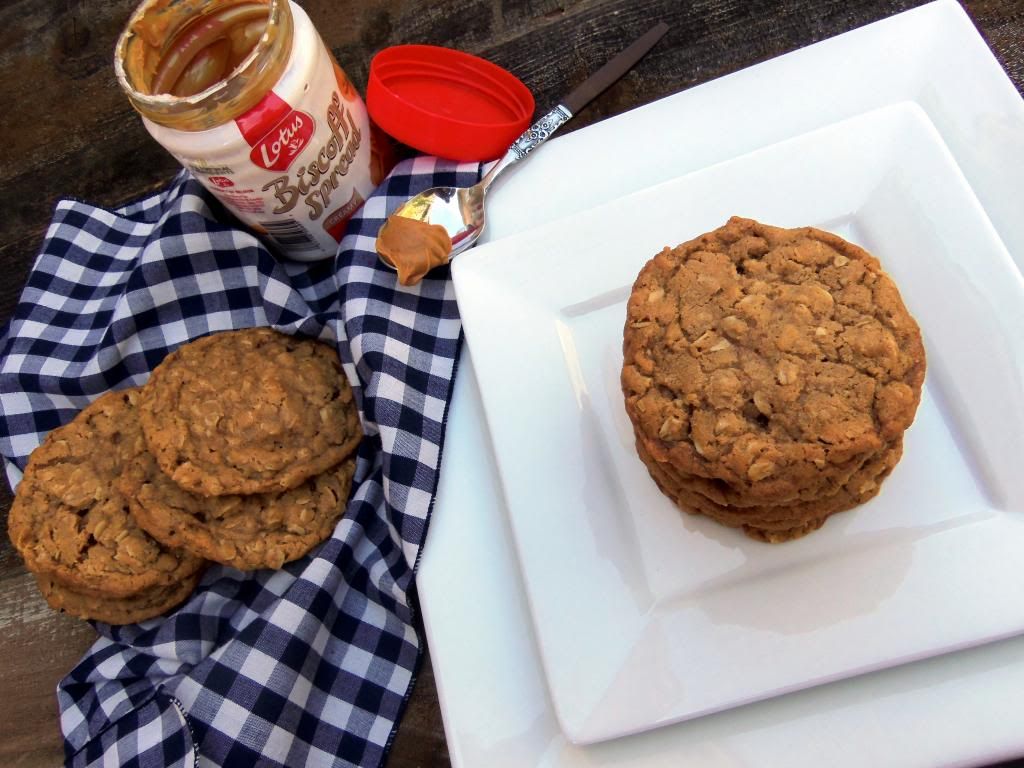
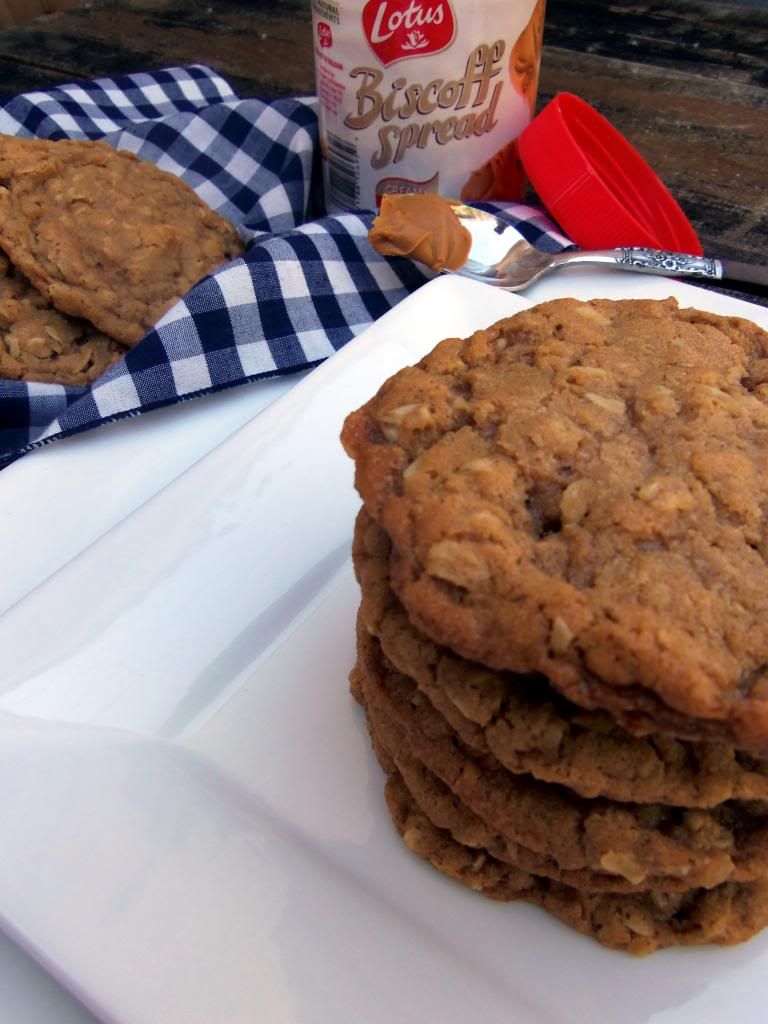
Biscoff Oatmeal Cookies

Lucky for me I am related to the ever so talented +Maria Lichty from Two Peas & Their Pod. She happens to be my sister in law and an incredible cook and baker extraordinaire! She specializes in creating recipes that are simple, fresh, and family friendly...and I might add delicious!! One of my families favorite recipes that she came up with are her Biscoff Oatmeal Cookies. Holy cow people these are addicting. I have made two batches in a 1 1/2 days time and I have nothing to show for it except an empty cookie container. 
There is nothing quite like the flavor of Biscoff Spread and if you have not had the fortunate opportunity of tasting it then I highly recommend you making a trip to your local grocery store immediately so you can cross this one off of your to do list. Though it has the same consistency of peanut butter, it is not made with nuts nor does it taste like peanut butter, but can actually be found on the same isle right next to your favorite peanut butter spread. So go ahead, make a batch and I dare you not to finish the batch before the day is done!

Biscoff Oatmeal Cookies

Ingredients:
1 1/2 cups old fashioned oats
1/2 cup all purpose flour, plus 2 tablespoons
1/2 teaspoon ground cinnamon
1/8 teaspoon salt
1/2 cup butter at room temperature
1/2 cup Biscoff Spread
1/2 cup granulated sugar
1/2 cup brown sugar
1 large egg
1/2 teaspoon vanilla extract

Directions:
Preheat oven to 350 degrees F. Line a baking sheet with parchment paper or a silicone mat. In a medium bowl, whisk together the oats, flour, baking soda, cinnamon, and salt. Set aside. In the bowl of a stand mixer, add the butter, Biscoff Spread, sugar, and brown sugar and beat on medium speed until smooth and creamy. Add the egg and vanilla extract and beat until smooth. Reduce the mixer speed to low and slowly add the dry ingredients, beating only until blended. Chill the dough 30 minutes in the refrigerator. Form the cookie dough into rounded tablespoons and place them 2 inches apart on the baking sheet. Bake for 8-10 minutes or until cookies are golden and just firm around the edges. Let the cookies cool on the baking sheet for 5 minutes and then remove with a spatula onto a cooling rack. Enjoy!

Blogging tips