blankhomeaboutthe fammy faithwhats cookinget crafty

Tuesday, October 30, 2012

DIY Origami Lotus Flower

I can remember years ago tuning into an episode of Oprah Winfrey and was devastated when Nate Berkus, home decorator, announced that having fake flowers in your home was one of the bigest faux pas of all time. What! No fake flowers?! Like for real for real or just kind of for real?! At the time I kinda maybe was guilty of having a fake flower arrangement on my dining room table that rivaled something out of Butchart Gardens. I thought it was pretty spectacular and my world had just been shattered. The news gave me pause to say the least and catapulted me into another world of creativity and imagination. I didn't replace my faux flowers over night but over time they were weeded out and I have begun to use other forms, such as crochet flowers, fabric flowers and yes origami paper flowers just like the tutorial for today.
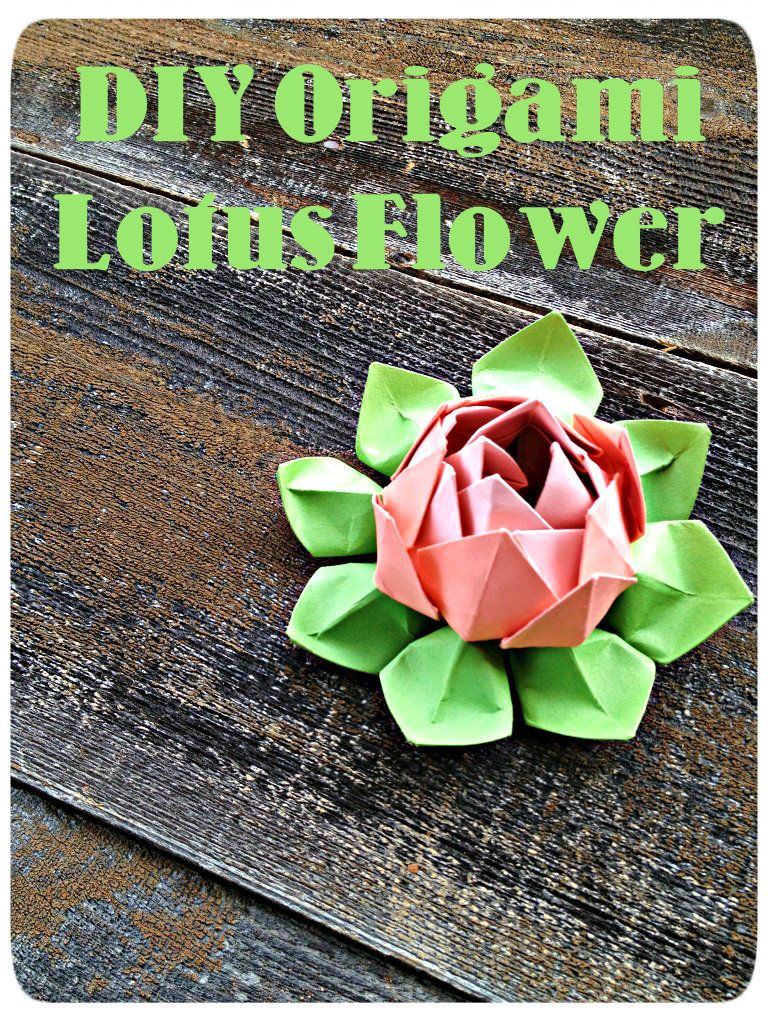
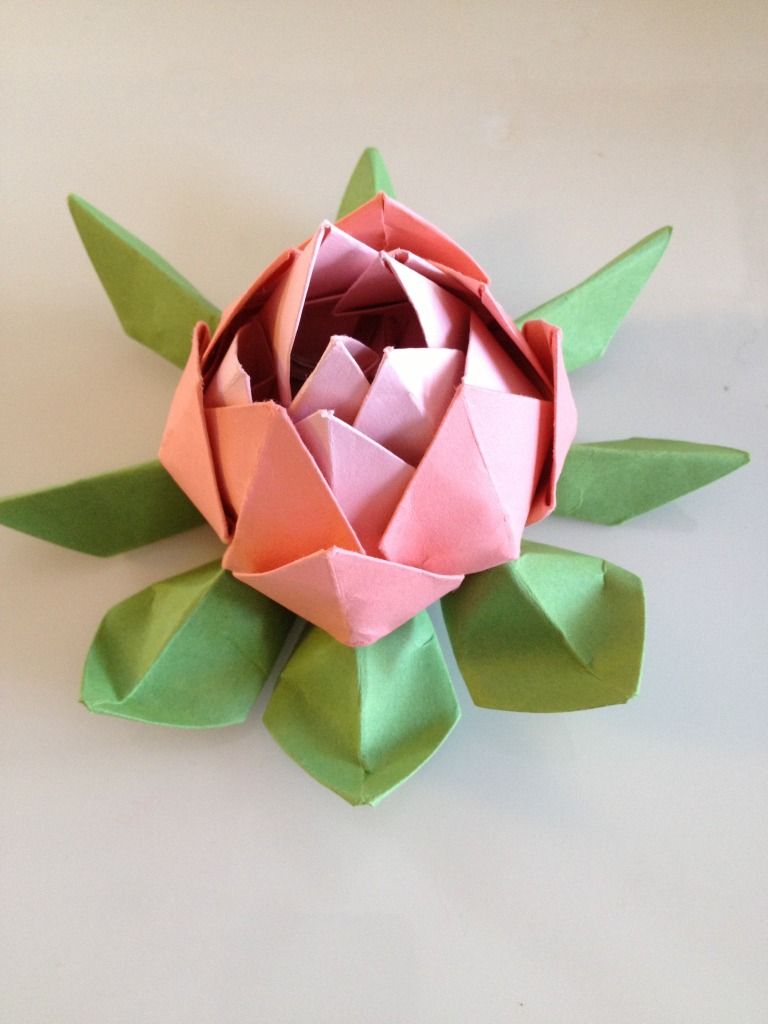
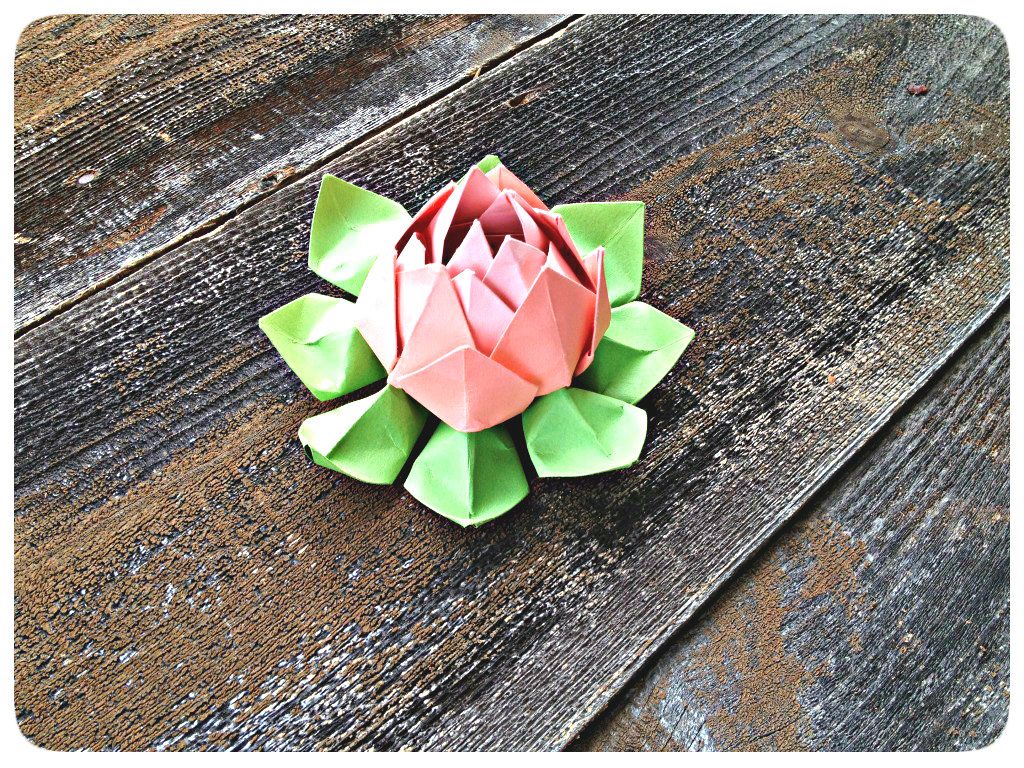
Beautiful right! And so easy. Your friends will think you are an origami master! I have my little Lotus flowers sitting around my house making my shelves more interesting and creating conversation. A great way to use one of these flowers would also include slipping a sweet little note right into the center of the pedals and gifting to a friend or loved one. Your welcome in advance :) 

Lets begin:

Materials you will need:
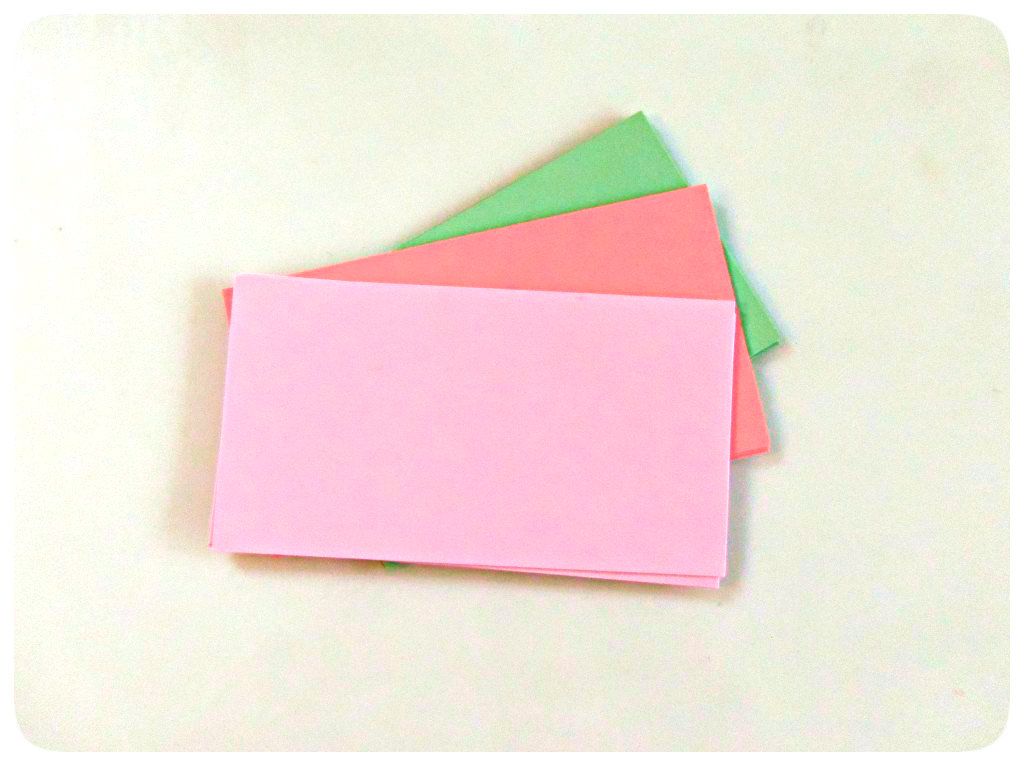
  • Origami paper (you can also use magazine paper, construction paper or scrapbooking paper, although with each paper comes a different paper weight and will either make it more difficult or easier to use)
  • A cutting board or scissors
  • Ruler
  • Rubber band or twisty tie
Once you decide on what color you would like your lotus flower petals to be, cut (8) 3x5.5-inch pieces of your paper in that color. You will also need (4) 3x5.5-inch pieces of green paper for your lotus flower leaves.
For both the petals and leafs, you will fold your paper in half . Be sure to run your nail or a sharp edge over all of your creases as you go. 
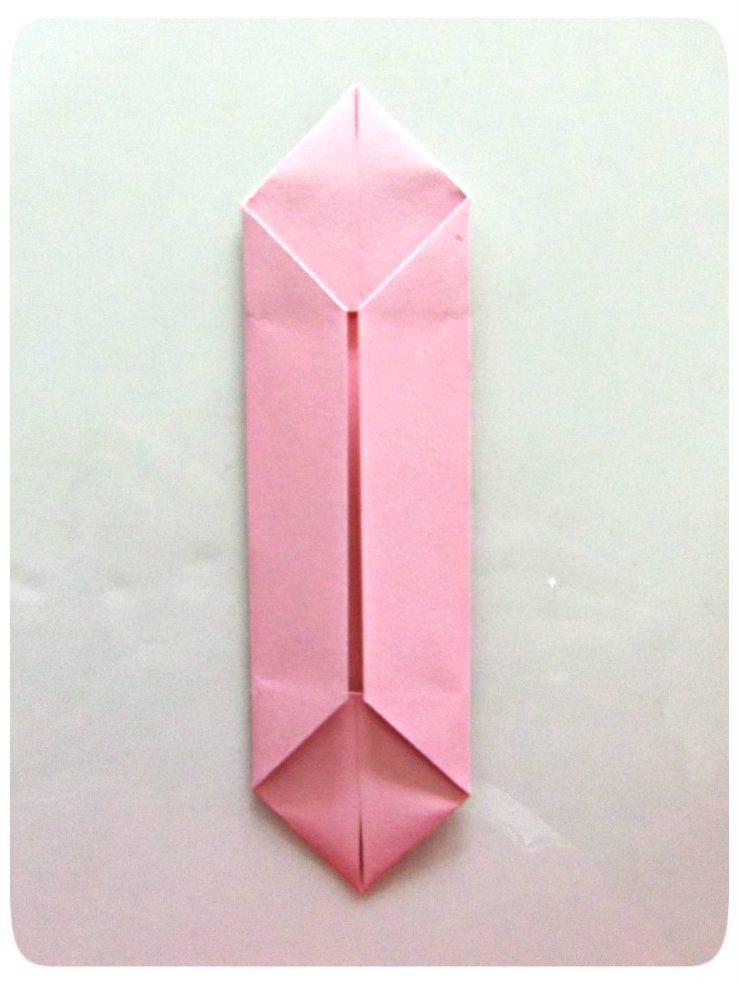
Next fold in each corner towards that center line.
Now fold in your straight edges toward that center line.
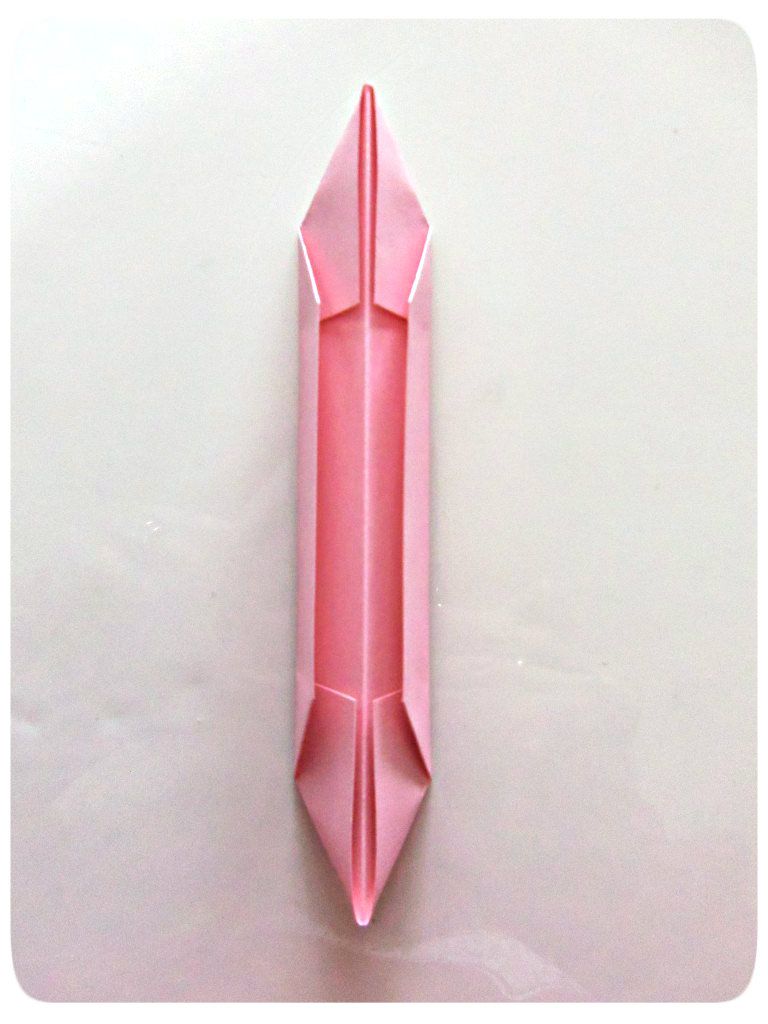
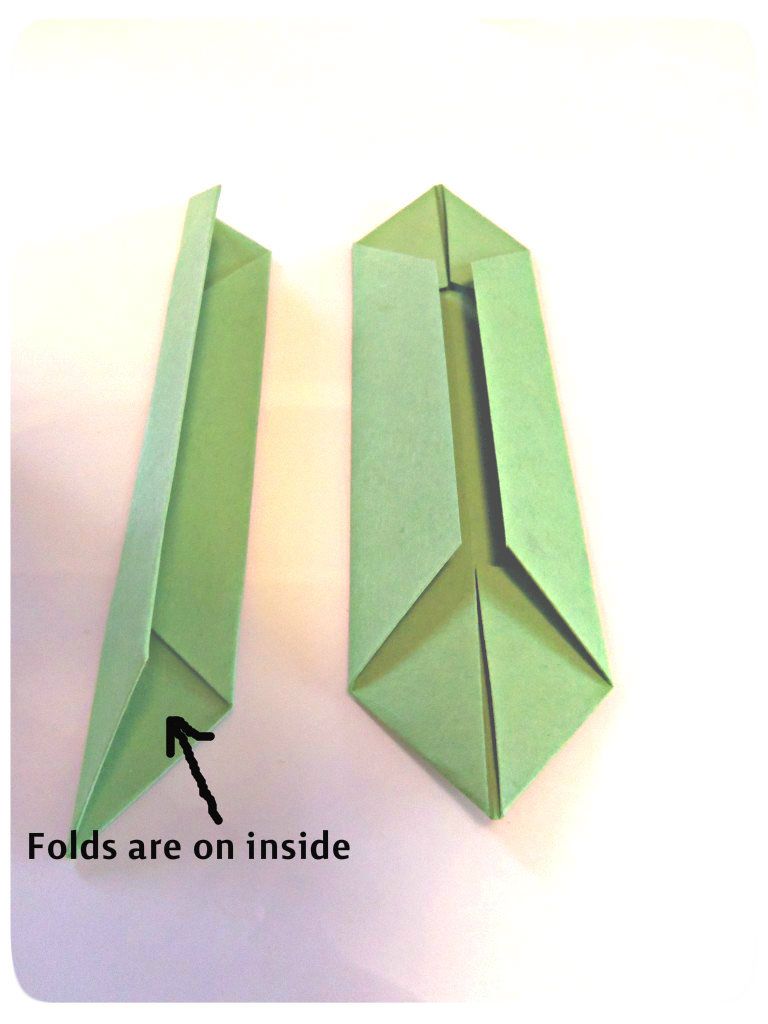
For the pieces of paper that are your petals you will fold your paper away from the center line. Now all of your folds are exposed
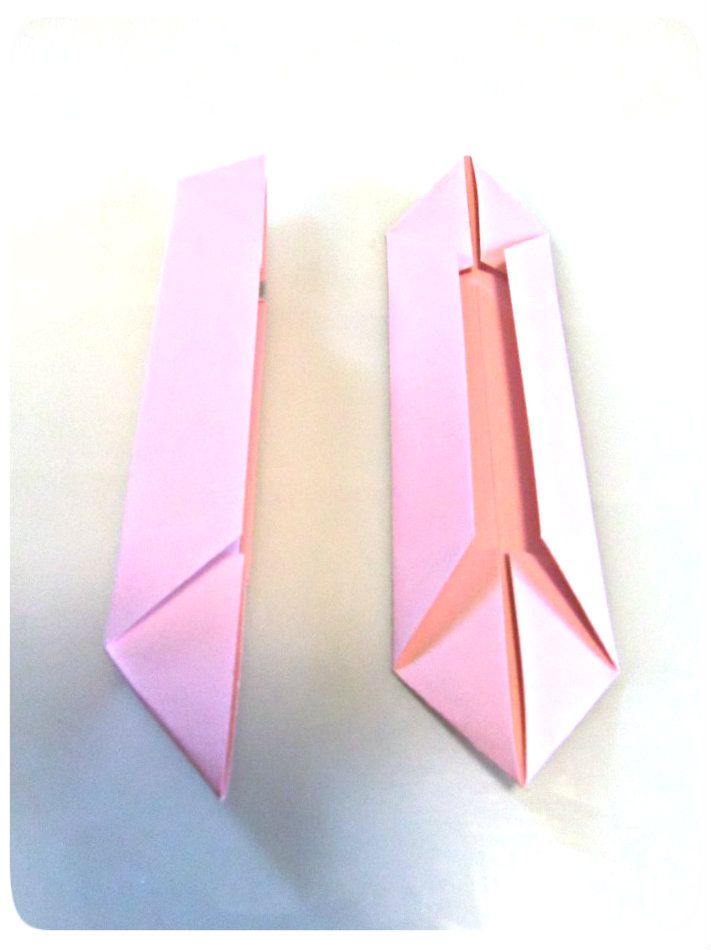
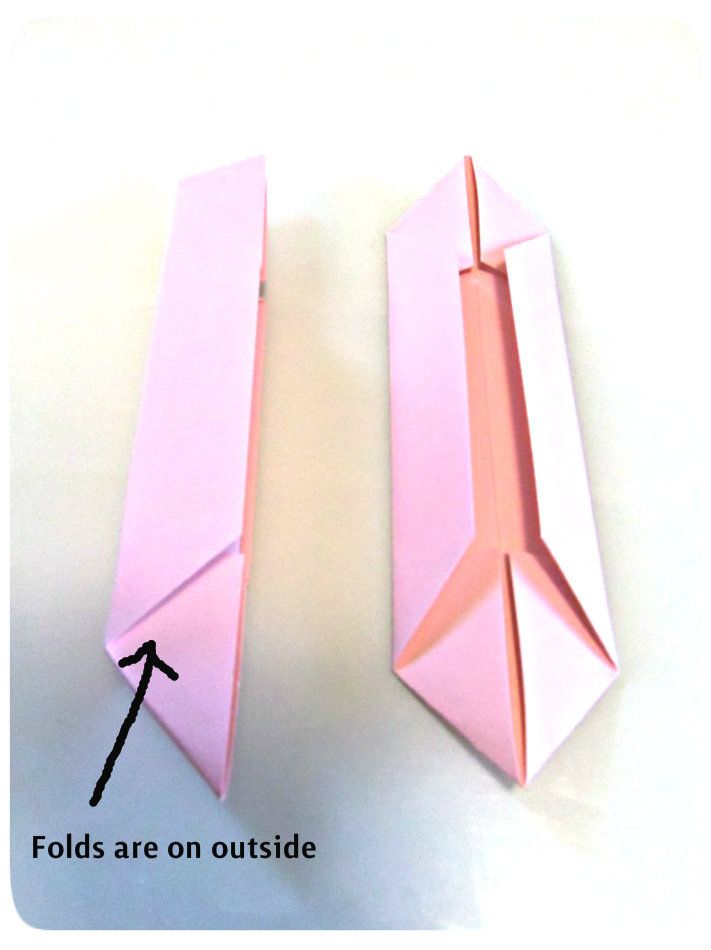
For the pieces of paper that are to be you leaves you will fold in your paper at the center line so that your folds are now hidden.
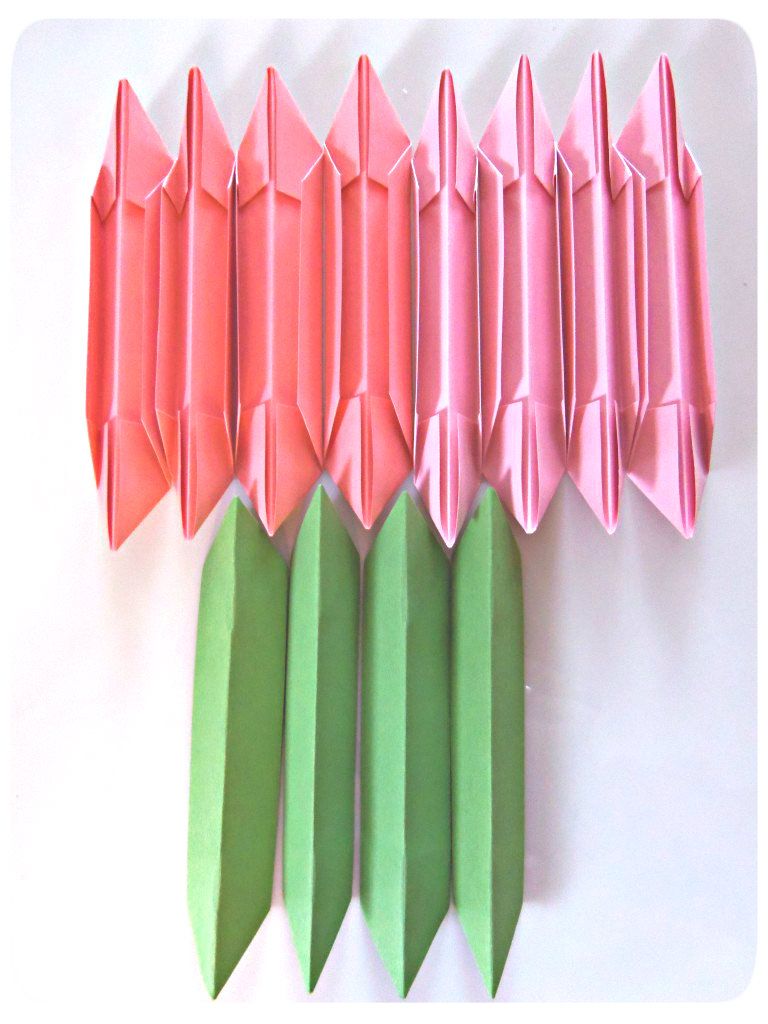
Finish folding all four of your leaves and all eight of your petals
Next make four stacks of three. Start by placing a petal paper over the top of one leaf paper, then place another petal paper over the top of the first petal; set aside. The petal paper will be stacked over the completely smooth side of the leaf paper like the picture above. At this point the first petal will have all of its folds exposed. The second petal will be stacked over the entire first petal with its folds now exposed. Make 3 more stack just like that.
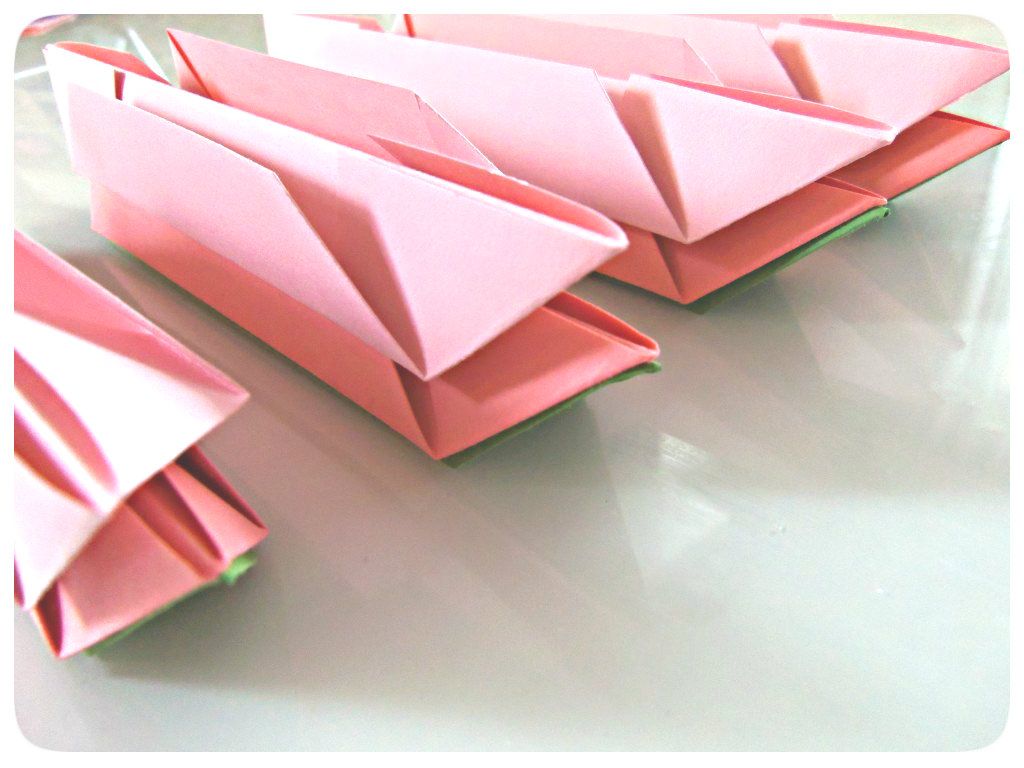
Now place each of your four stacks side by side in one grouping
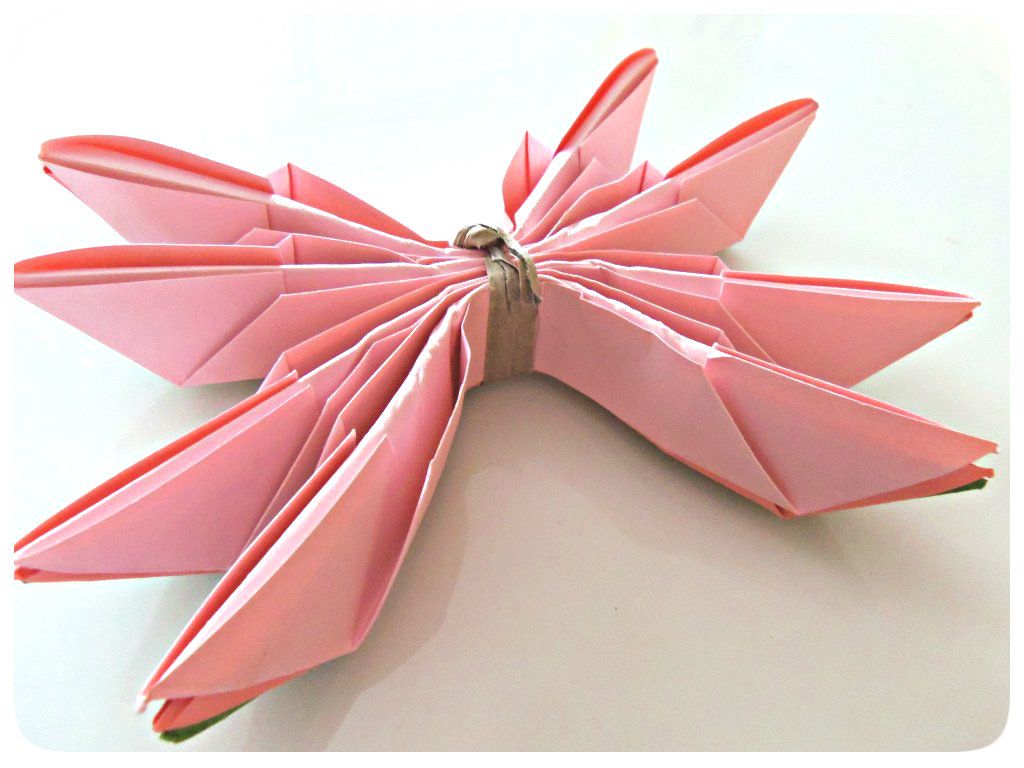
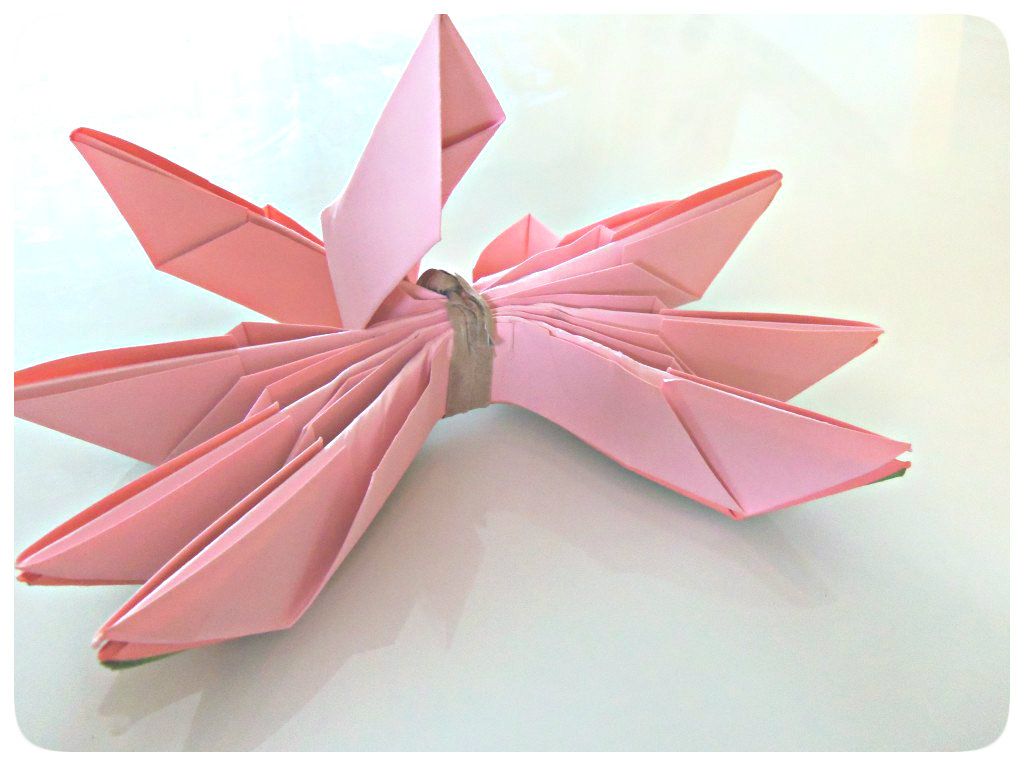
Secure the stack with a thin rubber band or twisty tie in the middle of the paper pieces and gently fan out the stacks of paper groupings
Now gently manipulate one of the petals forward toward the center where you have secured your paper.
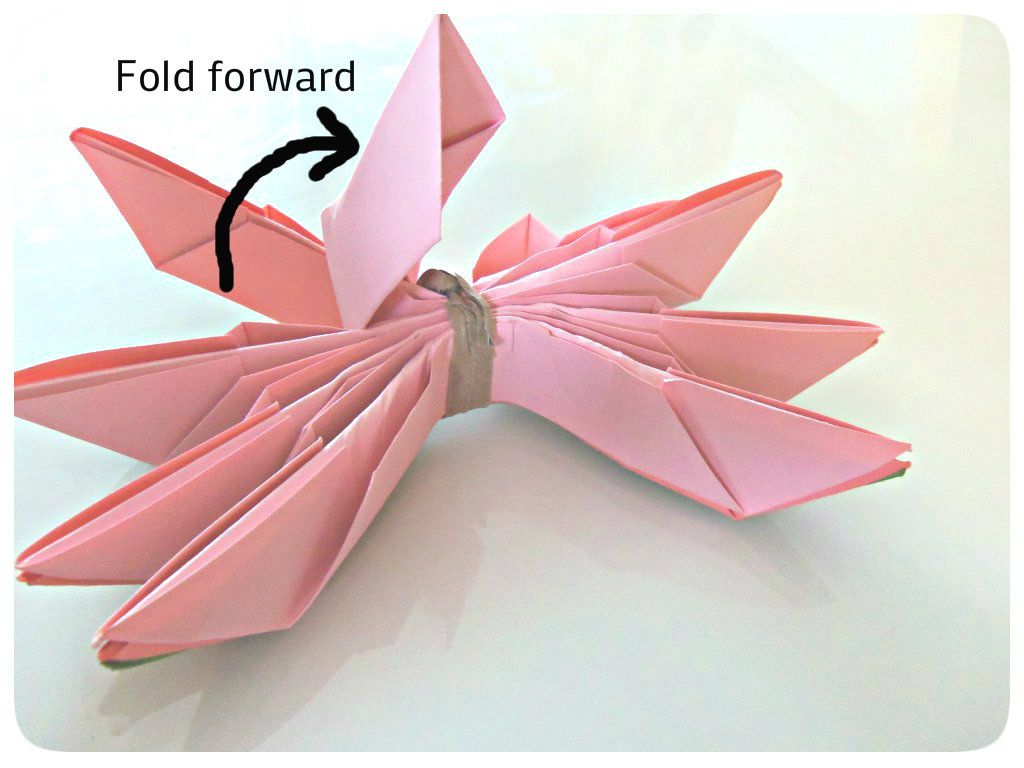
Now skip one grouping and fold another petal up, repeat all the way around until you reach your leaf paper, being sure to skip a petal every time.
Once you have completed your petals you are on the home stretch. Now gentle invert your leaves forward as shown in the photo below.
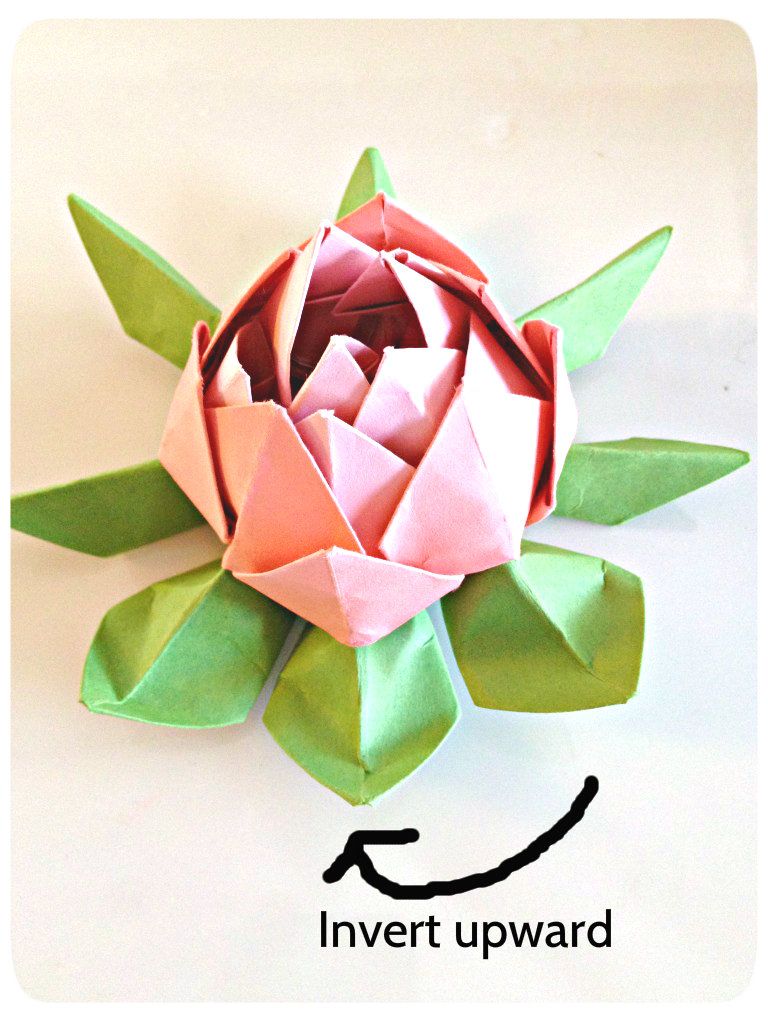
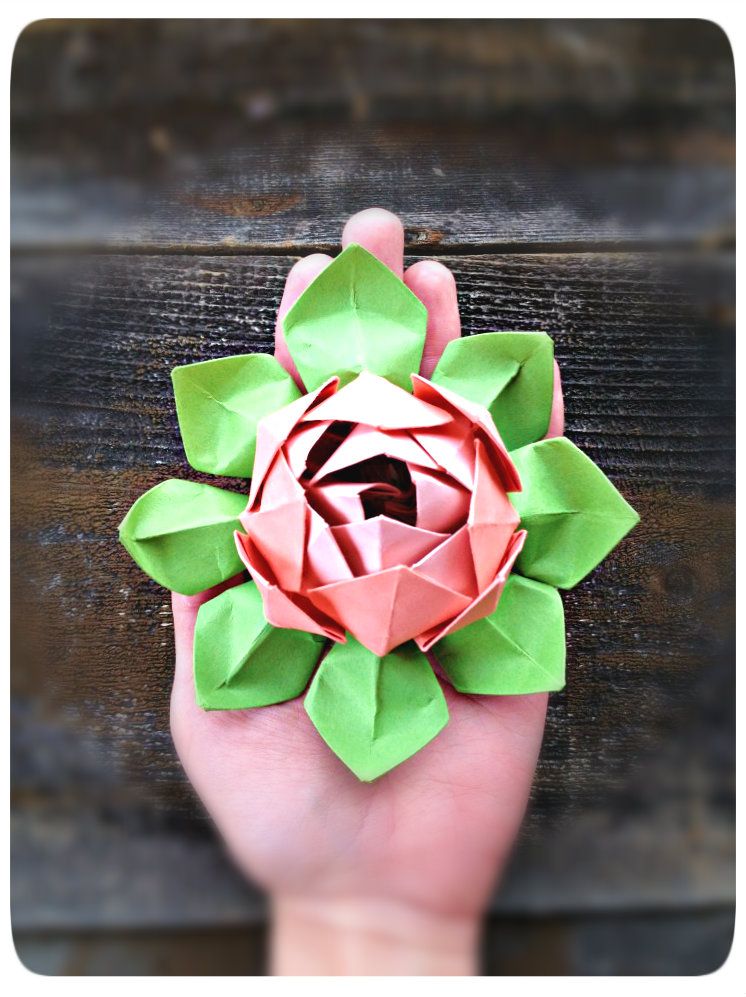
Continue with all of your petals and your masterpiece is complete!!!!
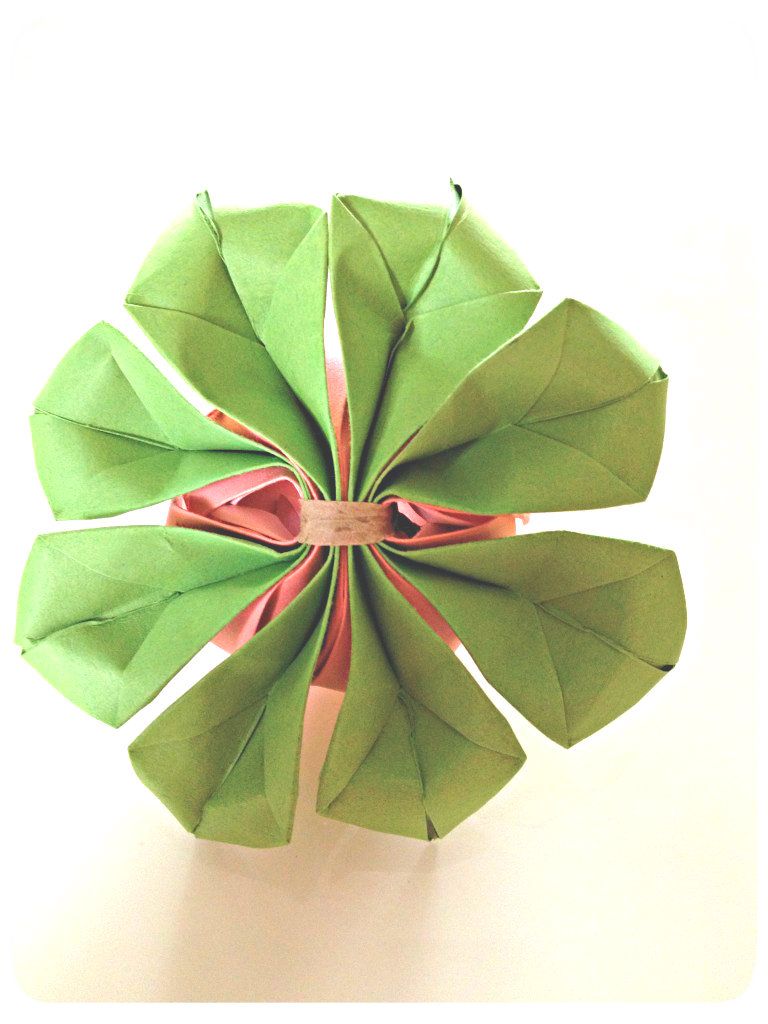
Here is what the underside will look like
And here is the finished product
Now its your turn!

Sunday, October 28, 2012

Brussels Sprouts with Lemon, Hazelnuts and Bacon


Oh how I love my little brussels sprout friends. So small, so round, so green! Can I confess a dirty little secret though....I have been spelling brussels sprouts as brussels sprouts...with out the extra s! Um should I have known this?!? When I say "Hey honey, we're having brussels sprouts for dinner tonight" I don't say brussels...that doesn't even sound right! And in my 32 years of  existence no one has ever corrected me. Well wait, one person might have....spell check. But every time I saw that squiggly line under the word brussels I knew that I had outsmarted spell check because there was no way I had spelled it wrong. News flash ...I spelled it wrong. Ces't La Vie, live and learn I guess! 

Well regardless of how you spell or have not spelled brussels, this dish is just plain yummy!  I mean come on, bacon and brussels sprouts are like long lost siblings. Then you throw in some toasted hazelnuts and a fresh lemon vinaigrette...ya, its a good thing. This is one of my go to recipes when having company over, and I'm thinkin its going to become one of yours as well!

Brussels Sprouts with Lemon, 
Hazelnuts and Bacon
Ingredients:
Vinaigrette-
zest of 1 lemon
2 Tbl lemon juice
2 Tbl brown sugar
1 Tbl olive oil
Salt and Pepper to taste

Brussels Sprouts-
6 slices apple smoked bacon
1 1/2 pound brussels sprouts, trimmed and shredded with a mandeline, by hand or in food processor
1/2 cup hazelnuts
salt and pepper to taste

Directions:
Start by whisking together your vinaigrette ingredients; set aside. Loosly chop your hazelnuts and place in a pan to roast until golden; set aside to cool. Cook your bacon in a large skillet until crisp. Crumble or cut your bacon into pieces and set aside. Remove all but about 3 Tbl of bacon grease from pan. Add your shredded brussels sprouts to pan and cook on medium high heat until tender, about 5-7 minutes. Combine brussels sprouts, bacon, nuts, and vinaigrette and season with salt and pepper to taste.


Wednesday, October 24, 2012

DIY Skeleton-Tee

So you all know that I have procrastinated  making Halloween costumes for my family for like 7 years now. And if you follow my blog you know that just last week, in a panic, I finally finished a quick and easy Halloween costume for my son. We have a church Halloween party coming up in less than a week and even though I don't have a legitimate costume for myself, I did want to show up with a bit of Halloween spirit. Having a 16 month old son would mean that my Halloween spirit would need to be sans costume make-up, any dangly jewelry or props and would need to be easy to chase a toddler in. Thanks to good ol' Martha I have found just the costume!! Her easy tutorial for a Skeleton-Tee can be found here, or just follow along.

Lets begin:

Materials you will need:
Print out the front and back rib cage templates. 
Trim the first page on solid line and match to dotted line on second page; tape together.
Pinch the front of your white or black t-shirt at center and pull forward, lining up the sleeves and side hem to create a fold down the center front of shirt. Lay your t-shirt down flat with the fold to the right.
Place the front rib cage template on folded front side of your t-shirt, lining up the vertical line on the template with the fold on your t-shirt. Tape the template in place.
Cut horizontal rib lines with your exacto knife or rotary blade cutter. Now cut the curved areas with your scissors. Using the rotary cutter was just a faster way to start the process but you could definitely do all of the cuts with just a small pair of sharp scissors.
Repeat the steps to create the ribs on the back of the t-shirt, using the back rib template and lining up the vertical line with the back fold.

If you are anything like me you will be dying to try on your skeleton-tee the second you remove the taped on templates. It felt like Christmas and the finished product was even better than I had anticipated. I cant wait to wear this to the Halloween party (I'll be sure to post some pics of  both E and myself in our costumes....now to find something for Ben to wear...eeek!)
Wear your black t-shirt over a white one or visa versa and you are set for a quick and playful Halloween costume.


Monday, October 22, 2012

Mexican Hot Chocolate Brownies


Now that the weather is cooling off its time to bring out the hot drink! I always look forward to Ben and my ritual of sipping on a hot cup of coco, Pero or Mexican hot chocolate before we wind down for bed. I was checking our cupboards this morning making sure we were adequately stocked when the perfect storm occurred. We were currently out of treats as of the previous night and as I was dreaming of warm gooey brownies my eyes met our container of Mexican hot chocolate. And that is how these brownies were born. It was my first time making them. I knew the idea sounded good but would it translate into an edible treat? Oh yes my friends its edible!...too edible if you ask me! These brownie are sinful, rich, gooey and have an amazing something that you can't quite put your finger on...hint: its the Mexican hot chocolate with notes of warm cinnamon. Yes, this will be my new go to brownie recipe. And now it can be yours too!
For this recipe I used Ibarra Mexican hot chocolate which can be found at most large Grocery stores as well as any Mexican market. There are plenty of other brands as well so feel free to experiment!

Mexican Hot Chocolate Brownies

Ingredients;
1 pound unsalted butter
2 cups plus 1/2 cups semi sweet chocolate chips
2 circles or 6 ounces Mexican Hot Chocolate
6 large eggs
2 Tbl vanilla extract
2 1/4 cups sugar
1 1/4 cups flour
1 Tbl baking powder
1 tsp salt
1 1/2 tsp cinnamon

Directions:
Preheat your oven to 350 degrees. Butter and flour a 12x9-inch baking pan. In a  pan over medium low heat melt together 2 cups of chocolate chips, 2 whole discs of Mexican hot chocolate and butter. Once completely melted, allow to cool. In a large bowl stir together eggs, vanilla and sugar. Stir in the warm chocolate mixture and allow to cool to room temperature.In a medium bowl sift together 1 cup flour, baking powder, salt and cinnamon. Add to cooled chocolate mixture. Toss 1 1/2 cups chocolate chips in 1/4 cup flour and add to chocolate batter. Place batter in prepared baking pan. Bake for 35-40 minutes; being sure not to over bake. I personally like my brownies a bit oooey goooey so I always pull them out a few minutes early when there is just a little remnant of brownie on the toothpick when inserted.  Allow to cool thoroughly before cutting. Enjoy with a large glass of milk!


GIVEAWAY!!!!

That's right folks, I said giveaway!!!! Don't miss out on a chance to win a beanie of your choice from my etsy shop. The adorable blog Momista Begingings was kind enough to feature a review of my beanie and a free giveaway. While you're there be sure to stay awhile and meander through some of Misty's  yummy recipes, fancy art projects, photos and random ramblings!

Enter at : Momista Beginings


Blogging tips