blankhomeaboutthe fammy faithwhats cookinget crafty

Sunday, March 31, 2013

Crepe Paper Flowers

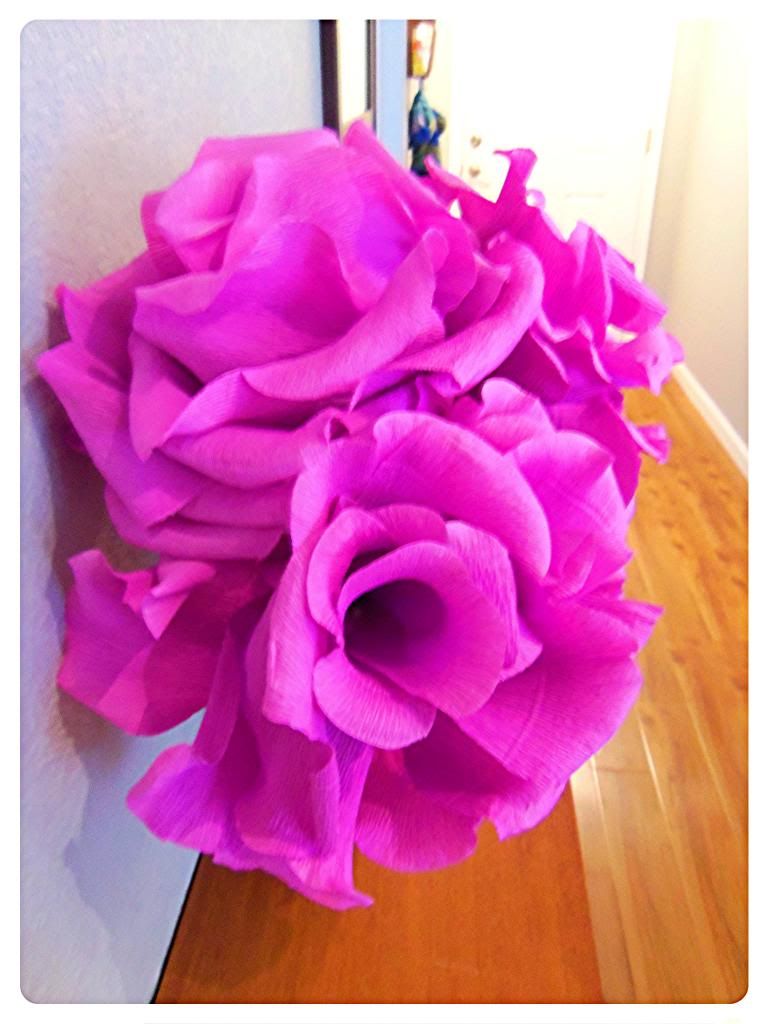
I thought I had dyed and gone to heaven when I watched a segment of the Martha Stewart show where a guest demonstrated how to make paper flowers. She demo'd small flowers but it was the large ones she had on display that took my breath away!!
I knew I had to make them as fast as I could get my hands on large enough sheets of crepe paper. There in lied the problem. I could not find crepe paper large enough anywhere! All I could find was small crepe paper streamers, that were in no way large enough for the size flower I had in mind. In fact I ended up purchasing a large roll of heavy duty crepe paper from papermart.com . They had a crazy amount of colors to choose from and was very reasonably priced. 
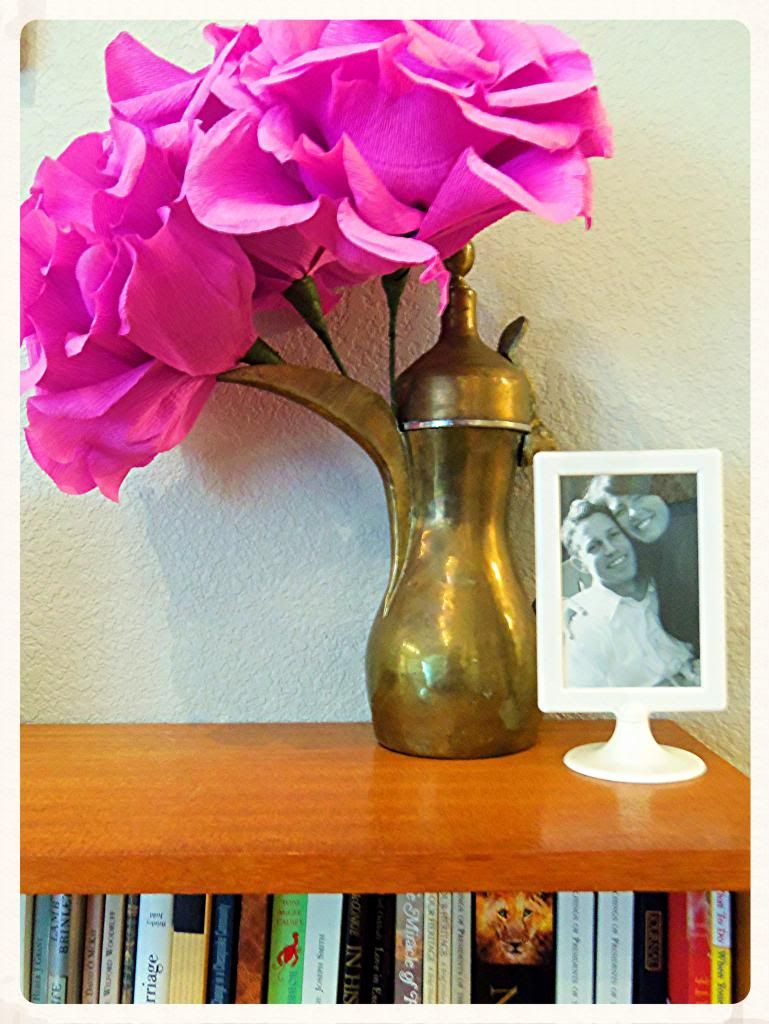
I stuck my flowers in an old antique iron pitcher, and I love them to pieces! If you are interested in the tutorial see this link on Martha Stewart's website. These flowers would be great made big or small, as center pieces or boutonnieres for a wedding! 

Wednesday, March 27, 2013

Milk Chocolate and Orange Cocoa

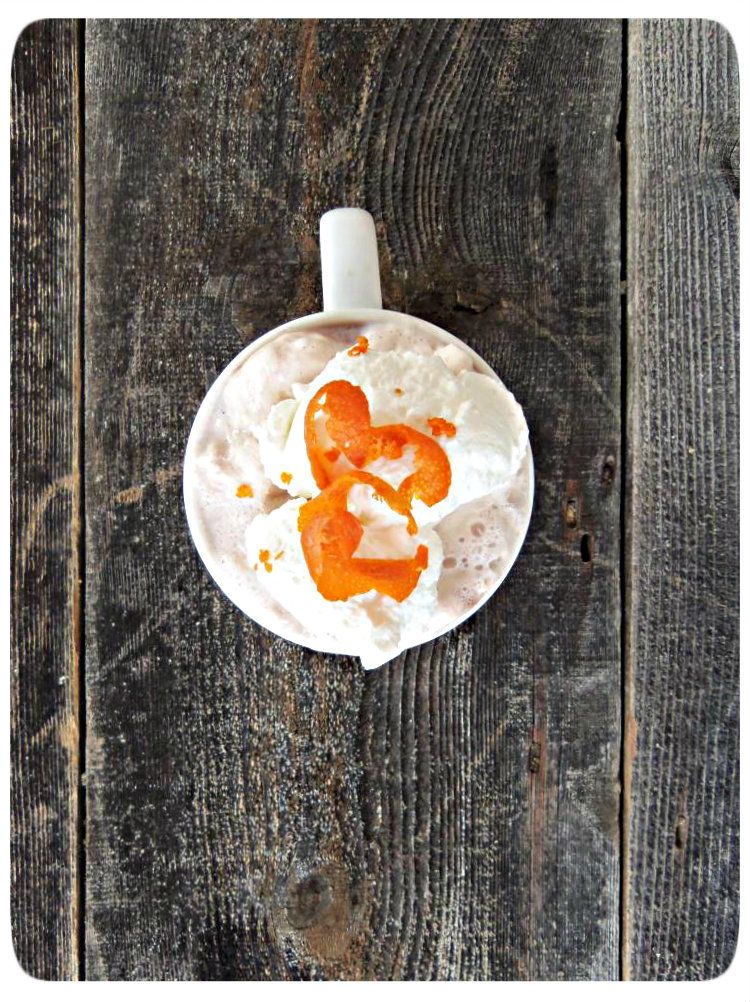
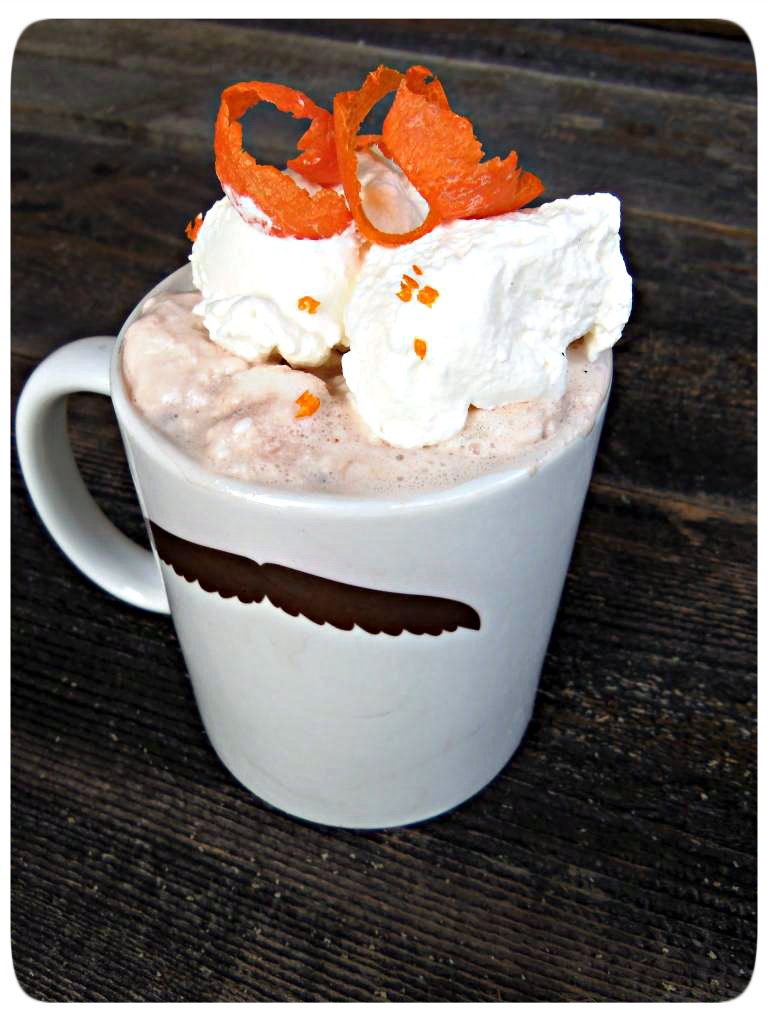
This Orange hot chocolate reminds me of the first time I was introduced to the Milk Chocolate Orange. I mean how cute is this! Each perfect little wedge of orange flavored chocolate...how can you resist!
I found that one of the only times I could really find the Chocolate Orange was at Christmas. Well, now I can have those same delicious flavors anytime I want with this recipe!
Milk Chocolate and Orange Cocoa

Ingredients:
1/3 cup whipping cream, chilled
1 teaspoon brown sugar
4 1/2 cups whole milk
zest from 4 large oranges
2 tablespoons unsweetened cocoa powder
9 oz milk chocolate, finely chopped

Directions:
Whip cream with brown sugar until stiff peaks form. Refrigerate. MIx milk with zest from oranges in a saucepan and heat to a simmer. Remove from heat. Cover and let stand for 30 minutes. Strain zest from the mixture and bring liquid to a simmer. Stir in cocoa powder and chocolate, whisking until smooth. Pour into mugs and top with whipped cream mixture.
Untitled_zpsf419afba

Sunday, March 24, 2013

Pomegranate Vinaigrette


I have really great memories of picking pomegranates with my family when I was just a little girl. We lived in the country and were surrounded by dairies, corn fields and fruit orchards. One wintery tradition we had was to set off over the creek in our back yard into a pomegranate orchard and load our pockets and maybe even a bucket with these little rubies. And now that I think of it, we may or may not have been stealing pomegranates. But I was just a little girl...I cant be blamed...right?!! For the sake of my fond childhood memory I am going to assume that my parents probably had an agreement with the neighbors to barter fruit or something of that nature :)

Moving on...my sister works at a garden now where there are a couple of pomegranate trees and I was lucky enough to be a recipient of some of her pomegranates. Ben and I could not eat them fast enough, so in order to use them up before they went bad I decided to make a pomegranate dressing which turns out to be a lovely change from my usual balsamic or orange based dressings!

Pomegranate Vinaigrette

Ingredients:
6 tablespoons pomegranate juice
4 tablespoons white wine vinegar
1 tablespoon honey
salt and pepper to taste
1/2 cup olive oil

Directions:
You are more than welcome to use pomegranate juice if you have any, but I opted to put my surplus of fresh pomegranates to use and juice them myself.

I started by cutting my pomegranate into small chunks and placing into a food processor. 

I blended until  I had a thick pulpy substance.

Then I strained my pulp and reserved the liquid for my dressing.

Once I had my pomegranate juice I combined it with my olive oil, honey, vinegar and salt and pepper. Be sure to mix well until the honey and salt are dissolved. Shake well before dressing your salad.

Wednesday, March 20, 2013

Photo Shoot

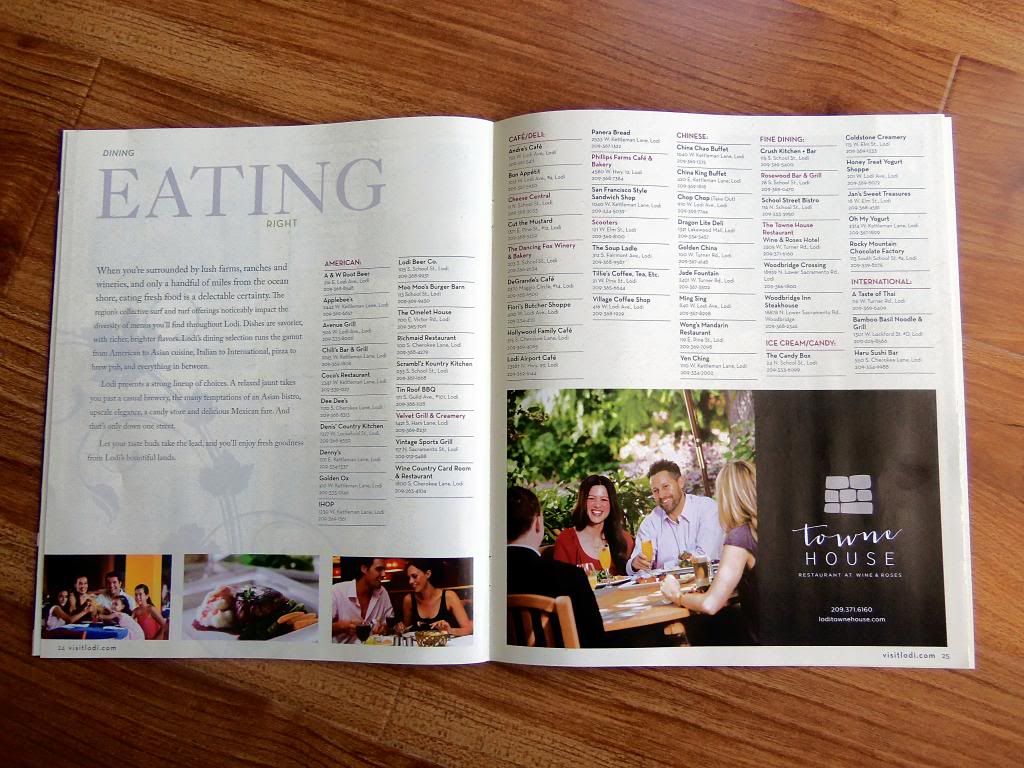
Early last year Ben and I were asked by a friend if we would be stand in's for some photos. She happens to be the graphic designer for a local restaurant/hotel/winery in Lodi, Wine and Roses, and was taking some new photos for the re-branding of their restaurant. We had never done anything like that before, it sounded like fun and we were going to get a free meal from a really nice restaurant out of it...so why not??! We sat at different tables in the restaurant with different meals placed in front of us and were asked to smile and look like we were having the time of our lives while our photos were being taken. It was a beautiful day and we had a lot of fun feeling like celebrities as the paparazzi took photos of us. After the day was over we really didn't think much about it. That is, until Ben got a phone call from a friend who had been looking through Lodi's Visitors Guide magazine and saw a photo of us advertising Wine and Roses Restaurant.

Hahaha, we had a good laugh and then went out and got ourselves the Visitors Guide magazine to see for ourselves!
It was true! There we were live and in color print! I wish I remember what the heck we were talking about because it looks like I was just told the most hilarious joke of all time, ugh. And yes those are mimosas in front of us and no that is not why I look like I'm having the time of my life...just props :)

Sunday, March 17, 2013

Broccoli & Brussel Sprout Salad with Mandarines, Raisins, Avocado and Sun Flower Seeds


You could say that growing up my family was vegetarian...almost.  We did eat meat and fish but very very sparingly. Consequently, in a wonderful way, I was exposed to a lot of different and incredible fruit and vegetables. I can remember my mother serving amazing salads and vegetable casseroles. In fact when asked what my favorite meal was as a young girl, I always said "My mothers eggplant casserole". You can imagine this taking more than a few people by surprise to hear that a preteens favorite meal to eat was eggplant. But it was true.

I used to marvel at how many different salad recipes my mother could come up with and how each one tasted so unique and delicious. So this is an homage to my mothers salads. I have taken a few of her combos and combined them with a few of mine.

Broccoli & Brussels Spout Salad with Mandarines, Raisins, Avocado and Sunflower Seeds

Ingredients:
1-1 1/2 large broccoli heads, cut into very small pieces
1 pound brussels sprouts
1 small can mandarine oranges
1/4 cup sunflower seeds
1/2 cup raisins
1 avocado, chopped

Directions:
Start by cutting your broccoli and brussels sprouts into very small pieces. At this point feel free to use a mandolin to slice your brussels sprouts. Combine in a bowl.

Slice your avocado into pieces and add to bowl, along with sunflower seeds, raisins and drained mandarines.

Dress with salad dressing and enjoy!

Wednesday, March 13, 2013

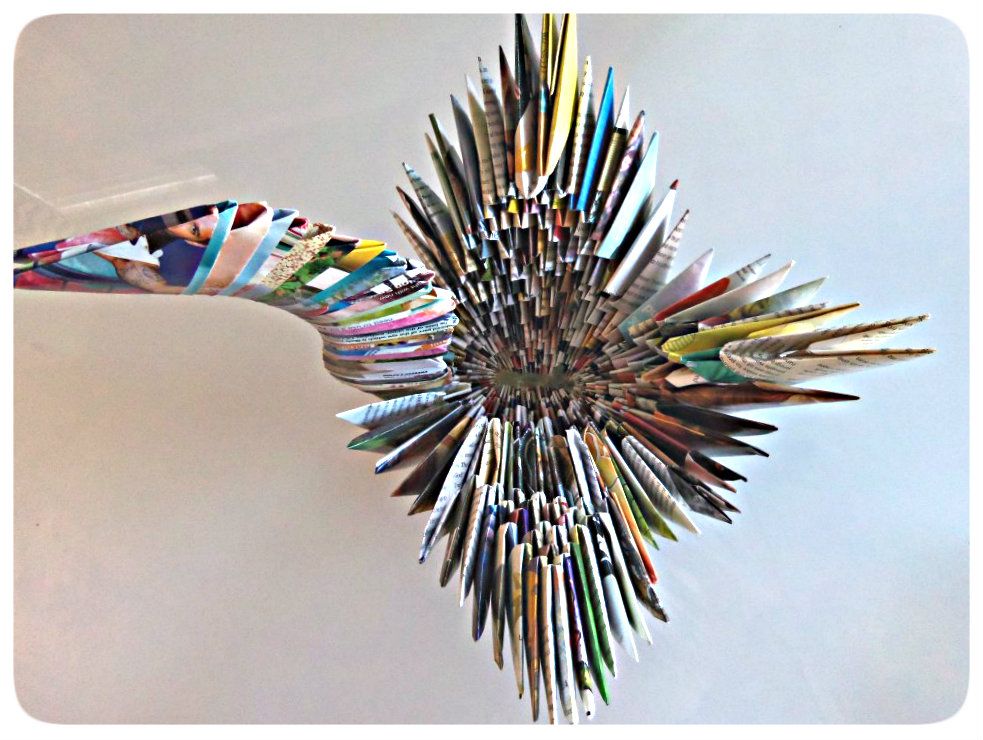
3-D Origami Swan

I've been obsessed with origami lately, especially when there are so many great tutorials on YouTube where you can actually watch and fold paper with a real person, its fool proof! I stumbled across a photo of a 3-D origami swan on the internet and knew that I HAD to make it. First of all I am so impressed with the creativity oozing out of so many people and I am so thankful that they are willing to share their creativity with me!
The great thing about this tutorial is that it is one simple fold for every piece of paper that you see on the swan. Once you have all of your paper folded then you can simply start to connect them all to create your swan. The size of paper you use will obviously determine the size of your swan. I have seen little baby swans made and have also seen life size paper 3-D origami swans that will either blow your mind or scare you.
This first tutorial will show you how to make the base triangle fold that will compromise your entire swan: HERE
The second tutorial will show you how to start connecting them: HERE
Good luck!

Sunday, March 10, 2013

"The Most Amazing French Lemon Cream Tart"


Need I say more....really. Doesn't the title give it away?! "The Most Amazing French Lemon Cream Tart" I kid you not, this is the actual name of the recipe found in Dorie Greenspan's  baking book, Baking: From My Home to Yours.

Between our lemon tree and overflow from friends trees I knew there was only one thing I wanted to make: The Most Amazing French Lemon Cream Tart. It is exactly that people! I make it a dozen times every year. I have made it in a large tart pan, in little tart pans and even in ever so small fancy mini tins that I picked up at a thrift shop. The french cream would also be great used as a filling in french macaroons or as a dip with fruit or baked pie pieces. In fact I might just make another batch of cream just to try those options :) Bottom line, it's AMAZING, its tart and its a staple in our household. One disclaimer if I may...making the cream is no small task. It is going to take some serious uninterrupted time and patience, but at first bite you will be handsomely rewarded!

The Most Amazing French Lemon Cream Tart
From Dorie Greenspan's Baking Book- Baking: From my Home to Yours

Ingredients:
Lemon Cream-
1 9-inch tart shell, I have also used an 11-inch and it worked just fine
1 cup sugar
finely grated zest of 3 lemons
4 large eggs
1/2 cup fresh lemon juice
2 sticks plus 5 tablespoons unsalted butter, cut into tablespoon-size pieces, at room temperature

Sweet Tart Dough-
1-1/2 cups all-purpose flour
1/2 cup confectioners' sugar
1/4 teaspoon salt
1 stick plus 1 tablespoon very cold unsalted butter, cut into small pieces
1 large egg yolk

Directions:
Lemon Cream-
Have an instant-read thermometer, a strainer and a blender or food processor at hand. Bring a few inches of water to a simmer in a saucepan.

Put the sugar and zest in a large heatproof bowl that can be set over the pan of simmering water. Off of the heat rub the sugar and zest together between your fingers until the sugar is moist, grainy and very aromatic. Whisk in the eggs, followed by the lemon juice.

Set the bowl over the pan and start stirring with the whisk as soon as the mixture feels tepid to the touch. Cook the lemon cream until it reaches 180 degrees F. As you whisk-you must whisk constantly to keep the eggs from scrambling- you'll see that the cream will start out light and foamy, then bubbles will get bigger, and then, as it gets closer to 180 degrees F, it will start to thicken and the whisk will leave tracks. Heads up at this point-the tracks mean the cream is almost ready. Don't stop whisking or checking the temperature, and have patience-depending on how much heat you're giving the cream, getting to temp can take as long as 10 minutes.

As soon as it reaches 180 degrees F, remove the cream from the heat and strain it into the container of the blender (or food processor); discard the zest. Let the cream stand, stirring occasionally, until it cools to 140 degrees F, about 10 minutes.

Turn the blender to high (or turn on the processor) and, with the machine going, add the butter about 5 pieces at a time. Scrape down the sides of the container as needed as you incorporate the butter. Once the butter is in, keep the machine going- to get the perfect light, airy texture of lemon cream dreams, you must continue to blend the cream for another 3 minutes. If your machine protests and gets a bit too hot, work in 1 minute intervals, giving the machine a little rest between beats.

Pour the cream into a container, press a piece of plastic wrap against the surface to create an airtight seal and refrigerate for at least 4 hours or overnight. (The cream will keep in the fridge for 4 days and, or tightly sealed, in the freezer for up to 2 months; thaw it overnight in the refrigerator.)

When you are ready to assemble the tart, just whisk the cream to loosen it and spoon it into the tart shell. Serve the tart or refrigerate until needed.

Sweet Tart Dough-
Put the flour, confectioners' sugar and salt in a food processor and pulse a couple of times to combine. Scatter the pieces of butter over the dry ingredients and pulse until the butter is coarsely cut in-you should have some pieces the size of oatmeal flakes and some the size of peas. Stir the yolk, just to break it up, and add it a little at a time, pulsing after each addition. When the egg is in, process in long pulses-about 10 seconds each-until the dough, which will look granular soon after the egg is added, forms clumps and curds. Just before you reach this stage, the sound of the machine working the dough will change-heads up. Turn the dough out onto a work surface and, very lightly and sparingly, knead the dough just to incorporate any dry ingredients that might have escaped mixing.

To press the dough into the pan: Butter a 9-inch fluted tart pan with a removable bottom. Press the dough evenly over the bottom and up the sides of the pan, using all but one little piece of dough, which you should save in the refrigerator to patch any cracks after the crust is baked. Don't be too heavy handed-press the crust in so that the edges of the pieces cling to one another, but not so hard that the crust loses its crumbly texture. Freeze the crust for at least 30 minutes, preferably longer, before baking.Well wrapped the dough can be kept in the refrigerator for up to 5 days or frozen for up to 2 months.

To bake the crust, preheat your oven to 375 degrees F. Butter the shiny side of a piece of aluminum foil and fit the foil butter side down, tightly against the crust. (Since you froze the crust you can bake it without weights.) Put the tart pan on a baking sheet and bake the crust for 25 minutes. Carefully remove the foil. If the crust has puffed, press it down gently with the back of a spoon. Bake the crust for an additional 8 minutes or so, or until it is firm and golden brown. Make sure to keep an eye on the crust's progress-it can go from golden to way too dark in a flash. Transfer tart pan to a rack and cool the crust to room temperature before filling.

When tart is cooled to room temperature you can now fill it with your lemon cream and enjoy the Most Amazing French Lemon Cream Tart that you will ever have!!

Wednesday, March 6, 2013

Oakland Zoo

In our 8 years of marriage I have come to realize that for having lived in California for more than 21 years, Ben has not seen very many attractions. So we have decided to do a bunch of little excursions every few weeks and knock some "to do's" off our list. The first being the Oakland Zoo. Of course this trip was as much for Easton as it was for anyone. He is a HUGE animal fanatic and we both knew this zoo would blow his little mind! Indeed it did!

We started our tour with the bear enclosure...and yes, hindsight tells me that it probably wasn't a great idea having my son dangle over a wild animal enclosure, even if his dad was right behind him.
Easton looooves giraffes, so we were super excited to see so many of them! Yes, I know, again dangling over the enclosure :(
I thought I would bust a gut watching this little giraffe try and take a drink from his watering hole. I'm guessing that since their legs are shorter than their necks that spreading their legs provides the balance needed to preform a simple act like drinking water. It was still so cute!
When we reached the meerkat enclosure we found what we thought was a dead meerkat and were about to alert a zoo staff member....
that is until Ben decided to preform a little experiment. He yelled really loud and woke the poor little guy up. Almost scared him to death. And then he curled back up and went right back to sleep!!
And of course we couldn't leave without visiting the elephants. One of my favorite books I have read is Modac, and ever since having read it I have been mildly obsessed with them, so this was as exciting for me as it was for Easton.
Normally I leave zoos feeling very sad for the animals cooped up in tiny cages looking so sad and depressed pacing back and forth. But this time was definitely an exception. The enclosures were some of the biggest I have ever seen. In fact some were so big that we could not even find the animals, for example the lions and tigers.It was fabulous! And the grounds were gorgeous. Half the time you would have thought you were walking in the wild with all of the animals. All in all it was a perfect day!

Sunday, March 3, 2013

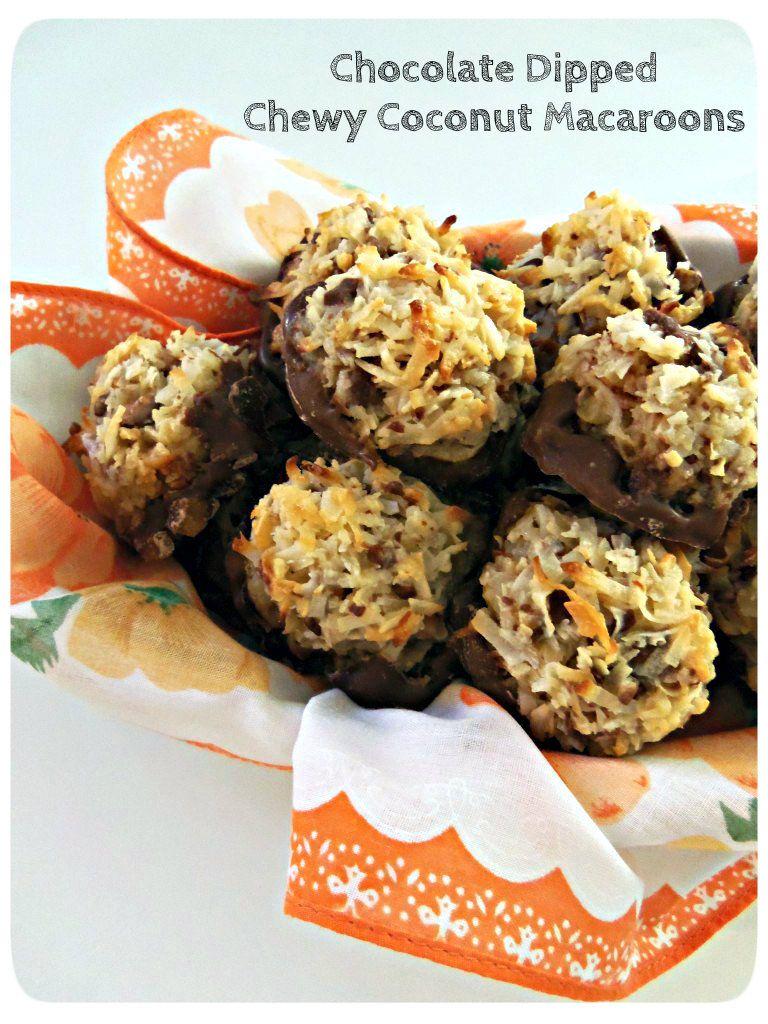
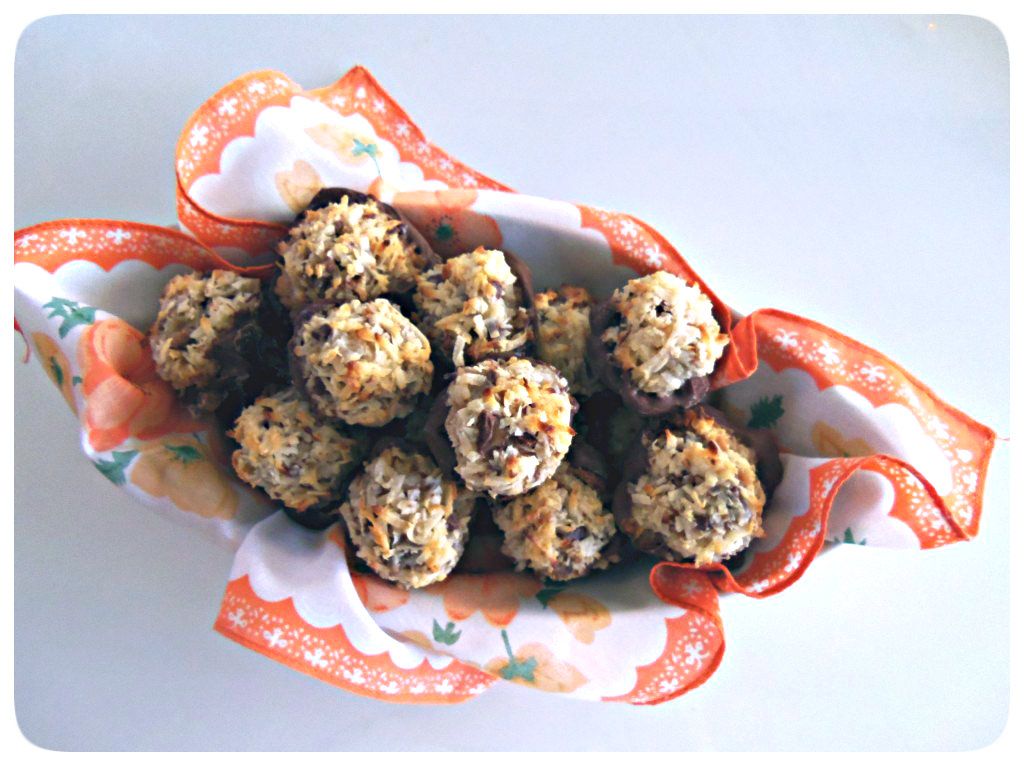
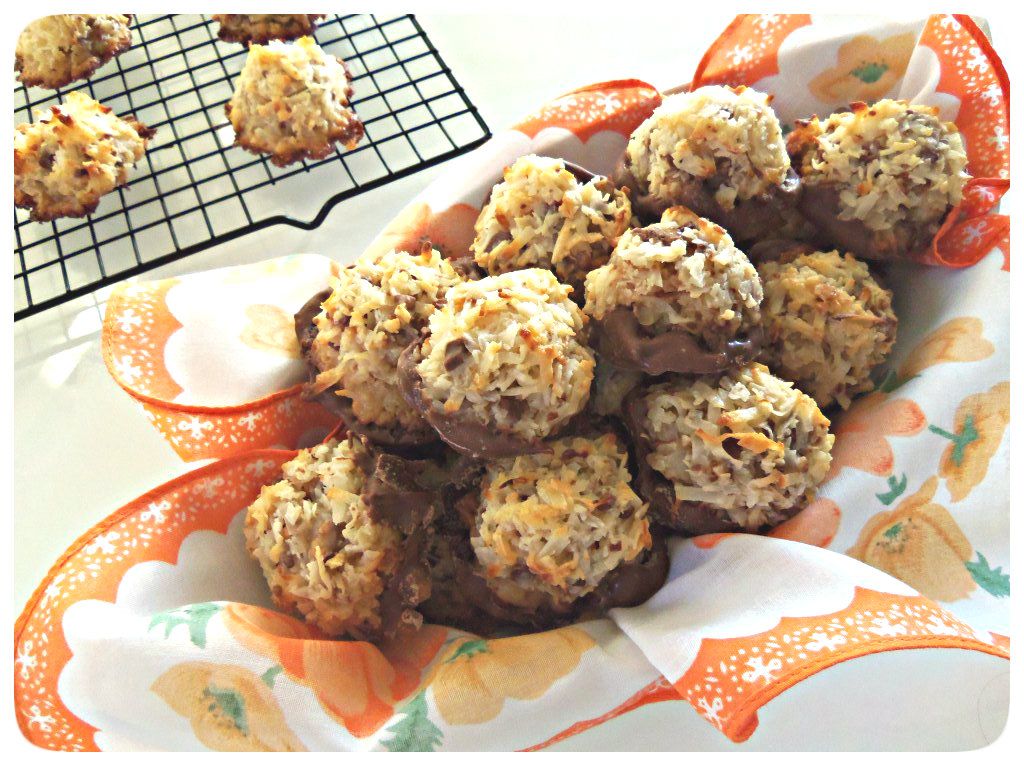
Chewy Coconut Toffe Macaroons Dipped in Chocolate

Macaroons macaroons, oh how I thought I knew all there was to know about macaroons...I was wrong. I had no idea that almost every culture has a variation of a macaroon; from Irish to Turkish, it seems people have been making macaroons for centuries. Up until 7 years ago the only kind of macaroon I had ever tried was a dry crispy coconut macaroon. I wasn't so amazed with my experience and haven't tried another since.
It wasn't until Ben and I were first married that we took a drive to the weekly farmers market in San Francisco at the Fairy Building. And it was there that I tried one of Miette's famous French Macaroons.
 It didn't look anything like what I thought a macaroon was nor was I thrilled to notice that one macaroon was $2.25. I'm talkin a one inch round cookie with a filling! After I got over the sticker price I decided that I could spare $2.25 to see what all the hub bub was about.  Needless to say I returned to the storefront moments later and used up a 20 spot to buy 8 more French macaroons. Yes, they were that good and I have scoured every city we have lived in since trying to find a bakery that sells these little bites of heaven.
Earlier this year we were visiting Hawaii and stopped by a local flea market that was said to have a booth that sold the most amazing coconut macaroons. I was very, very, very skeptical. Especially since my last encounter with a coconut macaroon was not enjoyable and even more so because I had made my mind up that a french macaroon was the only kind of macaroon I ever wanted to eat again.
We approached the booth and I was shocked to see the varieties of flavors listed. Instantly I was drawn to the salted toffee macaroon and with some persuading I bought a bag. To my surprise the coconut macaroons were crazy soft and chewy and the touch of crunchy toffee and addition of salt threw it over the edge. I was totally taken aback! How could this be?!? To be sure I really did like it I had to taste test a few more and yes, they really were delicious. So much so that I decided I would try and recreate my own recipe when I got back. And I did! And this time I dipped my macaroons in chocolate!! Sinful, I know!!
Chewy Coconut Toffee Macaroons Dipped in Chocolate

Ingredients:
1 large egg white
1 bag (14 ounces) sweetened shredded coconut
14 ounces sweetened condensed milk
1 bag heath bits
1 teaspoon pure vanilla extract
1 pinch of salt
1 bag milk chocolate chips, for melting and dipping macaroons 

Directions:
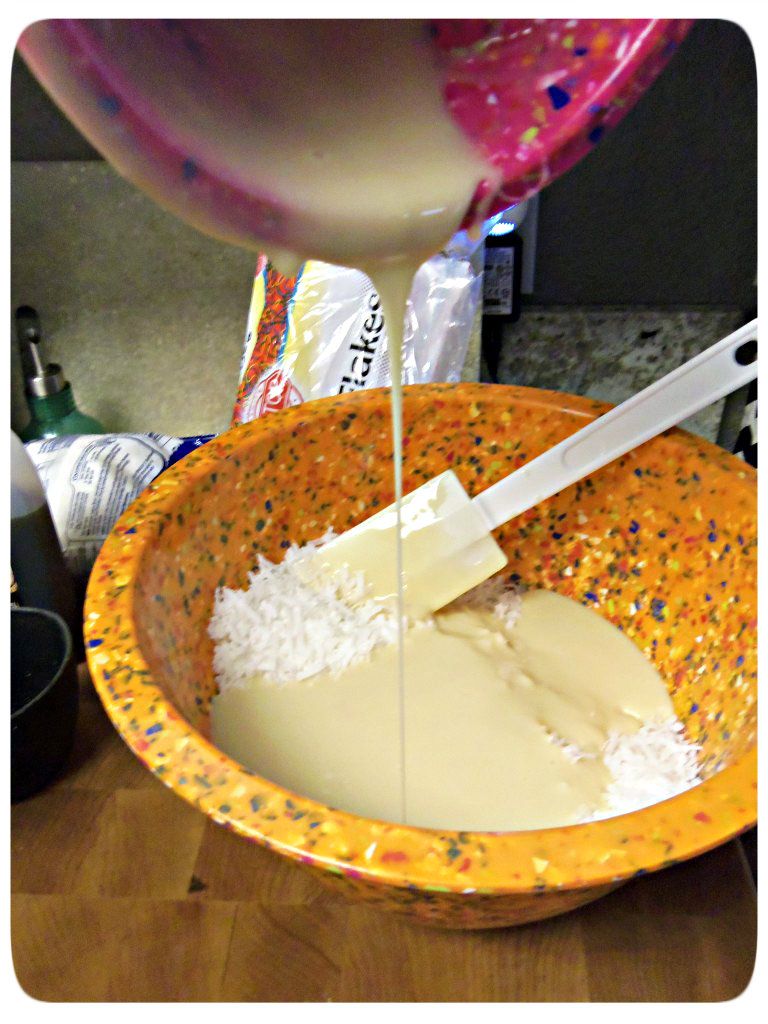
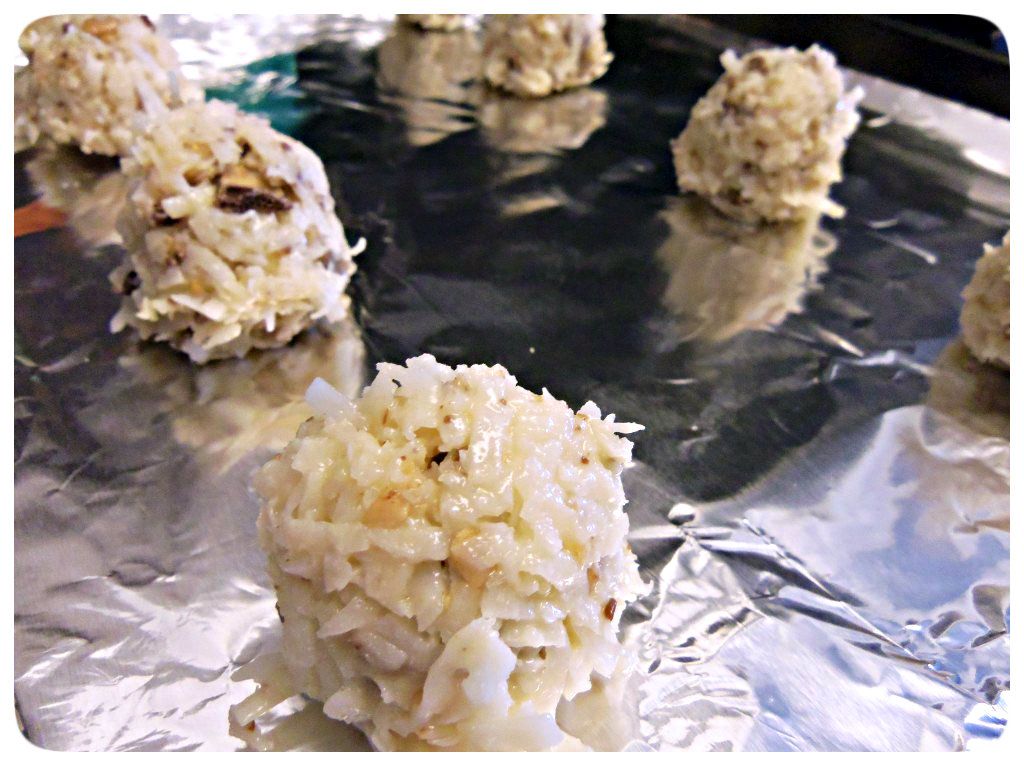
Preheat oven to 325 degrees. Line your baking sheet with parchment paper or foil and set aside. In a bowl combine coconut, sweetened condensed milk, heath bits, salt, vanilla and egg white. Fold mixture together until combined.
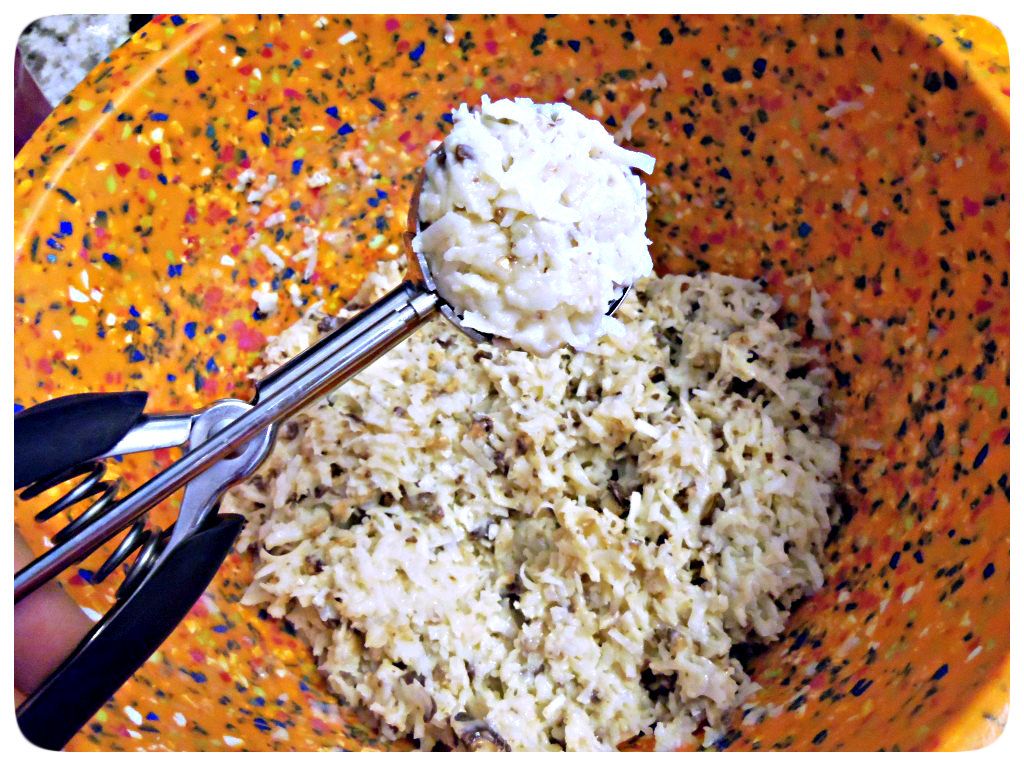
I used a small ice cream scooper to drop large tablespoon size mounds onto my cookie sheet about 1 inch apart.
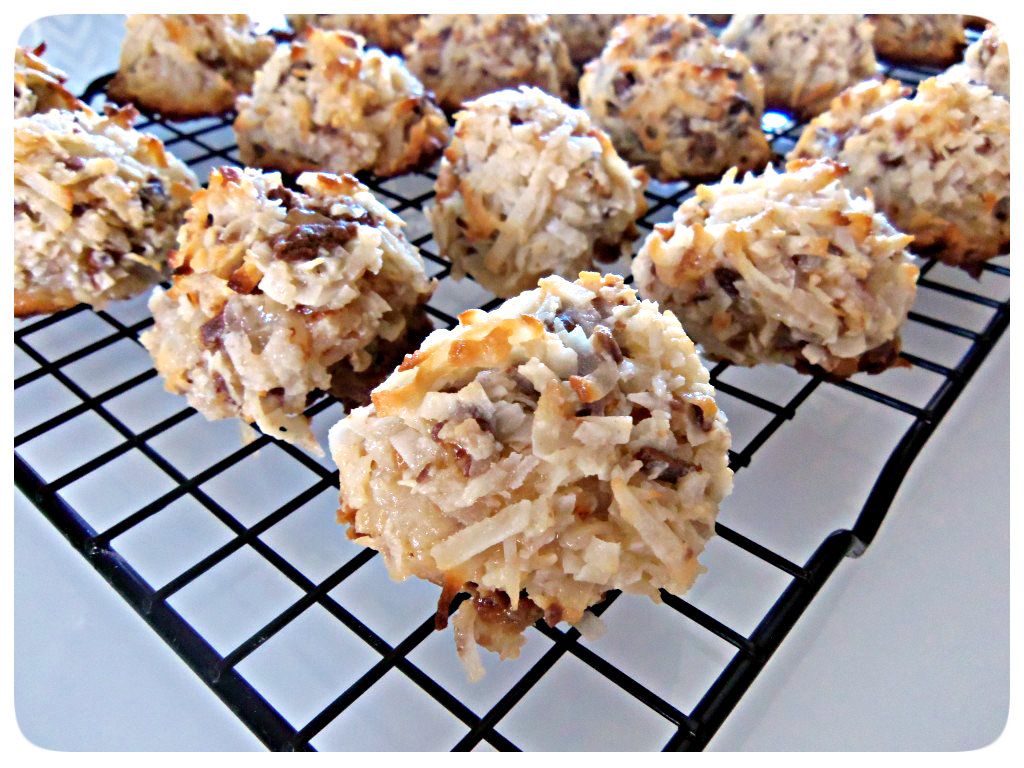
Cook until golden brown, about 15-20 minutes. Let cool. Once cooled I dipped the bottoms of all of my macaroons into melted milk chocolate for a little over the edge decadence!

Blogging tips