


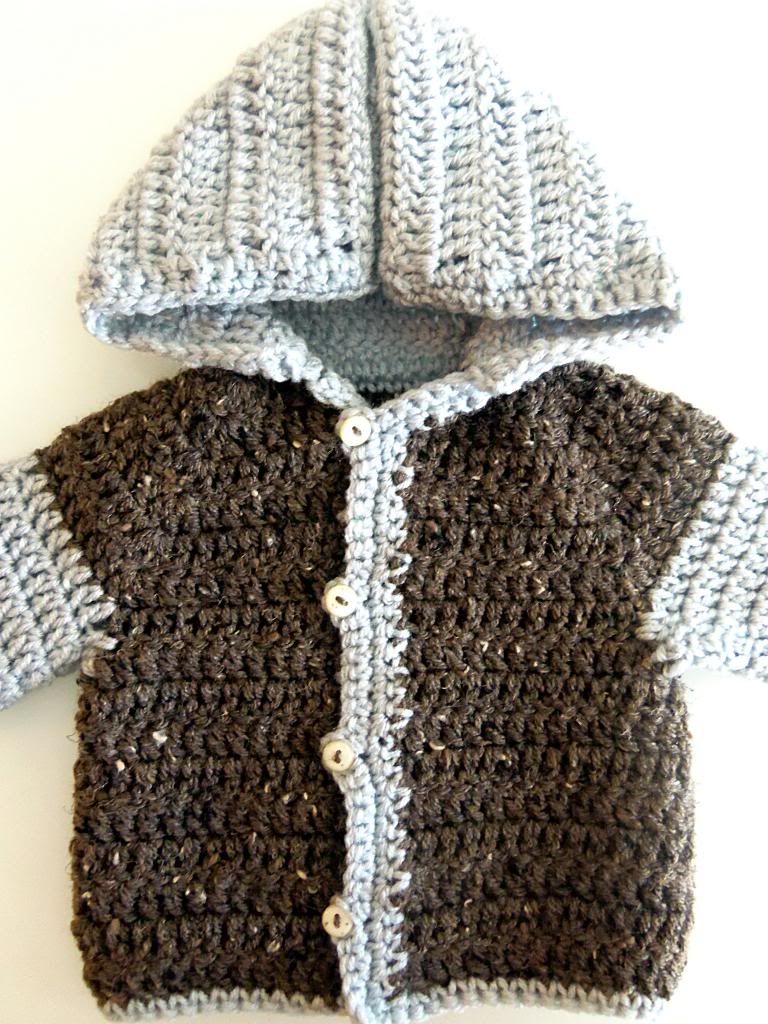
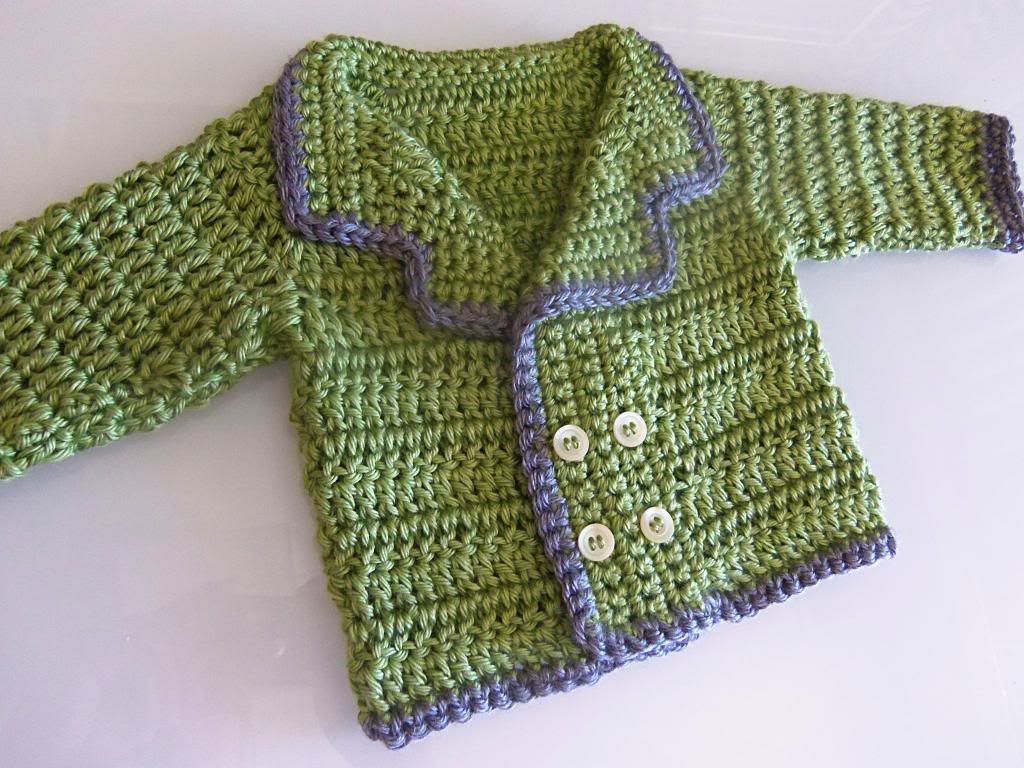
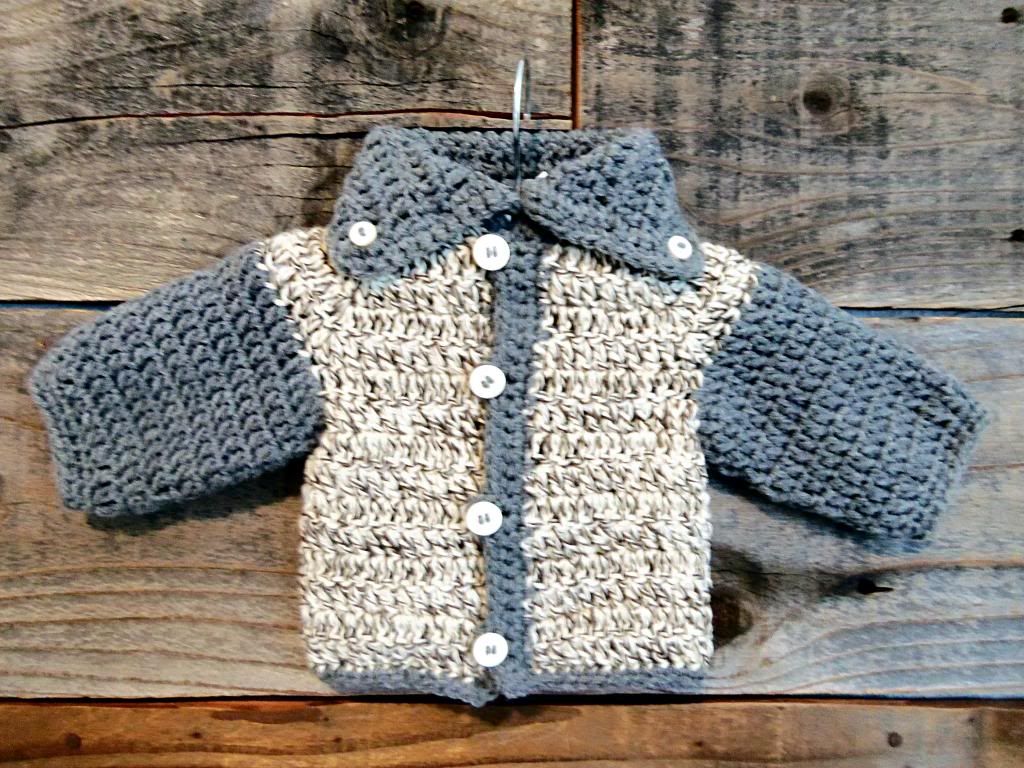
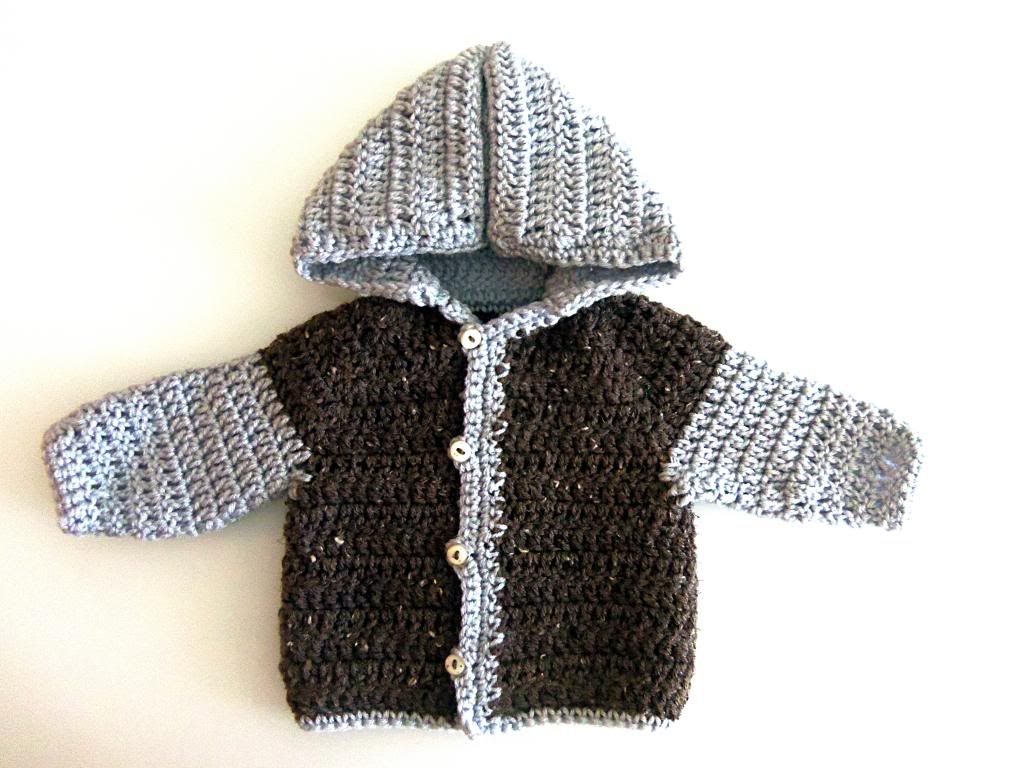
If you know me you know that I have a bit of a crochet obsession. I own way to much yarn for my own good! I find that it is a very relaxing hobby for me and I have loved creating all kinds of crocheted items. With a new baby on board now I of course had to outfit him with some crocheted sweaters for the cold winter months. This time I am sharing this easy tutorial with you so that you can make your little one a sweater as well!

In fact I went a little crazy and now my baby boy has an entire winters worth of sweaters to wear! And if crocheting isn't your thing, you can always purchase any one of these beauties in my Etsy shop!


Here are the measurements for sizes newborn to 9 months old:
0-3 months: 16 in / 40.5 cm
3-6 months: 17 in/ 43cm
6-9 months: 18 in/ 45.5 cm
You will want to use a different size hook for each of the sizes. I would use an H hook for the newborn-3 month size and then just use a size larger hook for each of the larger sizes.
ch= chain
dc= double crochet
sc= single crochet
Start by chaining 36
Row 1: 1 dc in fourth chain from hook, and in next 3 chs, 3 dc in next ch, 1 dc in next 5 chs, 3 dc in next ch, 1 dc in next 10 chs, 3 dc in next ch, 1 dc in next 5 ch, 3 dc in next ch, 1 dc in last 5 ch, ch 3 and turn work over.
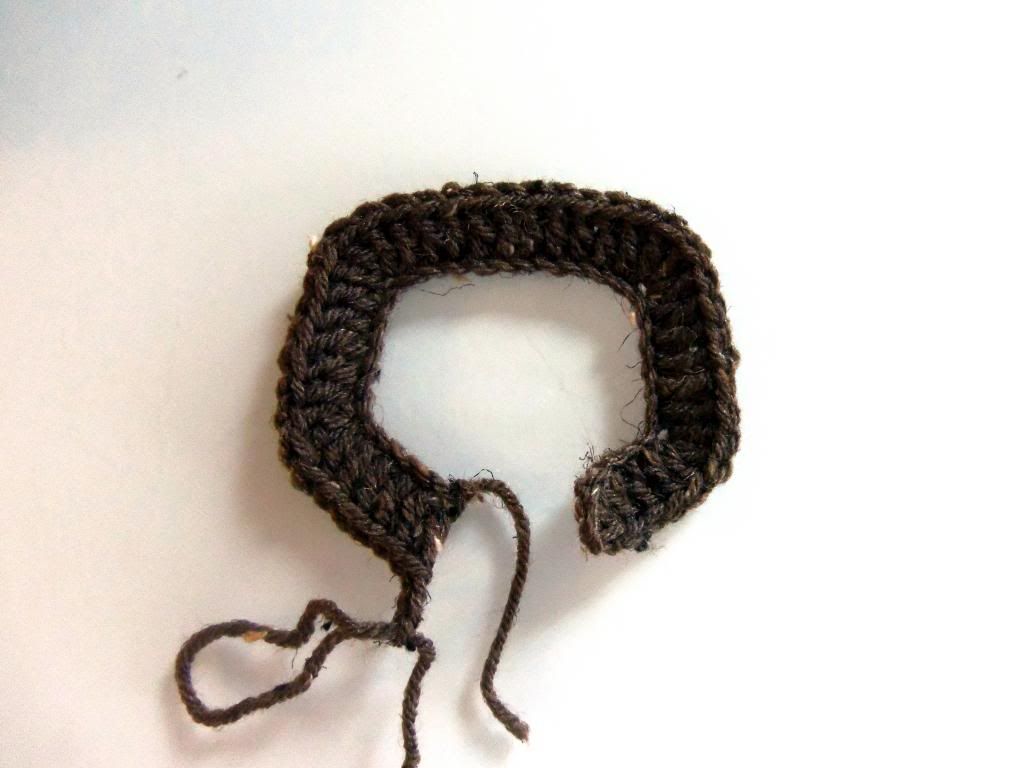
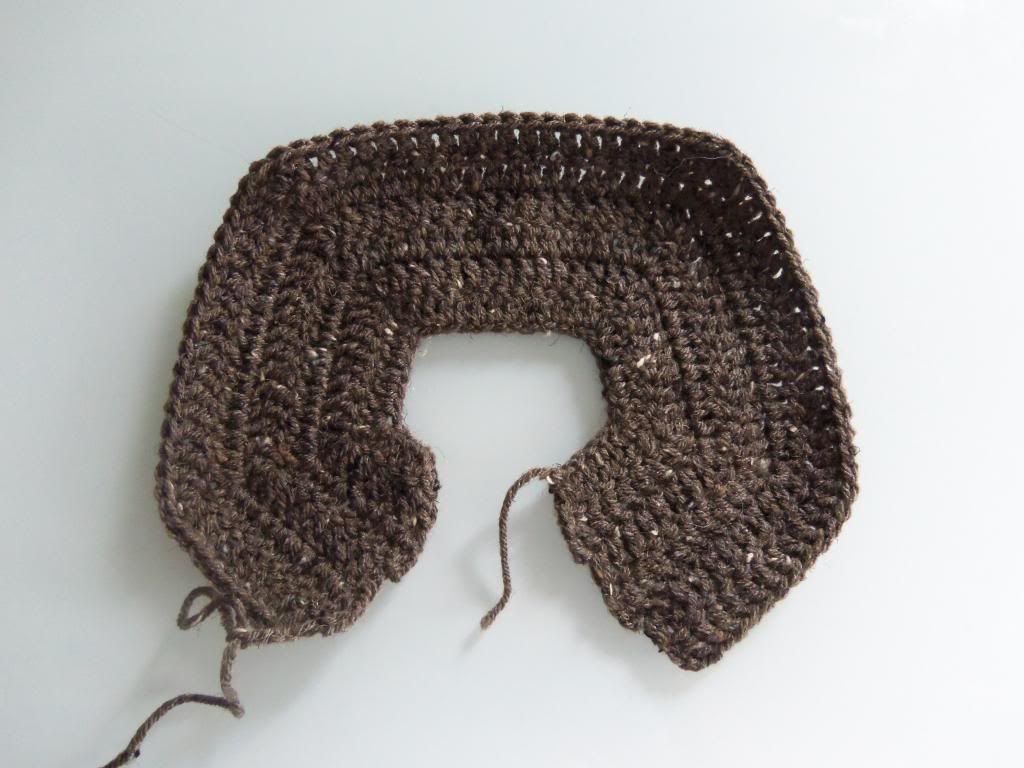

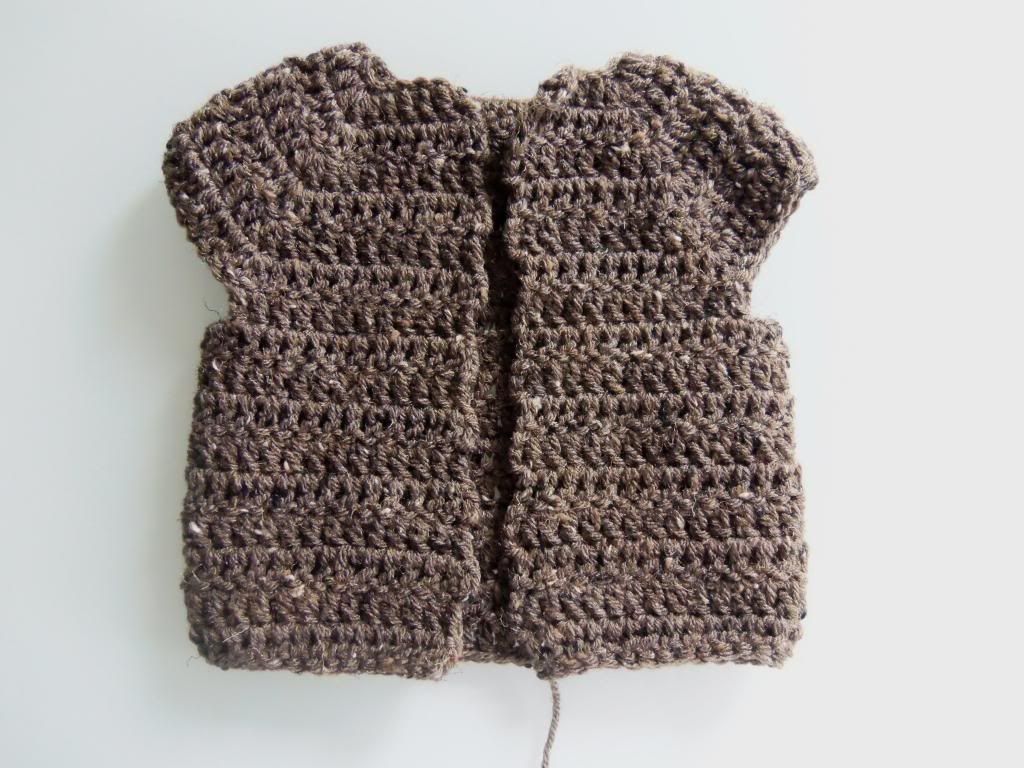

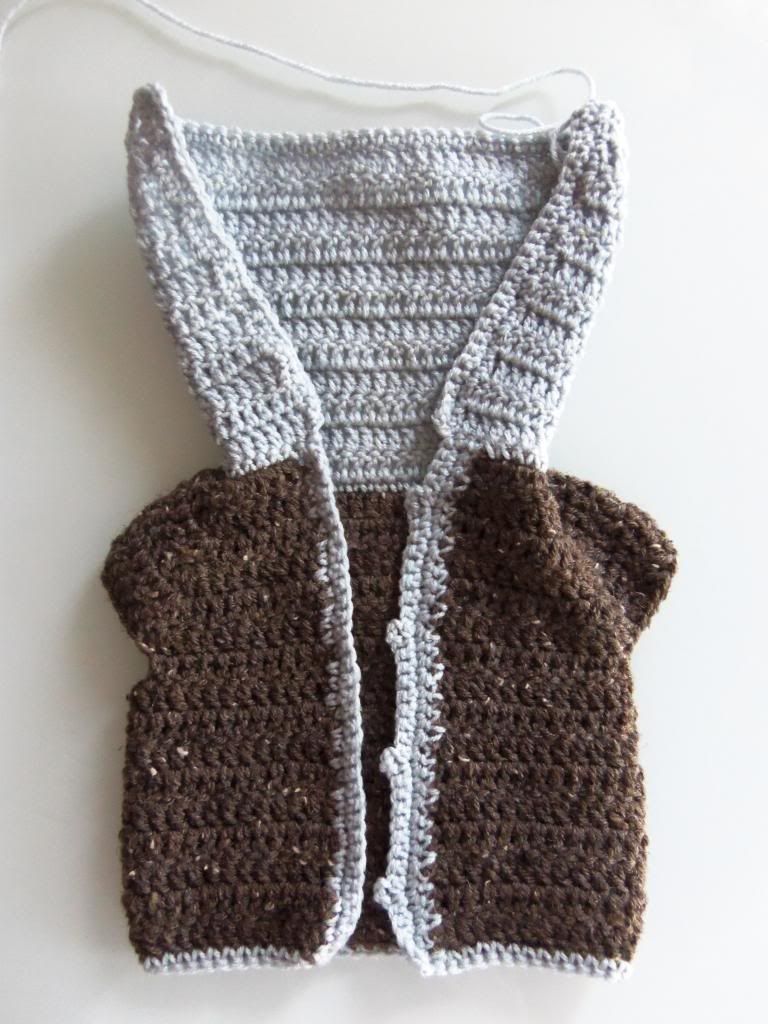
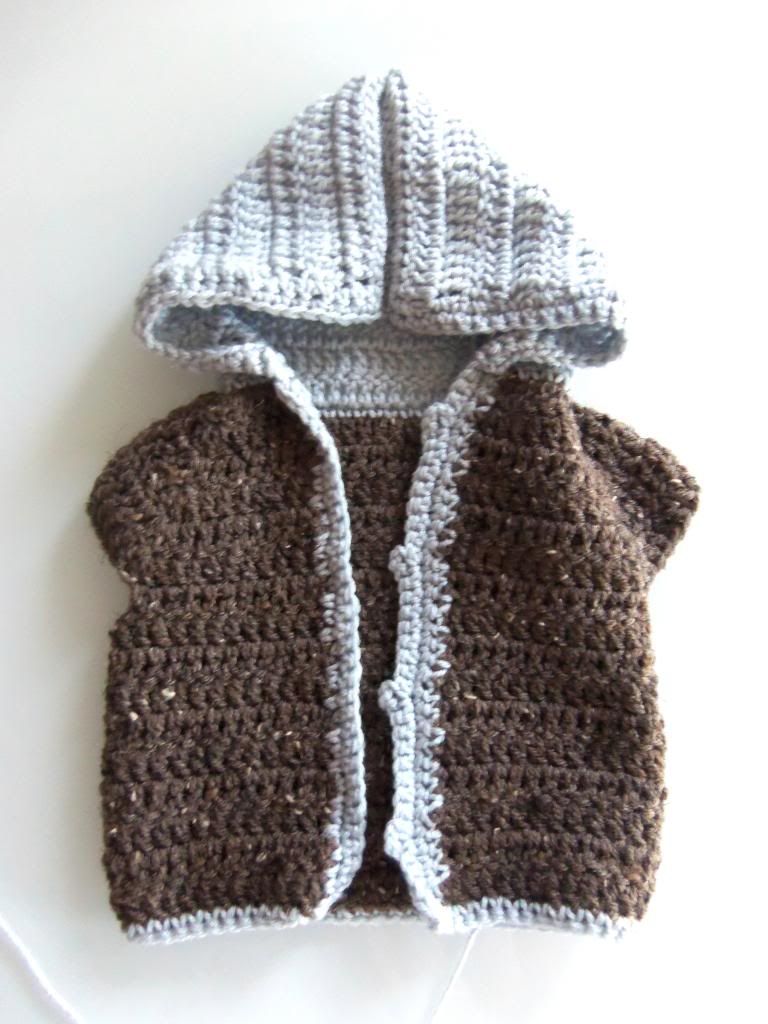
Hood: Attach yarn at corner of neck with slip stitch, ch 3, 1 dc in each ch across, ch 3, turn, 1 dc in each chain for 12 more rows. If you would prefer to do a collar instead of a hood you will stop at row 4 and just fold down the collar
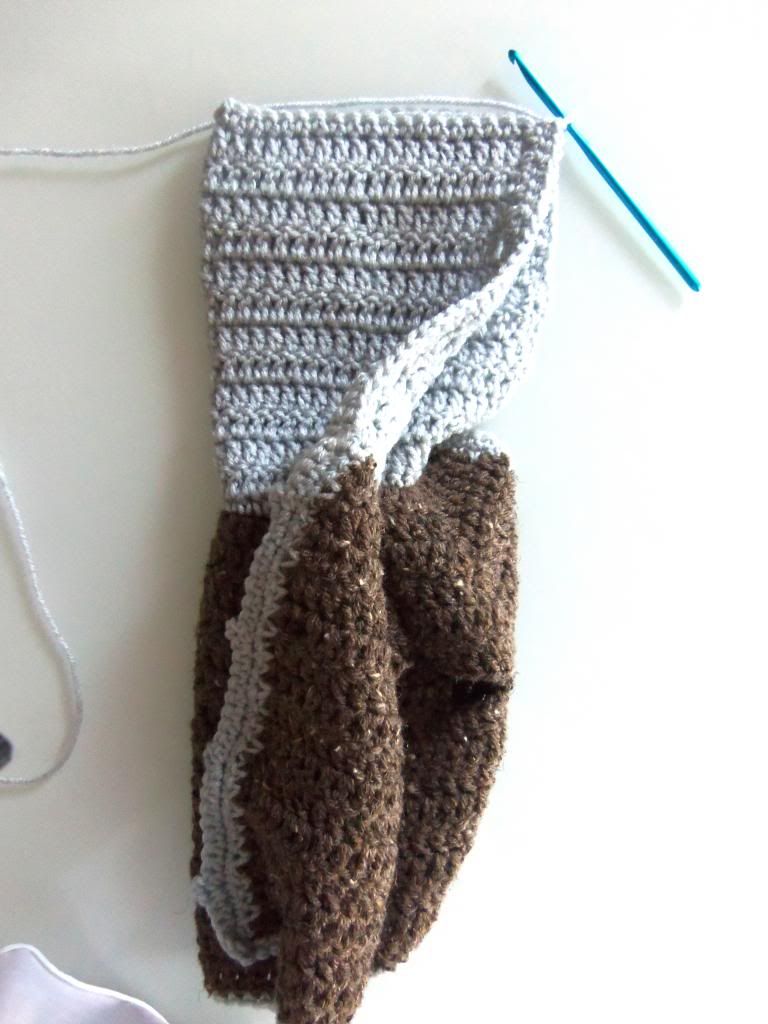
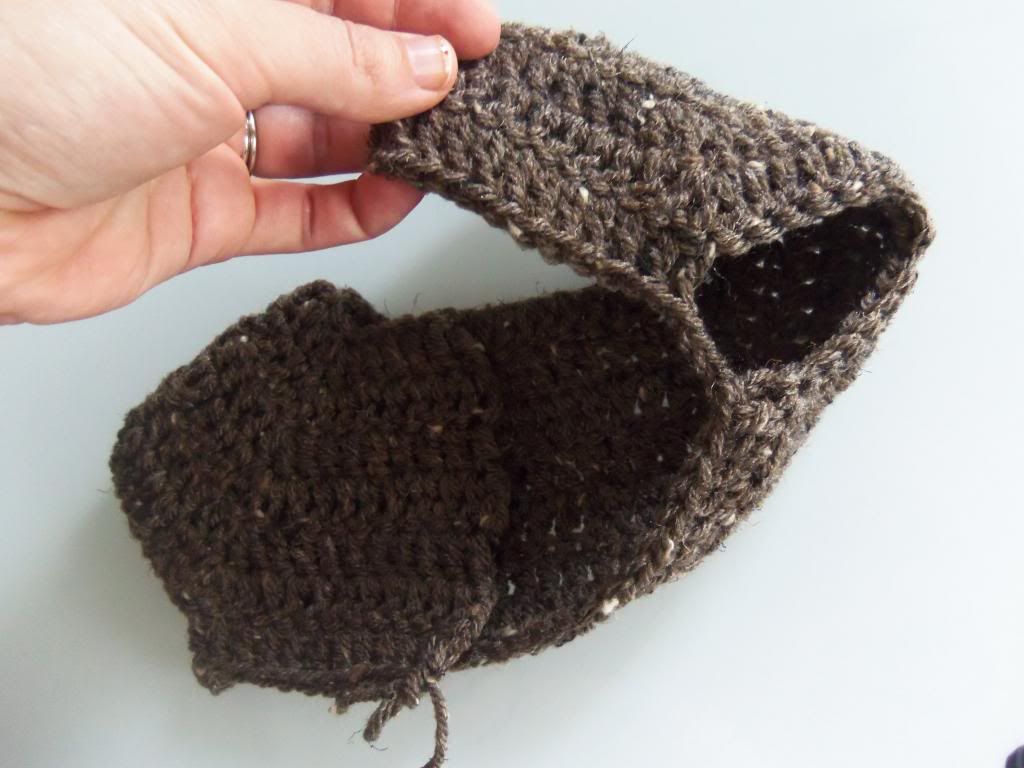
Row 1-9: Start in the middle bottom of the arm opening. Attach your yarn to one of the chains and ch 3, 1 dc in each ch (In the corners where the posts are you will 1 dc into ridge, 1 dc in post, 1 dc in ridge). Continue with one dc into each chain. Write down the number of dc's you made in the first round of your first sleeve so that when you move to the next sleeve you will be sure to have the same amount so that one sleeve is not larger or smaller than the other. When you have a dc in every chain in the first row, slip stitch into the 3rd ch that you started with, ch 3 to go up to your next round and continue to do 1 dc in each chain around and slip stitching into the first ch 3 and repeat for 8 more rounds followed by 2 rows of sc.

LOVE LOVE LOVE this pattern. Thanks for sharing. Here are a few I made
ReplyDeletehttp://onceuponapinkmoon.blogspot.com/2014/12/little-sweater-love.html
Thanks for sharing your crochet talent with this very detailed pattern. I will be attempting this for my 16 month old grandson! Thanks again:)
ReplyDeleteBuen día. Me encanta esta chaqueta, gracias. Me podría decir cuales son las medidas (incluidas las mangas) para un niño de cuatro años.
ReplyDeleteUn saludo,
Carmen
Just came across this on Once Upon a Moon blog and fell in love with the simplicity of it.
ReplyDeleteI have a new grandson...just one month old now...so believe I will start making a few for fall and winter.
Thank you for such a great tutorial and pattern....I can see why they become addicting to make! So simple and fast to create :)
Thanks again for sharing this.
Which yarn did you use? I like the tweed look.
ReplyDeleteThis comment has been removed by the author.
ReplyDeletePlease i need help. I'm in round 4 but my piece is soo small. How can i do it bigger. Which yarn sice did you use??
ReplyDeleteWhat do you mean by 16 inches? What measurement is thatr for?
ReplyDeleteThis is my first piece of clothing I've attempted...so be patient please �� I'm up to the "trim" part......I'm not sure where to start, could some kind person please help me out ....��
ReplyDeleteI believe you start where you just ended with the initial colour. If you look at the sweater picture above trim, it's where the yarn is hanging. Then go up, come back down same side, around the bottom. Then you'll be ready to go up the other side with button holes instructions, then finish by going around the neck line.
ReplyDeleteWhat weight yarn did you use? The pattern is just darling!
ReplyDeleteI recently found many useful information in your website especially this blog page. Among the lots of comments on your articles. Thanks for sharing.
ReplyDeletebest baby jumper
Help I’m stuck at row 6. Don’t know what I’m doing wrong
ReplyDeleteI love this pattern THANK YOU
ReplyDeleteThis pattern seems pretty easy. Thank you for sharing this with us.
ReplyDeleteAs cute as the sweater is, and I'm almost finished with it, it would have been so helpful to at least have the weight of the yarn as a starting place. And also, as mentioned in a previous comment, is the measurement for the entire sweater with the hood? My 6 month old grandson measures around 10" from shoulder to where a sweater would end. So the 18" was a bit confusing. I'm buying a bulkier yarn to make another one. I'm hoping the one I am finishing works as I used a #4 weight with a J hook with a very loose crochet, and not sure it is big enough.
ReplyDeletehi can I ask you what kind of wool you used for these lovely jumpers please.
ReplyDeleteNice Article, Also Check The original Knit baby woolen sweater, designed for those who love to knit sweaters for their babies. We've created this natural, soft and unbelievably comfortable all-cotton sweater that's suitable from birth through toddlerhood.
ReplyDelete