


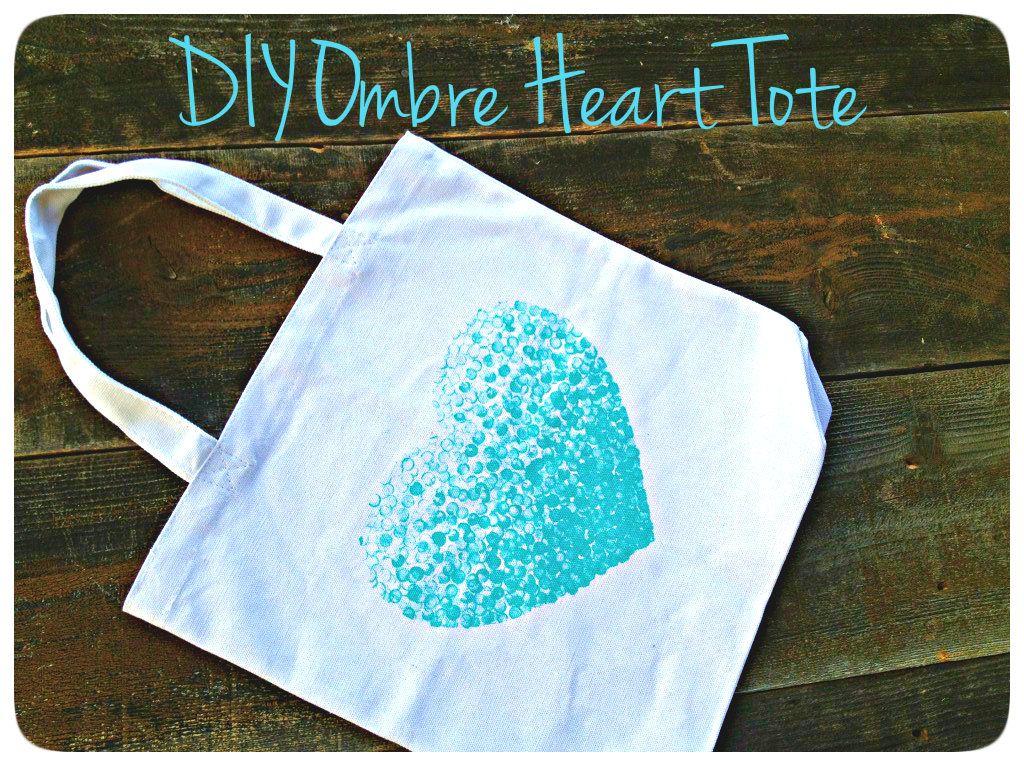
I am always on the look out for a cute tote bag/ bag to bring home groceries in/ bag to place library books in/ whatever I need it to be kinda bag. I got tired of looking and decided to make my own! Introducing the Ombre Heart Bag. I love it, I really really love it and it was really cheap and took less than 30 minutes to make. Best of all I purchased the bags at Walmart and they came in a pack of 3!


Lets begin:
Materials you will need:
- Bag of your choice
- Pencil
- Paint
- 1 piece of paper
First draw a heart of desired size onto your piece of paper and cut it out. Discard the cut out heart as we will be using the piece of paper.
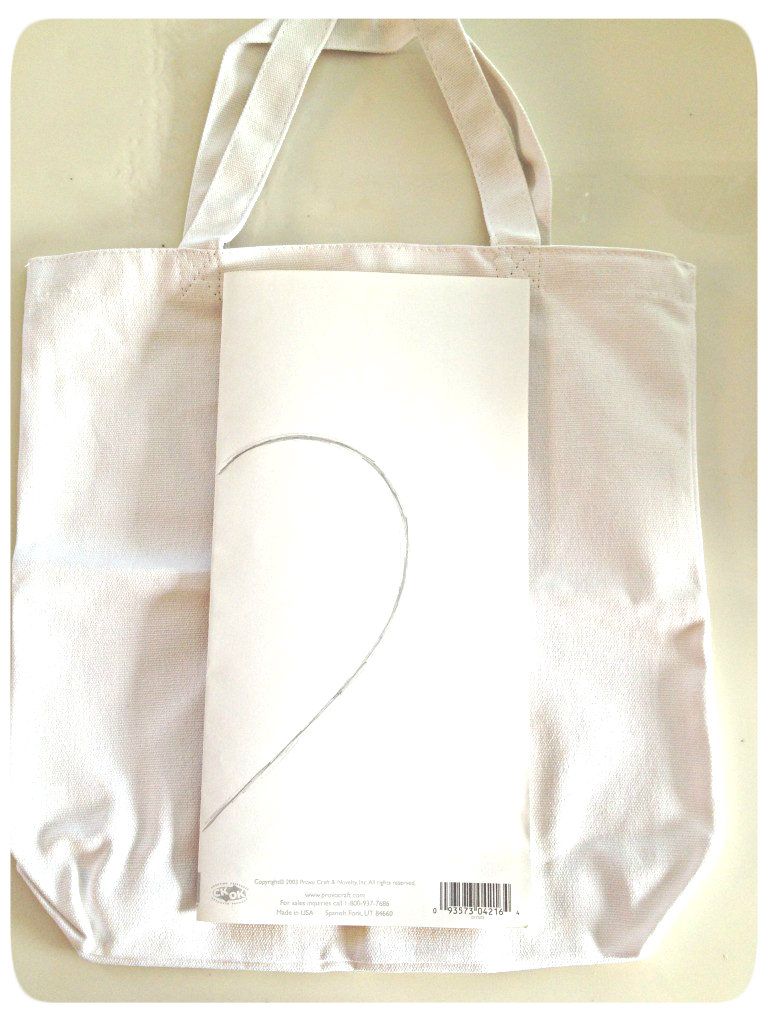
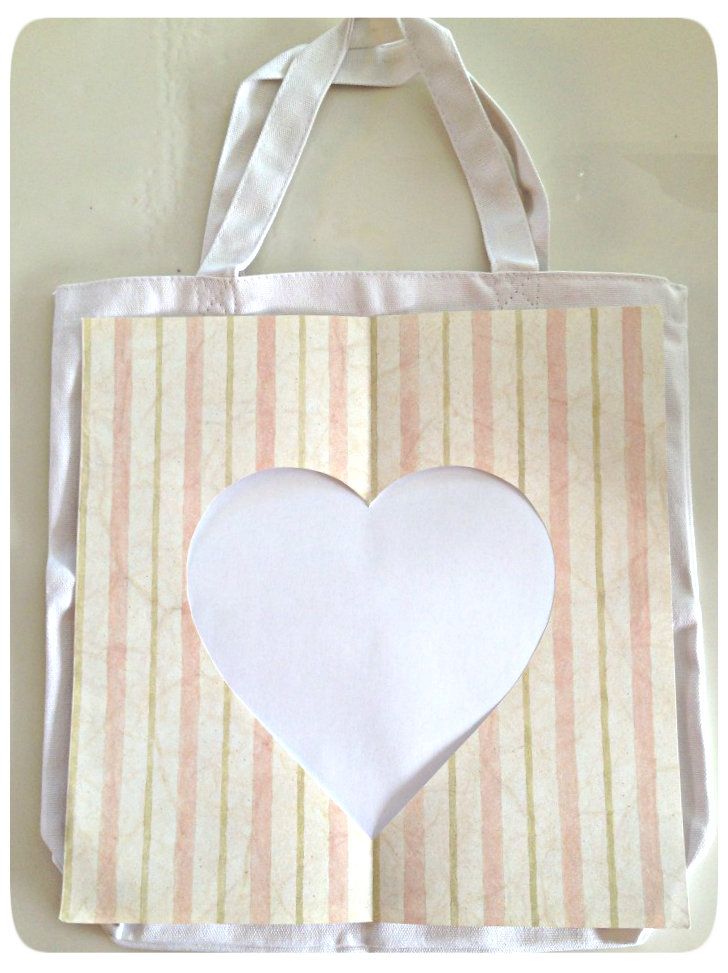
Place your paper over your tote, being sure to center it. This piece of paper will serve as a guide for our ombre heart. Pour your paint onto a surface and gently dab the eraser of your pencil into the paint. Do not over do it and dunk half your pencil into the paint. In fact, once you have dabbed your eraser into the paint, try a test dab and press it down onto a piece of paper to make sure you haven't over loaded your eraser as well as to practice before you apply to your desired surface.
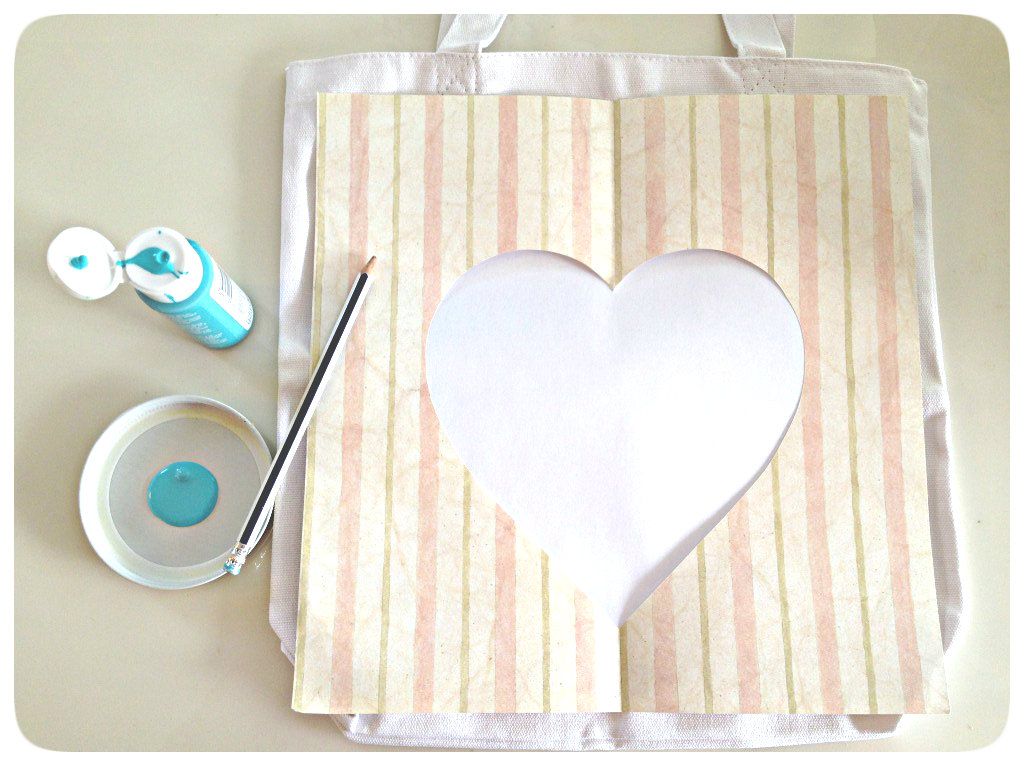
Once you are feeling confident start dabbing your eraser onto your tote starting at the point of your heart. Reapply after each dab since the bottom of the heart is where the heaviest amount of color will be.
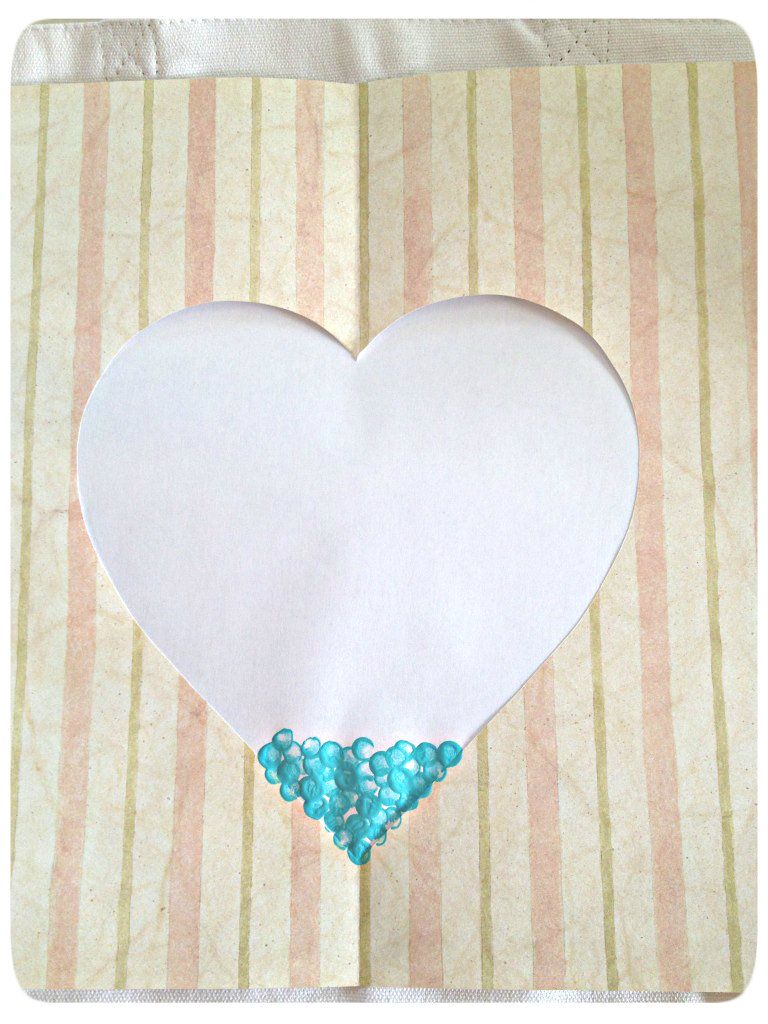
As you work your way up dab your eraser a few times before re applying more paint. This will start to create the ombre effect.

Continue working your way up the heart using less and less paint. Once you have finished pull your template away and be amazed at what you have created!


That's cute Whitney! Going to have to make one :)
ReplyDeletecasadesoria.blogspot.com
Thanks Rachel! It was really fun to make, and I was super happy with how it turned out!
DeleteThis comment has been removed by the author.
ReplyDelete